Tag Archives: Kitchen Tools

Recipe: Hallacas Venezolanas | Venezuelan Christmas Dinner Hallacas

1 Jan

I am truly exited to be able to share this recipe with my readers and followers. As a kid I was sometimes involved in the making of hallacas during Christmas in Venezuela, but with very little responsibility; something like handing over a piece of yarn, or a spoon. Finally, eleven years after moving to the US, I can say that I have truly been involved in, and enjoyed the hallaca making experience. If you haven’t read my previous post regarding Venezuelan Christmas traditions, you can take a look here, to understand the full scope of a traditional Venezuelan Christmas Dinner, celebrations, traditions and dishes, but for this post I am going to limit myself to only explaining the hallacas.
This past year (2014), my paternal grandparents came to spend Christmas here in Florida with the rest of my paternal family, which they usually do every year. However, this year was extra special because they didn’t come alone, they invited my great-grandmother (my paternal grandfather’s mother) to join us. My great-grandmother, la señora Nery Ruso (98), is my true role model and a great inspiration as a woman. From a very young age she was dedicated to working, studying, raising her children, and it paid off in a life filled with accolades, awards, medals, and the highest honors as an entrepreneur, writer, business owner, a true influential character in the Venezuelan society. Writing for the most important newspapers in the country, socializing with several presidents and their wives, marrying internationally recognized painters, founding recognized magazines and pageants. A true inspirational woman who worked hard to position herself into spots once only held by highly educated men.
As I was sitting there ready to learn how to make the traditional hallacas from my great-grandmother, my grandmother and my aunt, I asked my great-grandma, who we all call Bila (A nickname my dad gave her when he was a kid), if she knew where and how did the hallacas come from. Bila said the story she knows is the one I wrote on my previous post about Venezuelan Christmas. But the way she described it to me was even better. She said a long time ago there were the very rich families with European descendants and they used to have these giant parties with all kinds of dishes that their maids would prepare for them. At the end of the parties, the maids would clean up the tables and think what a waste to throw away such expensive ingredients like olives, capers, steaks, pork, chicken, and raisins. So the maids would chop up all the ingredients and make them into a stew, and since the corn dough was cheap they used that to make the outer envelope for the stew. She said eventually the rich people would come to try these inventions and they became what we know today as the hallaca.
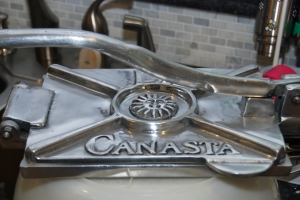
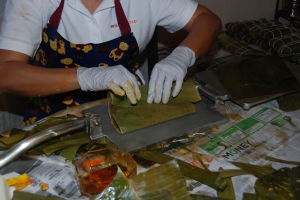
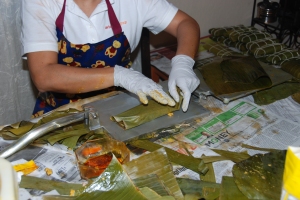
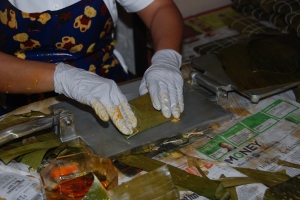
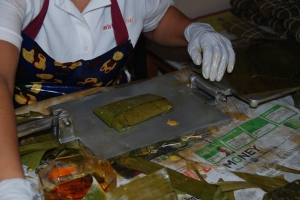
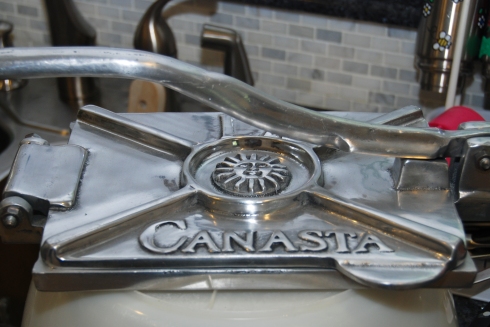
The hallaca/hayaca (pronounced Ah-jac-kah) is an original traditional Venezuelan dish that we only consume during the month of December and during Christmas and it is the number one most important component for a true Venezuelan Christmas Dinner. The hallaca brings our families together even for the preparation, which can take up to 3 days and at the very least two people to make at least 50 Hallacas. The preparation itself is a reason to come together and celebrate, and create an assembly line with positions assigned, like the chopper, the cook, the dough kneader, the wrapper, and the knot maker. This year I was very fortunate to have these three women teach my sister and me how to make the hallacas. We made them over two days in the afternoons (because of my busy work schedule), at my aunt’s house, in the middle of her moving overseas. It was definitely a crazy experience, but all the fun we had and all the tips I learned were worth it. I felt blessed that there were three generations of experts each giving me their own tips and advice, at the end I was very tired, but the experience couldn’t have been any better and definitely worth it. Each person has their own way of making hallacas, each family has their own secret ingredient or traditions passed down from generation to generation, and techniques that are also improved upon generation to generation. For example, the flattening of the dough was and still is usually done by hand pressing with your fingers, but my aunt has a beautiful tortilla press (tortillera), which she bought in Mexico that she uses for hallaca making, and it makes it a lot faster and easier. Even tying the yarn can be a subject of debate. The funny part is my great-grandmother would want to teach me how to do it her way, my grandmother would want to teach me how to do it her way, and my aunt had her own way of doing it, which was different that both their ways. After taking in all that knowledge from those three generations I think I am confident in making hallacas on my own next year and sharing all this knowledge with you so you can also make them at home this year, or next year.  Each family and each region in the country has their own recipe and their own way of making the hallacas, but the process is basically the same.

A Few Tips Before We Begin
This is basically a summary of all I learned while making hallacas with my great-grandmother, my grandmother and my aunt.
a) The entire process is time consuming and it takes a toll on you physically. Be sure to set aside at least two entire days for making hallacas, and enlist the help of a couple of friends or family members. However, as my great-grandmother said… “Muchas manos en la olla ponen el caldo morado” – Too many hands on the pot, make the broth turn purple.
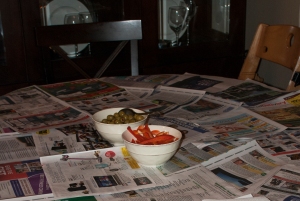
b) You will need a large area for the ‘assembly line’. You can use your dining table if you have a large enough one, but be sure to cover it either with newspaper, a tablecloth you don’t care about damaging, a plastic table cloth, or some other protective surface. Be sure you don’t have a carpet or rug you don’t wish to damage or stain either.
c) On that note, come prepared with a change of clothes that you don’t mind staining, or aprons…and some hairnets, or if you want to be cute and fancy like us, you can wear bandanas. You just want to make sure that hair doesn’t become an ingredient.
d) Be sure one of your helpers is the person in charge of cleaning up. You don’t want to wait until the end of the night when you are tired and have a mountain of dishes to wash. Be sure your helper is washing everything as you go, because sometimes you might need to use the same tool twice.
e) Be sure to gather all the tools and ingredients necessary at least a day before you begin, so you don’t have to send someone out to get them and loose a pair of helping hands. Also be sure the tools are nice and clean and ready to be used.
f) Be sure to empty out your fridge because you will need a lot of space to store the hallacas when ready. And also be sure you don’t make the hallacas way to far in advanced, otherwise you will have to freeze them, and they are better when they are not frozen. The weekend before Christmas is good enough.
g) Kitchen Tools. There are a few kitchen tools that would make your job a lot easier. You don’t have to buy the expensive brands, and you may even be able to borrow some of these from someone else. A tortilla press or tortillera is not something you would probably have in your home, but there are a few cheap wooden ones you can get online, like the ones from the IMUSA brand. They have a round cast iron one for $20 at Bed Bath and Beyond, but I am not sure if those are large enough. You are better off with a large rectangular one, which you can buy online from a Mexican store, on etsy or ebay. You could also make your own as shown here… or you could just use your hands or a rolling pin, or even a large heavy Pyrex baking pan. You will also need several cutting boards, sharp knives and keep your knife sharpener handy, several bowls and Tupperware containers to keep all the ingredients you have to chop beforehand, large stew pots and large pans, several clean wash cloths and scissors, extra large bowls for mixing the dough and keeping the stew, strainers, latex gloves, measuring cups, and measuring spoons.

What you need for 50 Hallacas:
Guiso | Stew (Filling):
– 5.5 lbs. Sirloin Tip Roast
– 3.5 lbs. Chicken Breast With Rib (No Skin)
– 2.5 lbs. Rib End Boneless Pork Roast
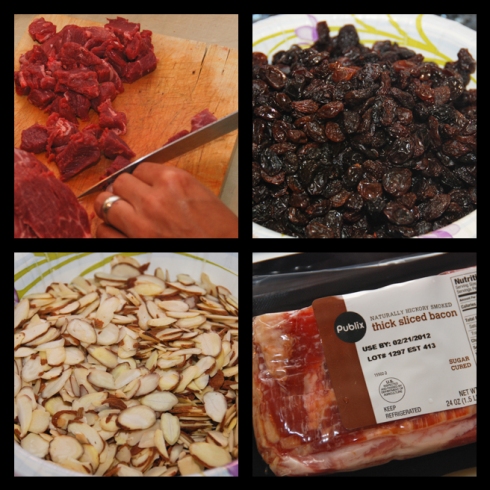
– 1 lb. Bacon
– 5 Lemons Cut In Half
– 1 Cup Vegetable Oil
– 6 Cups Chopped Onions
– 4 Cups Chopped Leeks
– 2 Cups Chopped Green Onions
– 3¼ Cups Minced Garlic
– ½ Cup Capers in ½ Cup Chicken Broth
– 2.5 lbs Red Bell Pepper, Grated without skin or seeds
– 5 Cups grated Tomatoes (No Skin or Seeds)
– 4 Chopped Sweet Peppers (Ají Dulce)
– 1 Cup White Wine
– ½ lb. Papelón Rallado (Grated shredded sugar cane blocks available in Latin stores)
– 1 Tablespoon Ground Black Pepper
– 2 Teaspoons Paprika
– 5 Tablespoons Salt
– ½ Teaspoon Mustard
– 2 Cups Chicken Broth
Masa | Dough:
– 9 lbs. Harina P.A.N.
– 4½ Cups Chicken Broth
– 17 Cups Water
– 5 Cups Oil
– 6 Tablespoons Annatto Seeds
Adornos | Garnish:
– 1 lb. Bacon (Same one that was cooked with the pork cut in long slices)
– 2 lb. Red Bell Peppers (Cut in long slices without skin or seeds)
– ½ lb. Sliced Almonds
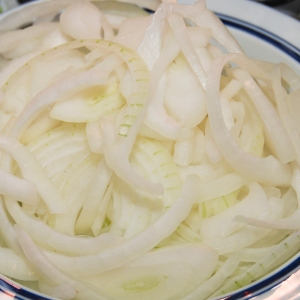
– 1 lb. Medium Onions, cut in long rings or long slices
– ½ lb. Small Drained Capers
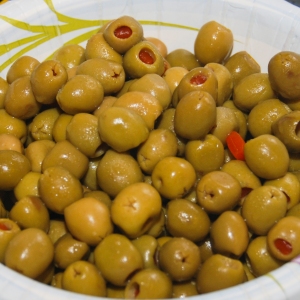
– 1 lb. Medium Pitted Green Olives, Drained
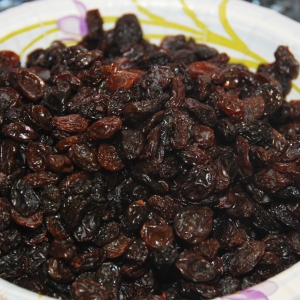
– ½ lb. Raisins
Envoltura | Wrapping:
– 10 lbs. Plaintain Leaves (about 10 bags)
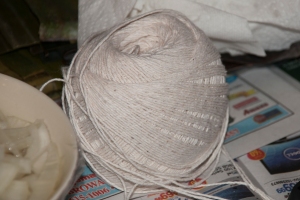
– 2 rolls of Pabilo (Cotton Yarn, Butcher’s String, Kitchen Twine, etc)

Preparation:
DAY ONE
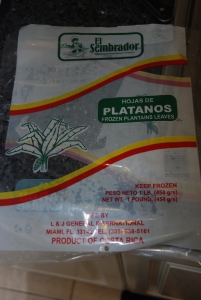
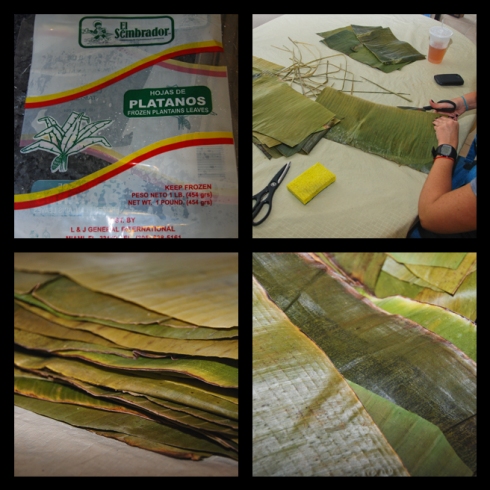
1. The first thing you want to do is prep and clean all the plantain leaves, cut them and separate them by size. As I mentioned before, this recipe can take up to three days in the making and you want all your assembling parts to be ready on the final day. Therefore, you can begin by prepping the plantain leaves on day one. You can even do it before day one, or you can do it while the stew is on the stove. Either way you should do it before you are ready to assemble the hallacas.  Here in the US, it is fairly easy to find plantain leaves. There are a couple of brands that sell plantain leaves in a bag, in the frozen section. They sell them as Hojas de plátano or Banana Leaves, although the real translation should be plantain leaves. They have Goya, La Fe, La Nuestra, El Sembrador, etc. You can buy either one. My aunt bought El Sembrador and La Fe brands. The plantain leaves are really large and they come all folded together inside the bag, and they are pretty cold when you handle them because they are frozen. Its best if you leave them out to thaw a bit before you begin this process, because they will be easier to handle.

Hojas de Platanos | Plantain Leaves | Banana Leaves

Hojas de Plátanos | Plantain Leaves | Banana Leaves

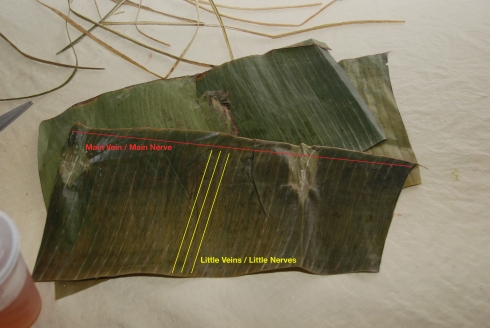
If you look at the leaf, you can tell it has a main vein or central nerve, which is where it is attached to the tree, then a lot of little lines perpendicular to the vein/nerve that go from the nerve to the edge of the leave, lets call them little veins or little nerves. When you are working with the leaf, whether it is cleaning it or cutting it, you should always keep the side where these little veins or little nerves are most visible protruding, side up. And also lay them with those lines going away from you (you would see them vertically) and the line where the main nerve is, or used to be closest to you. Don’t worry I will illustrate all of these complicated terms below for you.

Plantain Leaf Parts

Plantain Leaf Parts

2. First you should open the bags and lay them all opened and flat on a large table. They are supposedly already cleaned, but you should clean them anyways with a wet kitchen towel or cloth. They are easily broken and torn in half so it is better to clean them all first and then proceed to cut the veins and cut them into all the different sizes you will need. Clean the leaves with a wet cloth and then dry them with a dry cloth.
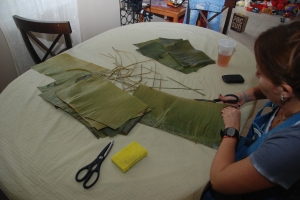
3. Once you have cleaned them and dried them all, you can proceed to cut the vein or central nerve if you will. If you lay the long plantain leaf vertically in front of you, you will notice one side has a thick vein (the side that is most straight). You can proceed to cut the whole vain, which is only about half an inch from the edge.

Cuttin the veins of the plantain leaves

Cutting the veins of the plantain leaves

4. Once you cut all the veins from all the leaves, you can proceed to classify and cut them into all the different shapes and sizes you will need. You can also proceed to tear apart the pieces, which are already torn, because if they already have a tear, they will eventually tear all the way.
5. The different pieces you will need are:
– La camisa | The Shirt: This is the main piece which is used to directly place the dough on. They can be roughly about 15” x 10” rectangles. You want to pick the best pieces for this category. You want them to be flexible and without any torn edges. These will also be used as the second piece, which goes on top of the shirt to prevent much water to getting into the shirt, which holds the hallacas itself. But this second piece will not be directly in touch with the dough, its just a second cover (I guess we can call it the jacket, lol… just kidding, that is not the official name)
– La Tapa | The Cover: These leaves are a bit smaller than the shirts, they are usually about 8” x 10” rectangles. They are used are a cover or top for the main ones. The more you cover up your hallacas, the less water will get into them.
– The faja | The Belt: These leaves are 3” to 5” wide times whatever width of the original plantain leave. They are used, as their name describes it, simple to hold in the hallacas and all those previous leaves together right before it is ties up with the thread.
*From one good entire plantain leaf you can probably get one or two shirts, a cover and a couple of belts.
*Someone asked me if they could make Venezuelan Hallacas without using the plantain leaves, the answer is no.  As you will understand by the end of this post, the plantain leaves are essential to the making of Venezuelan Hallacas, and they even give the that distinctive smell and taste.
DAY ONE (Continued) OR DAY TWO
Guiso | Stew (Filling):
1. Clean the pork and the chicken rubbing them with the lemon halves and then rinsing thoroughly with enough water.
2. In a large enough stewing pot with hot boiling water, cook the pork and the bacon on medium heat for 10 minutes. Remove from the pot and drain the meats (you can get rid of this liquid). Set the pork aside to cool down so it can be cut into small square pieces of about ½ an inch to ¾ of an inch. Cut the bacon in long strips and reserve it for the adornos | garnish.
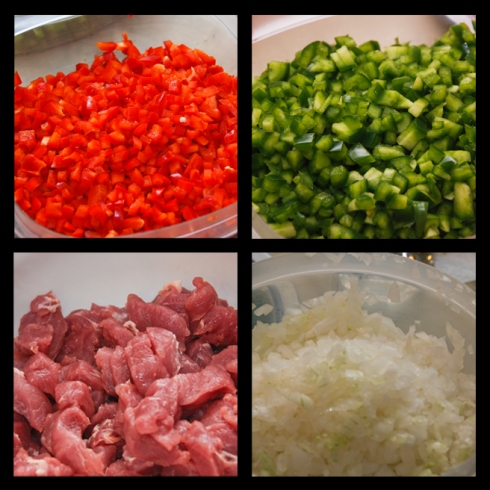
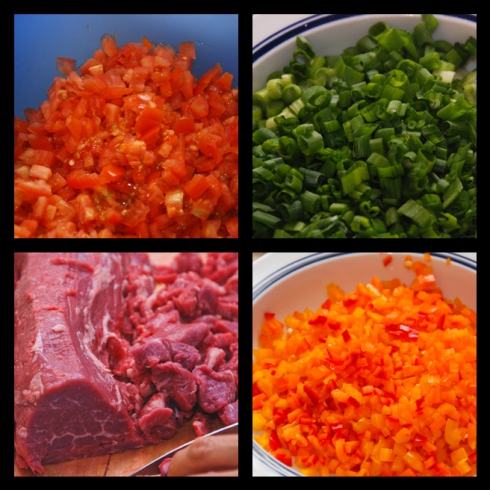
3. In the meantime you can begin to chop up, de-skin, de-seed, and grate all the rest of the ingredients for the stew (filling), like the onions, leeks, green onions, garlic (mince it), red bell peppers (grate), tomatoes (grate), sweet peppers, sugar cane (grate), all in small little pieces.

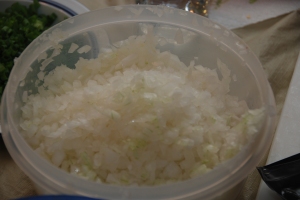
Chopped Onions

Chopped Onions

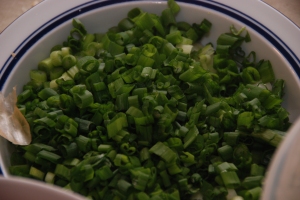
Chopped Green Onions

Chopped Green Onions

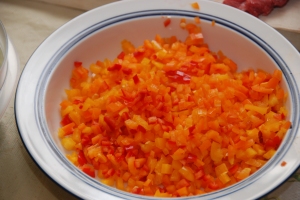
Chopped Ají Dulce | Sweet Peppers

Chopped Ají Dulce | Sweet Peppers

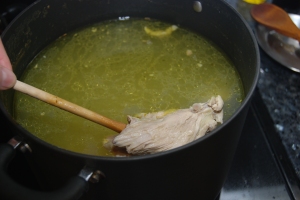
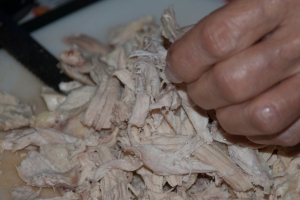
3. In a different pot with enough water, cook the chicken at medium heat until it is thoroughly cooked, but not too long. Remove the chicken from the broth, and drain the broth and let it cool (we will be using it later). Take ½ Cup of this broth and put all the capers in it, save the rest of the broth. Let the chicken cool down and once it is manageable, shred only half of it into long strings of about 2 to 3 inches long.

Chicken Broth & Chicken

Chicken Broth & Chicken

Shredding the Chicken

Shredding the Chicken

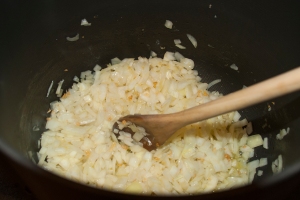
4. In yet another large pot, add the oil and stir-fry at high heat the onions, leeks and green onions for about 5 minutes or until they brown. Add the garlic and the capers along with the chicken broth they have been soaking in, and cook at medium heat for about 15 minutes or until it begins to boil.

Frying the Ingredients

Frying the Ingredients

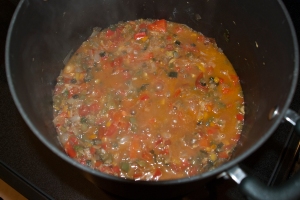
5. Add the bell peppers, tomatoes and sweet peppers and let it cook for 10 more minutes at medium heat.
6. Add the wine, sugar cane, pepper, paprika, salt, mustard, 2 cups of the chicken broth we saved earlier, and cook at medium heat for 15 minutes or until it begins to boil.

Adding the liquids

Adding the liquids

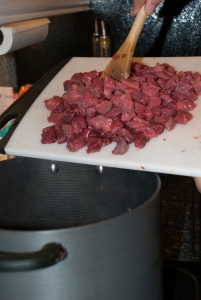
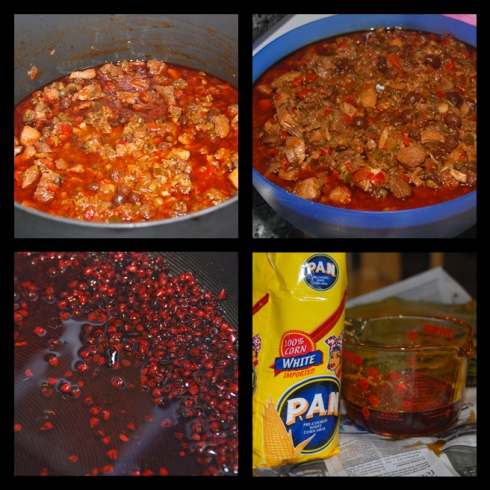
7. Add the beef and the pork we cooked earlier, cover, and continue to cook at medium heat for 40 minutes.

Adding the Beef

Adding the Beef

8. Add the half of the chicken you didn’t shred before and continue to cook for 15 more minutes making sure the meats are not disintegrating and they are still in small pieces.
9. Taste the stew and add more salt if necessary.

Add Salt To Taste

Add Salt To Taste

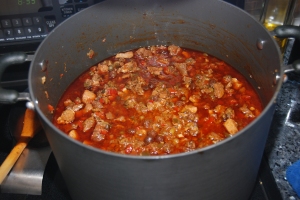
10. Remove from the heat and let it cool down. If your stew if too liquid, you can thicken it by adding one tablespoon of Harina P.A.N. dissolved in water. Add as many as necessary to get the right consistency.

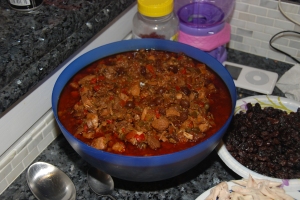
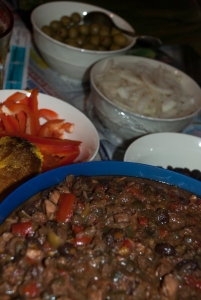
The Stew Is Ready

The Stew Is Ready

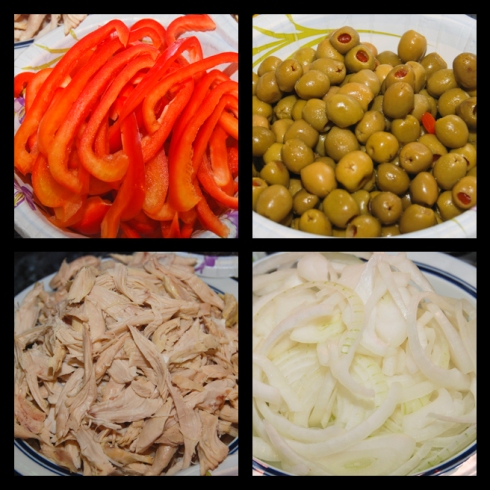
11. You can cut and prep all the garnishes while you are cooking the stew so you have them ready before you begin with the next step.

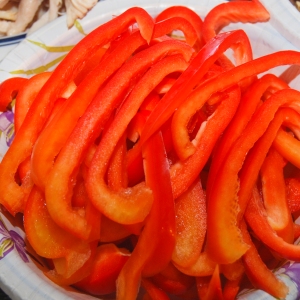
Garnish : Red Bell Peppers

Garnish : Red Bell Peppers

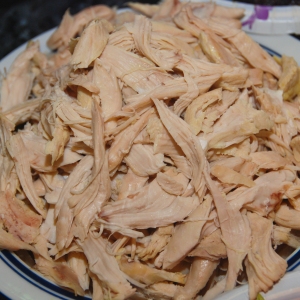
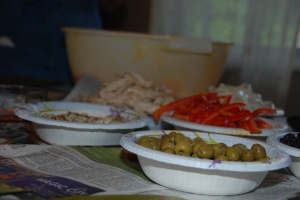
Garnish : Shredded Chicken

Garnish : Shredded Chicken

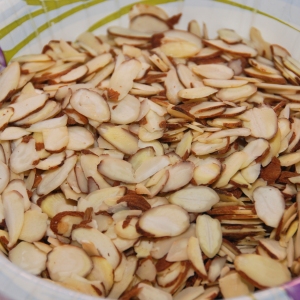
Garnish: Almonds

Garnish: Almonds

Garnish: Olives

Garnish: Olives

Garnish: Onions

Garnish: Onions

Garnish: Raisins

Garnish: Raisins

DAY TWO OR THREE
Masa | Dough:
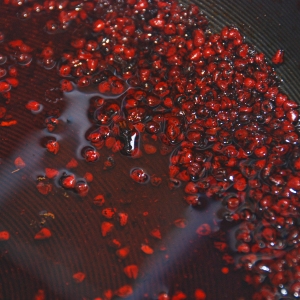
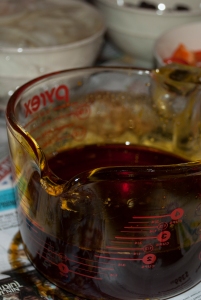
1. In a large pan, heat up the oil and the annatto seeds at low heat. This step is the process by which we are tinting the oil to the necessary color we need to give the hallacas its famous color. The annatto seeds are the ones that give this reddish caramel color to the oil, and the oil then turns the dough its bright orange/yellow color. Once the oil is tinted it can be placed in a measuring cup, making sure to drain all the annatto seeds from it first. Let it cool.

Making Annatto Oil

Making Annatto Oil

Annatto Oil

Annatto Oil

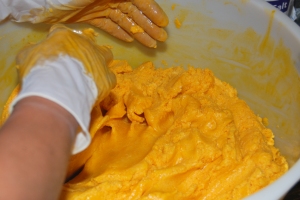
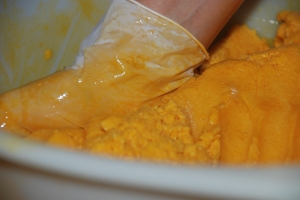
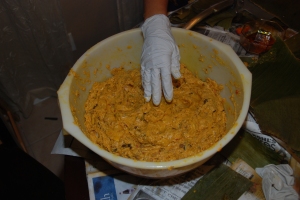
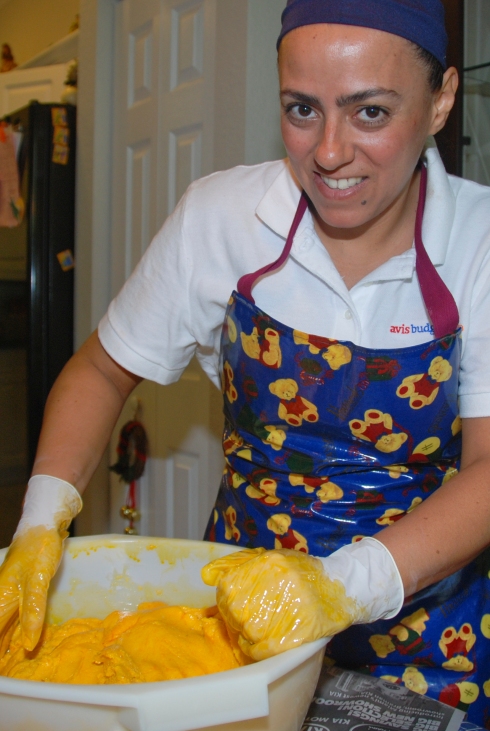
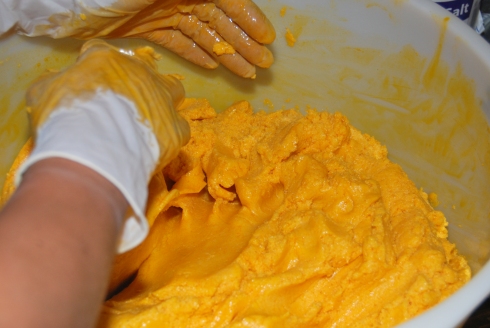
2. In a very large bowl, like extra extra large mixing bowl, add the Harina P.A.N. and add one cup of oil and two cups of the colored/tinted annatto oil we just made. Add the chicken broth that we saved, and add the salt and water, and mix in together with both hands until you have a fine and soft dough, that is easily manageable. It is a bit softer than your usual Harina P.A.N. mix for arepas, because it has oil in it.

Making The Dough

Making The Dough

Making The Dough

Making The Dough

3. You can add more Harina P.A.N. more salt, or more annatto oil to make it just the right consistency or the right color. You can also divide all the ingredients in half and make two batches at a time instead of the whole batch at once.
4. Divide the dough into small little balls the size of a small orange, or two to three inches in diameter.

The Set Up:
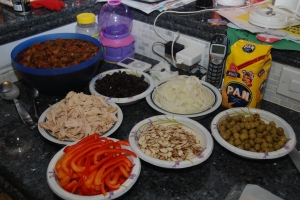
1. Now that you have everything you need ready, you need to set up your assembly line in a large enough table. What you will need (in this order) is:
– Plantain Leaves: The Shirts
– The rest of your annatto oil (you should have some left over, but if you don’t you can make some more, following the steps above, it’s pretty easy)
– The dough
– The Stew
– All the garnishes ready in different little bowls
– Plantain Leaves: The covers and The Belts
– The Thread

Setting Up The Work Area

Setting Up The Work Area

Setting Up The Work Area

Setting Up The Work Area

Setting Up The Work Area

Setting Up The Work Area

Setting Up The Work Area

Setting Up The Work Area

Setting Up The Work Area

Setting Up The Work Area

Setting Up The Work Area

Setting Up The Work Area

Setting Up The Work Area

Setting Up The Work Area

Envoltura | Wrapping (The fun part):
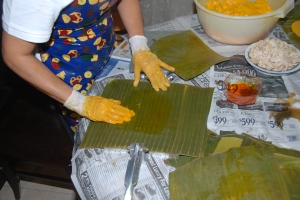
1. Now that everything is set up and ready to go, we can begin assembling each hallaca. The first step is to grab one plantain leave (the shirt) and lay it flat in front of you. Be sure to place the leaf with the lines going vertically from side to side in front of you, and the protruding and most visible parts of the little veins or little nerves side up.

Start with an empty shirt

Start with an empty shirt

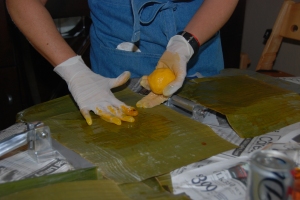
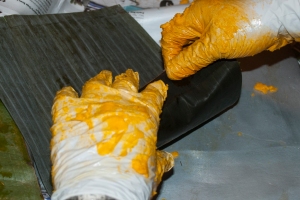
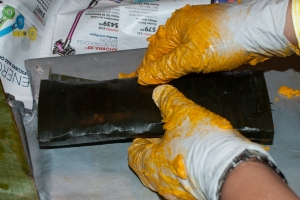
2. With a small clean kitchen rag or towel (I used my hands because I was wearing gloves, remember I told you, you will need gloves for all this), grab some annatto oil and spread it in a circular motion on top of the leave.

Add Annatto Oil

Add Annatto Oil

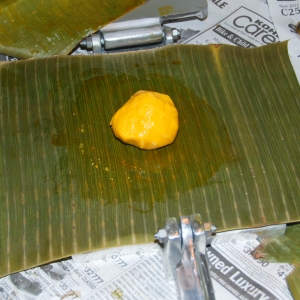
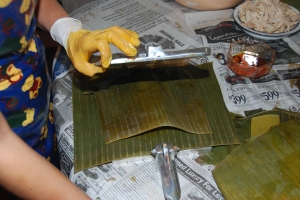
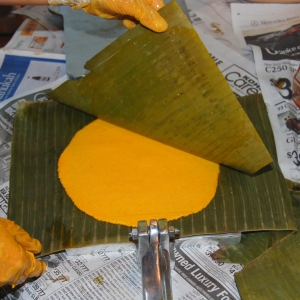
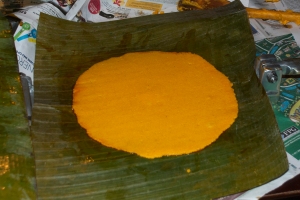
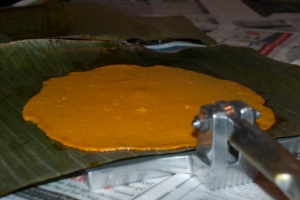
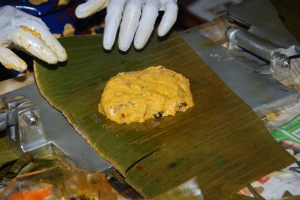
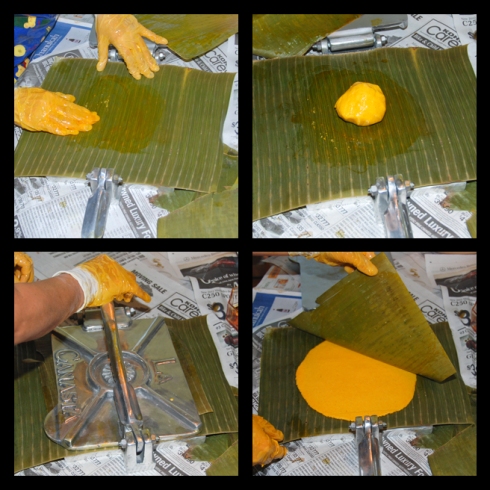
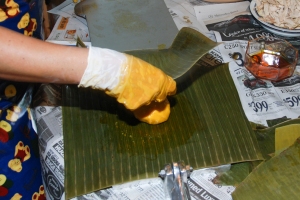
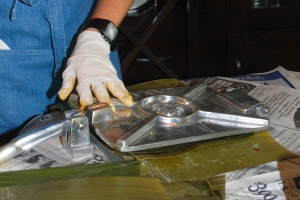
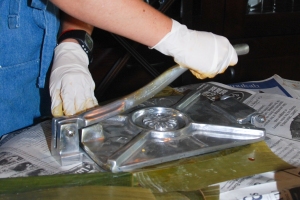
3.  Grab one of the balls of dough and place it in the middle of the leaf. If you have an awesome tortilla press like my aunt has, just press it and voila! If not you have to press the dough lightly with your fingers until its flat. You can also use a heavy plate or any other way you can come up with to flatten the dough faster and easily. Use another shirt on top of that one covered with annatto oil if you use any other method other than the manual method to flatten the dough. The flat dough should be about 4 millimeters thick and be flattened in a circular shape.

Set a ball of dough in the center

Set a ball of dough in the center

Cover with another plantain leave with annatto oil on it

Cover with another plantain leave with annatto oil on it

Close the press

Close the press

Press down a bit

Press down a bit

Press down fully, but not too much

Press down fully, but not too much

Open the Press and Remove the top leaf

Open the Press and Remove the top leaf

Easy as Pie

Easy as Pie

Voila!

Voila!

Beautifully pressed hallaca dough

Beautifully pressed hallaca dough

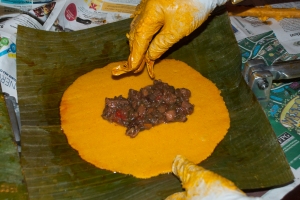
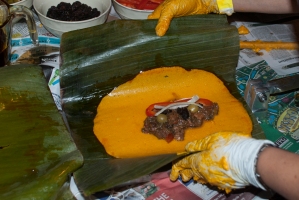
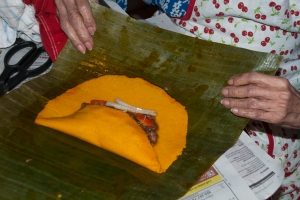
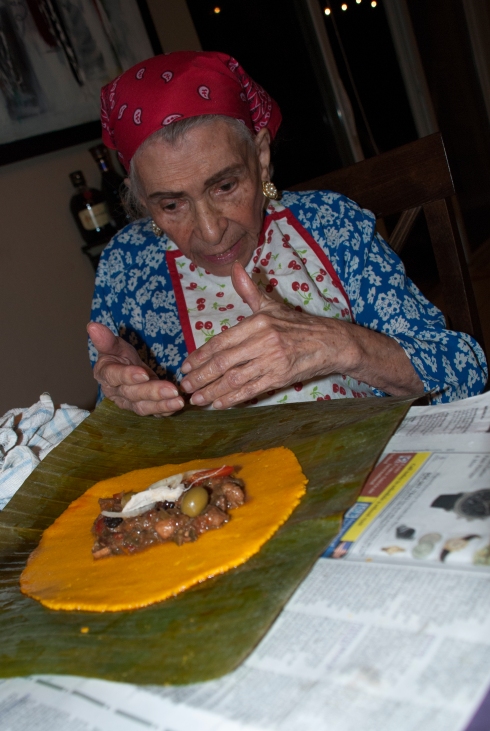
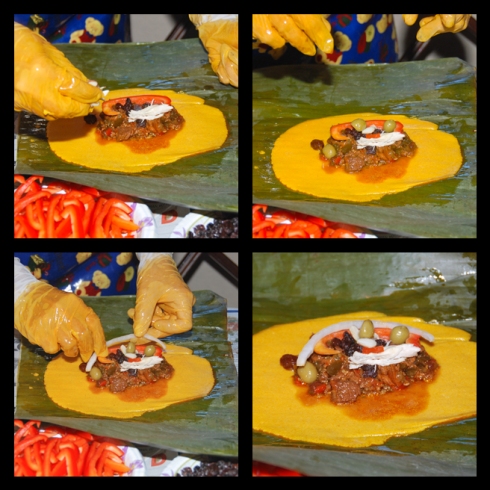
4. With a large spoon that measures out about half a cup (or 8 tablespoons), pour some of the stew in the center of your flattened dough.

Add the stew

Add the stew

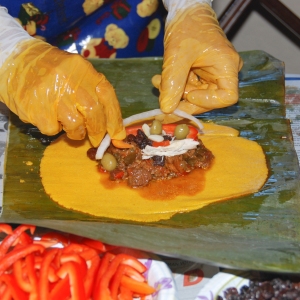
5. Add all the garnishes as follows for each hallaca: 2 strips of bacon, 2 strips of red bell pepper, 2 sliced almonds, 2 strips of onions or one onion ring, 2 green olives, 4 capers, and 6 raisins.

Add garnishes

Add garnishes

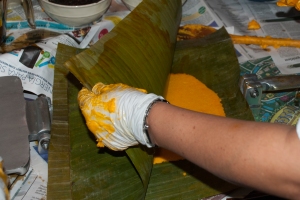
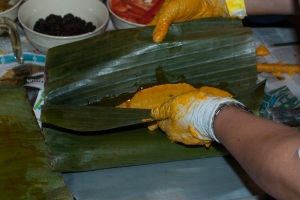
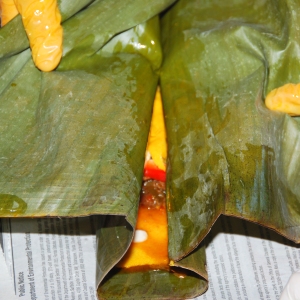
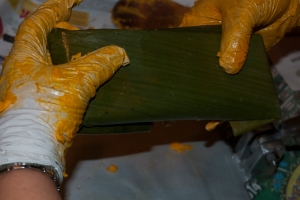
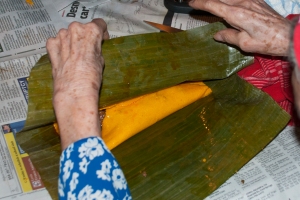
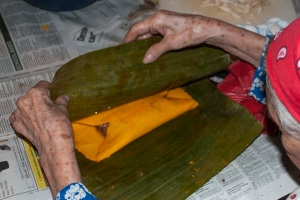
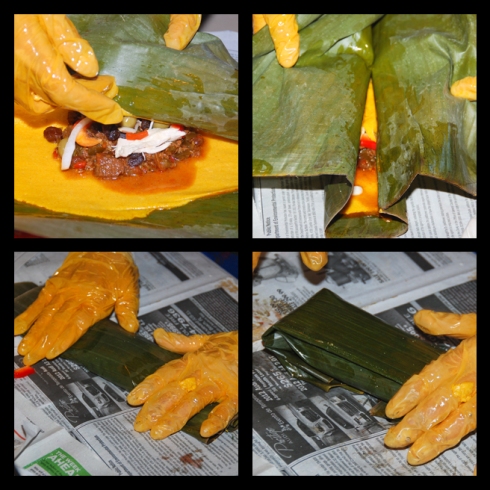
6. Proceed to close the hallaca by folding in the top and bottom of the leaf towards the center, once the leaves meet in the center on top of the hallaca dough, fold that piece a couple times (the extra leaf), and lay it flat then fold the sides in.

Closing an hallaca (my aunt's method)

Closing an hallaca (my aunt’s method)

Closing an hallaca (my aunt's method)

Closing an hallaca (my aunt’s method)

Closing an hallaca (my aunt's method)

Closing an hallaca (my aunt’s method)

Closing an hallaca (my aunt's method)

Closing an hallaca (my aunt’s method)

Closing an hallaca (my aunt's method)

Closing an hallaca (my aunt’s method)

Closing an hallaca (my great-grandmother's method)

Closing an hallaca (my great-grandmother’s method)

Closing an hallaca (my great-grandmother's method)

Closing an hallaca (my great-grandmother’s method)

Closing an hallaca (my great-grandmother's method)

Closing an hallaca (my great-grandmother’s method)

Closing an hallaca (my great-grandmother's method)

Closing an hallaca (my great-grandmother’s method)

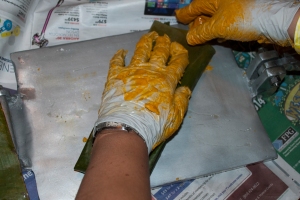
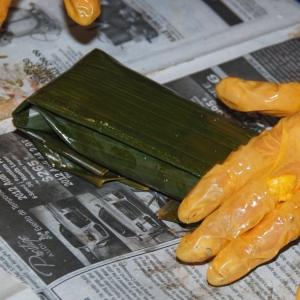
7. Cover it again with another leaf (the shirt) if necessary. Then wrap it again with a cover and finally add the belt to it.

Wrapping an hallaca

Wrapping an hallaca

Wrapping an hallaca

Wrapping an hallaca

Wrapping an hallaca

Wrapping an hallaca

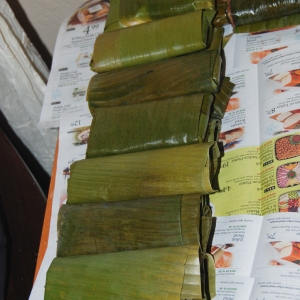
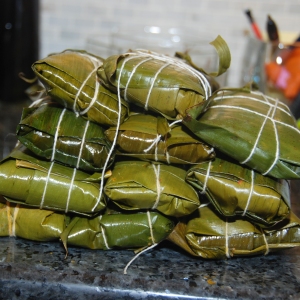
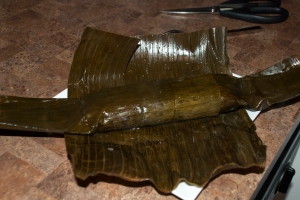
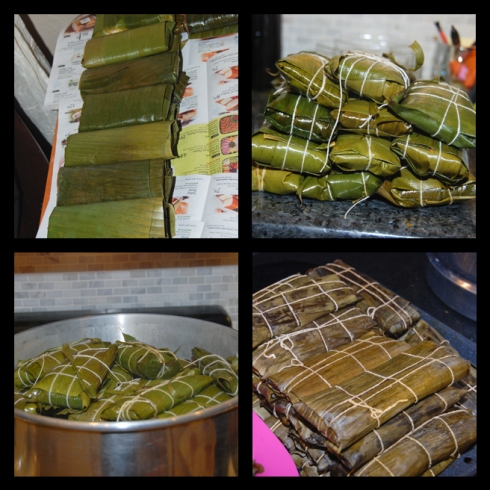
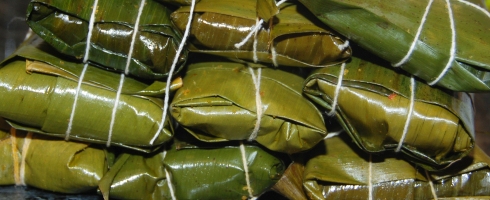
Wrapped Hallacas Ready To Be Tied Up

Wrapped Hallacas Ready To Be Tied Up

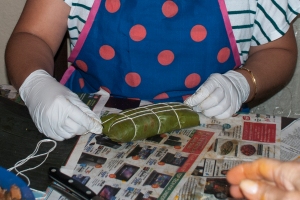
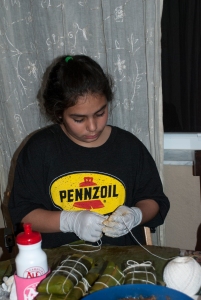
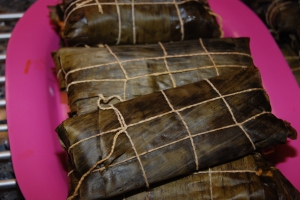
8. Tie up as you would a gift (as shown in the photo) and tie up with a knot.

Tie them up

Tie them up

Even the little ones can help

Even the little ones can help

9. Set aside one next to another, preferably not one top of another. If you run out of space you can do up to two layers, but not more than that.

Hallacas

Hallacas

10.  Continue until you run out of ingredients. You should end up with about 50 hallacas in total.

Cooking:
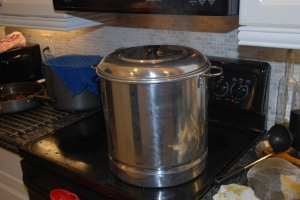
1. In a large enough pot heat up enough water (about half the size of the pot). Add a bit of salt. Cook at high heat until the water boils. Add as many hallacas as you can fit, they must all be completely submerged in the water. You can do it in batches as they become ready from the assembly line. You can also add some of the left over plantain leaves on top to help keep them submerged and also add aroma to them. Cover and let them cook for about 1 hour. You might want to have several pots and timers on your stove to keep track of you different batches.
2. Once cooked, remove them from the pot and let them drain. The easiest way is to drain them on a clean sink, and stand them up one next to the other so they can drain the water inside them a lot faster.

Boiling Hallacas

Boiling Hallacas

The Hallacas Are Ready

The Hallacas Are Ready

Serving:
1. Let it cool for a minute, but not too long, you don’t want it to get cold.
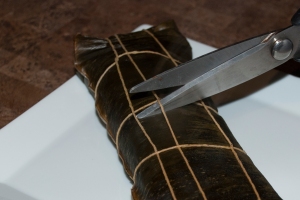
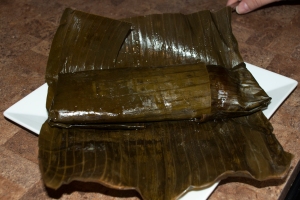
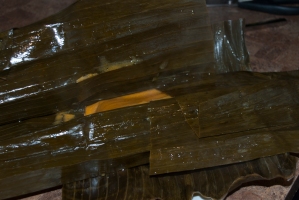
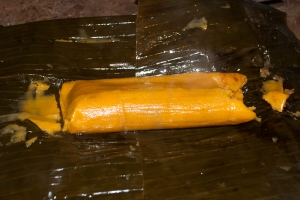
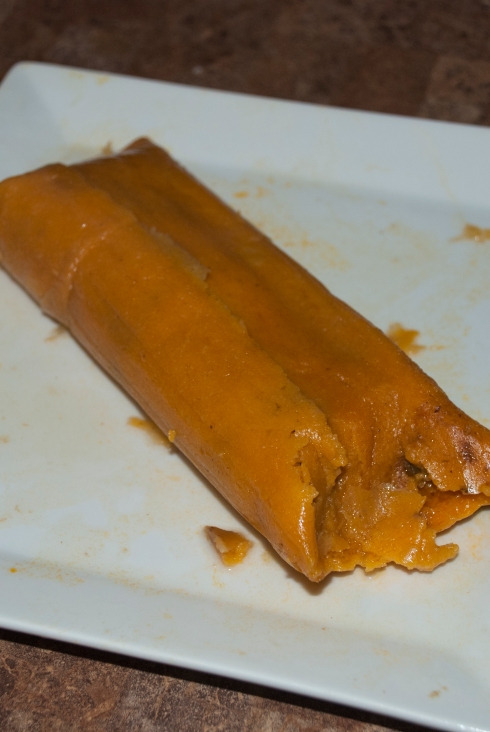
2. Lay them flat on a large enough serving plate that will serve as the ‘opening plate’. Cut the thread and carefully open each layer of plantain leave until you get to the hallaca. Use the last plantain leave to lift up the hallaca and carefully slide it on to the plate where it will actually be served.
3. Just to clarify… you do not eat the plantain leaf.

Serving An Hallaca

Serving An Hallaca

Serving An Hallaca

Serving An Hallaca

Serving An Hallaca

Serving An Hallaca

Serving An Hallaca

Serving An Hallaca

Serving An Hallaca

Serving An Hallaca

Recipe: Hallacas Venezolanas  | Venezuelan Christmas Dinner Hallacas

Recipe: Hallacas Venezolanas | Venezuelan Christmas Dinner Hallacas


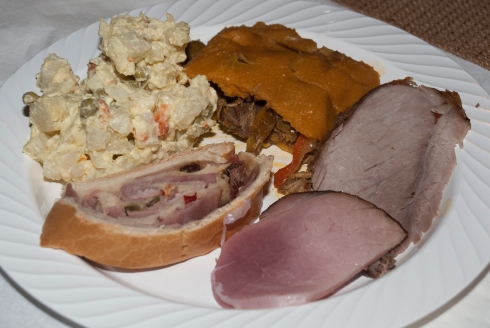
Venezuelan Christmas Dinner Plate

Venezuelan Christmas Dinner Plate

Storing:
1. After you make your entire batch of 50 hallacas and you wish to store them, you can let them all cool down and then keep in the fridge for up to 4 weeks.
2. If you are planning on freezing your hallacas its better to freeze them before they are cooked so that the dough maintains itself better. In this case, you can take them straight from the freezer and then boil them as described above.
3. If you do freeze them after they have already been cooked, you should thaw them to room temperature before you boil them again.

Re-heating:
1. To reheat your hallacas, take them out of the fridge and boil them in enough water to cover all the ones you wish to serve at the moment. Add a little bit of salt to the water. Boil them for 15 to 20 minutes, turning them at the half point.

Bollos de Hallaca:
1. If you run out of some ingredients, or if you already have the number of hallacas you wish to make and still have some leftovers of the ingredients, you can make bollos de hallaca.
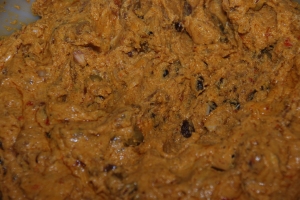
2. To do so, simply add all the leftover dough, stew, and garnishes and mix them all together to form the compact dough.
3. You wrap them the same way you did with the hallacas, but add a distinction, like a little bow made of a string of plantain leaf, or a different tying method, or just something distinctive to set them apart from the hallacas. It is basically the same thing, except the bollos are all mixed in together in a uniform mass, and the hallaca has all the stew and ingredients inside and the dough outside serving as a pocket or container.

Bollos de Hallaca

Bollos de Hallaca

Bollos de Hallaca

Bollos de Hallaca

Bollos de Hallaca

Bollos de Hallaca

Bollos de Hallaca

Bollos de Hallaca

Bollos de Hallaca

Bollos de Hallaca

Bollos de Hallaca

Bollos de Hallaca

Bollos de Hallaca

Bollos de Hallaca

¡Buen Provecho!

¡Gracias A Todos!

This post is very special to me and I will never forget the two days I spend making hallacas with my family, and I dedicate it to everyone involved in making hallacas possible for Christmas 2014:
Nery Russo, Felípe Ramón Ojeda Russo, Ana C. Sandoval de Ojeda, María Gabriela Ojeda de Sucre, Fernando Sucre, Marialejandra Ojeda, Raymond Wolowicz, and even little miss Andrea Sucre.
You were all involved in a small or big way, you all taught me something and you all sacrificed your time and busy schedule so we could all make hallacas together! I love you all!

*This post was supposed to be out by December 24th, but you guys know (by reading this post) how Venezuelan Christmases can be, so it is a little bit late.

Recipe: Pay de Parchita | Venezuelan Passion Fruit Pie

26 Oct

I’m not usually a fruit dessert lover. My philosophy is that if it doesn’t include chocolate, then it’s not worth it. However, there is one fruit desert that I absolutely love, and that is Passion Fruit Pie. Passion Fruit is a tropical, exotic and seeded fruit native from South America, specifically from Brazil. The passion fruit in Venezuela is known as parchita or maracuyá, and it can have either a yellow-orange or a red-purple skin. Its shape is oval and the skin is tough and smooth. You can tell when it is ripe because the skin gets softer and wrinkled. So don’t pick the prettiest ones when buying passion fruit, on the contrary, pick the ugly ones. Just make sure they don’t smell sour or have any dark or bruised spots. On the inside both the yellow and the red versions look the same. The inside of a passion fruit is filled with black oval shaped seeds surrounded by a yellow gooey pulp. The flavor of the passion fruit is a bit sour and the aroma is very powerful. The pulp is used to make juices, mousses, cakes, ice cream, jelly and jam and to prepare different kinds of sauces, vinaigrettes and salsas. It may be hard to find passion fruit at your regular supermarket store, so try to call them ahead of time and make sure they have some ripe ones available. The fruit is available year-round so it shouldn’t be too hard to find some. Your best bet is places like Whole Foods, the Fresh market or even any farmers market near you. I would go for the farmers markets first, because the other places may be expensive, I had to pay around $3 per each fruit (crazy!).

Parchita, Maracuyá, Passion Fruit

Parchita, Maracuyá, Passion Fruit

Parchita, Maracuyá, Passion Fruit

Parchita, Maracuyá, Passion Fruit

The passion fruit comes from the passionflowers plant called Passiflora. It is said that the passionflowers’ name came to be around the sixteenth century, when the first Christian missionaries came to South America and found these flowers to be a good sign that their mission would be a successful one. The name came to be because they believed that the flower symbolized the death of Christ (the Passion of Christ). The flower itself has five petals and five sepals, which they believed to represent the disciples without Peter and Judas. The flower also has two rows of colorful filaments, which they believed to signify the halo around Christ’s head or the crown of thorns. The flower has five stamens and three spreading styles with flattened heads, which they believed to represent the wounds and the nails respectively. The flower has tendrils that look like the whips used to afflict Christ. Finally, the leaves look like fists or handgrips, believed to be those of the soldiers. Weather you believe in all this symbolism or not, you have to admit it’s a pretty cool name for a fruit.

A long time ago, my paternal grandfather used to own a restaurant called TACÚ back in Caracas. I used to work there as a hostess. My mom used to make whole desserts and sell them to TACÚ to be resold by the slice. She used to make all kinds of delicious Venezuelan desserts, and one of them was this Passion Fruit Pie. One time, our oven at home wasn’t working so my mom had to bake her desserts elsewhere. She went to my paternal grandparents’ house to bake the desserts there. My grandpa, being the passion fruit lover he is –he eats one almost every morning for breakfast– said the passion fruit pie my mom was finishing up didn’t look too presentable, and that she should leave it at his house and make another one again to be sold at the restaurant. The truth is he just wanted to keep the pie at home, and eat it himself, which he did. So now I am sharing with all of you my mom’s famous and secret Passion Fruit Pie recipe that all the clients at TACÚ (and the owner himself) loved.

2014-10-12 Pie de Parchita 025 EDITWhat you need:
For the Crust
– 1 whole package of Galletas María Puig (María Cookies) – 250 gr.
– 180 g. Margarine or Butter
– 2 tbsp. Sugar
– ¼ tsp. ground cinnamon
For the Filling
– 2 c. Passion Fruit juice (freshly squeezed)
– 5 tbsp. Corn Starch
– 3 egg yolks
– 1 cup sugar
For the Meringue
– 3 egg whites
– ½ cup sugar
– ¼ tsp. ground cinnamon

Preparation:
The Crust
1. Preheat your oven to 350°.
2. Use a food processor or blender to grind up all the Galletas María Puig until they are finely ground. The Puig brand is a Venezuelan brand, and the Galletas María, or María Cookies are a staple in traditional Venezuelan brands. I understand it would be hard to find the original Galletas María Puig, however you can purchase other brands that are not the exact same, but they are very similar to the original María Cookies. Some of the other brands of María Cookies can be found at Wal-Mart, Publix, and Sedanos. The other brands are Goya, Iberia, La Fé, Conchita, Rio and Gullon among others. Just make sure that the entire package amounts to 250 gr., which means for some of the brands you may have to buy 2 packages.

Blend the María Cookies

Blend the María Cookies

3. Melt the butter or margarine at low heat in a small pot.

Melt the butter or margarine

Melt the butter or margarine

4. In a large bowl combine the María Cookies, the melted butter, the sugar and the ground cinnamon. Mix well with a wooden spoon, and also with your hands to make sure there are no large pieces of cookies left behind and no clumps in the mix.

Mix the ingredients

Mix the ingredients

5. In a round 9-inch pie Pyrex add the mixture and press gently with your fingers to mold and shape the mixture evenly into the Pyrex.

Shape the mixture evenly into the Pyrex

Shape the mixture evenly into the Pyrex

6. Bake for 15 minutes at 350°. Once done, let it cool down a bit and then put it in the fridge while you make the filling.

The Filling
7. First you must make the fresh passion fruit juice. Take each passion fruit and cut it in half, then with a spoon, scoop out all the pulp and seeds into a food processor or blender. After you have taken the juice of all the passion fruits you have (I used about 10), blend them as much as you can. The seeds will create these black spots on the mixture when you blend them, but don’t worry, that just makes your pie look even better, because it was made with fresh fruit and the seeds are edible. I did strain it a bit after I blended it, just to remove any big pieces of seeds left behind, and I used a very tight strainer. After you make the juice, it will be very strong and sour/bitter so you will have to add some water to water it down. I ended up with about 1½ cups of juice concentrate, and then I added ½ cup of water to complete the 2 cups of juice. There is no telling how much juice concentrate you will end up with, or how much water you will have to add, but you can guestimate with these measurements I provide from what I got.

Blend the Passion Fruit pulp and seeds

Blend the Passion Fruit pulp and seeds

Blended passion fruit juice

Blended passion fruit juice

Strained Passion Fruit juice

Strained Passion Fruit juice

8. In a medium saucepan, add the sifted cornstarch, the sugar, and mix in at medium heat. Little by little, add the passion fruit juice, and mix constantly. Add the 3 egg yolks (lightly beaten), and continue to mix. Cook the mixture at medium temperature until it comes to a boil. Cook for one more minute and then remove from the heat and let it cool down.

Combine ingredients in sauce pan

Combine ingredients in sauce pan

Combine ingredients in sauce pan

Combine ingredients in sauce pan

9. Take the crust out of the fridge and add the filling mixture on top. Be sure that the crust isn’t hot when you add the filling on top of it. Let it sit for a bit and then put it in the fridge one more time for it to harden while you make the meringue.

Add the filling on top of the crust

Add the filling on top of the crust

The Meringue
10. Making the perfect meringue can be a bit tricky, so if you have already mastered this task, you can just go ahead and use your own meringue recipe. There are all kinds of rules that people believe you must follow to create the perfect mile high meringue, but I am just going to tell you, I am no meringue expert, and the two times I have made it, it has come out just fine.  I just whipped the egg whites with an electrical handheld mixer and then added the sugar slowly until I reached the desired consistency.  However, you can Google the steps to creating the perfect mile high meringue and you can follow them, but don’t be surprised if it doesn’t come out just right. Here is a good blog post on Meringue.

Add meringue on top

Add meringue on top

11. After you make the meringue, using a pastry bag and tip, decorate the pie top with the meringue making swirls to create dollops with tips all around the pie top. Sprinkle the cinnamon on top just to decorate. Then bake the whole pie again for 15 minutes at 350°. You just want to brown the meringue, so keep an eye on it.
12. You can store it in the fridge after it cools down a bit. Serve cold.

Pay de Parchita | Venezuelan Passion Fruit Pie

Pay de Parchita | Venezuelan Passion Fruit Pie

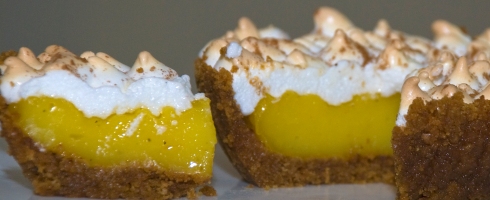
Pay de Parchita | Venezuelan Passion Fruit Pie Individual Portion

Pay de Parchita | Venezuelan Passion Fruit Pie Individual Portion

Pay de Parchita | Venezuelan Passion Fruit Pie Individual Portion

Pay de Parchita | Venezuelan Passion Fruit Pie Individual Portion

¡Buen Provecho!

¡Gracias Mami & Mariale!
This post is very special to me, and I dedicate it both to my mother (the owner of this recipe), and to my sister for helping me throughout the whole process from searching for the right parchitas all over town up to tasting the first bite and taking us back in time when we lived in Venezuela and ate my mom’s passion fruit pie when she used to make it a long, long time ago.

Cool Tool Thursday

12 Jan

Today’s Kitchen Tool is:

The Soup and Cracker Mug

The Soup and Cracker Mug

The Soup and Cracker Mug

One of my favorite things to eat is soup, of any kind. And of course I love to eat crackers with my soup. These mugs are PERFECT for that !!!

Navidad Venezolana | Venezuelan Christmas

4 Jan

One of the things I miss the most about Venezuela is our Christmas.  We Venezuelans have a very celebratory spirit.  You just give us an excuse, and we’ll make a party out of it.  So Christmas is definitely a good excuse for a GRAND celebration.  Usually, the entire family gathers in one place and we have a full house of 30+ people for Christmas.  When I was a kid it usually took place at my great-grandparent’s house, where all the aunts, uncles, grandparents, sisters, brothers, nieces, nephews, cousins, and even dogs and cats where invited.  They had a pretty big house where they could fit and feed all those people.  I was young and had several cousins my age that I had fun with.  But there were too many guests to bring a present for each, so we usually did a gift exchange in which you give one gift to someone (picket out randomly) and then you got one gift from someone else, so basically like a Secret Santa, but sometimes it wasn’t a secret.  However, within each individual family, the mom and dad exchanged gifts, and the kids all got gifts from everyone and also from Santa!
As I grew older, my great-grandparents passed away, and most of my family immigrated to the United States.  Pretty soon, it was mostly my grandparents, my parents, my sister and I.  Sometimes we spent it with my mom’s side of the family too, which is also pretty large (20 + people).  One time I event went with my dad’s entire family to spend Christmas in Puerto Rico.  Now, I have family in Venezuela, and in Florida, so the possibilities of getting everyone together for Christmas are slim.  But one thing that was definitely present in every single Christmas, no matter who was there, who wasn’t and where we were, was the food!

“La Cena Navideña” (The Christmas Dinner) is something that has to be present during Christmas and New Years Eve in order for it to be considered a real celebration.  No Venezuelan home can be called a Venezuelan home without the traditional Christmas dinner during Christmas, no matter where they live.  Venezuelans celebrate Christmas during Christmas Eve, on December 24th.  Dinner starts late, around 9-11 pm, in true Venezuelan fashion.  Then people exchange gifts (like our gift exchange), and then adults have drinks, talk and dance, while the kids play and try to stay awake to see if they can get a close look at Santa.  The same goes for New Years Eve, where the Christmas Dinner is also present.  Another important Venezuelan Christmas tradition we can never forget about is our Christmas music.  Gaitas, Aguinaldos and Villancicos serve as the perfect soundtrack to a true Venezuelan Christmas.  Gaitas are the most popular music genre during Christmas, originated as church songs, and later becoming popular outside church and during Christmas season.  Aguinaldos and Villancicos are based on Spanish Christmas carols and old carols.

La Cena Navideña Venezolana | Venezuelan Christmas Dinner

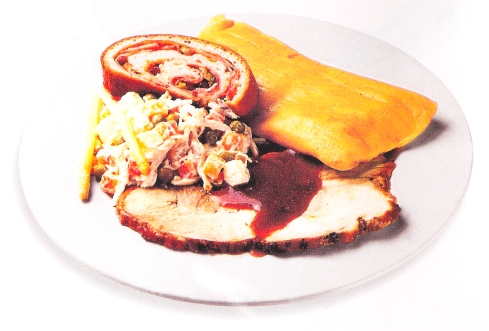
The Venezuelan Christmas Dinner Table is the greatest example of the miscegenation of Venezuelan Food.  The different dishes served at a Venezuelan Christmas Dinner are the result of the many different culinary traditions that converged and intermingled in our country, as a reflection of the miscegenation of the country during colonization.  The Hallaca is the main component of the Venezuelan Christmas Dinner, joined by Pernil de Cochino, Ensalada de Gallina, Pan de Jamón, and Dulce de Lechoza (Ham, Chicken Salad, Ham Bread, and Papaya Delicacy).

La Cena Navideña Venezolana | Venezuelan Christmas Dinner

La Cena Navideña Venezolana | Venezuelan Christmas Dinner

La Hallaca/Hayaca
Pronounced Ah-jac-kah, is the most important component for a true Venezuelan Christmas Dinner.  The origins of the word, the spelling, and the origins of the actual dish have been in dispute for quite some time, so I will give you the versions that I like the most.  As far as the spelling goes, I like Hallaca better.  As far as the origin of the name, I like to believe the word Hayaca comes from the Guaraní dialect, in which “ayua” or “ayuar” means to mix or stir something together, and “ayuaca” is the mixed ‘thing’ that you get.  Then this became “ayaca”, latter “Hayaca”, and finally “Hallaca”.  And as far as the origin of the dish itself goes, I like the story that back in the colonial times, the aristocrats descendants of our Spanish conquerors would enjoy great banquets and the leftovers would be either donated to the slaves or basically taken by them, and then mixed all together, wrapped in corn flour and plantain leafs and boiled.  And once the aristocrats discovered this amazing dish, it was incorporated into their fancy banquets and became our popular Hallaca.  The popular dish that makes an appearance only during Christmas, and brings our families together even for the preparation, which can take up to 2 days and at the very least two people to make at least 50 Hallacas.  The preparation itself is a reason to come together and celebrate, and create an assembly line with positions assigned, like the chopper, the cook, the dough kneader, the wrapper, and the knot maker.

Unfortunately for me (and you), this year I didn’t have a Venezuelan Christmas, and I didn’t have any Hallacas.  So I do not have a personal recipe to share with you.  I can only hope, and promise you, that next Christmas I am surrounded by enough family members to help me make my own Hallacas, and the rest of the Venezuelan Christmas Dinner Menu, so I can share my very own recipe.  I do however, have a GREAT collection of photographs of the complicated process of making Hallacas, that my awesome uncle Fernando took for me, while my beautiful aunt Gaby (the designated Hallaca maker and personal gourmet inspiration and influence) was making Hallacas this year.  And also a couple of links of good Hallaca recipes:

– From Adriana Lopez and Pica Pica with VIDEOS and complete Recipe Booklet!

– From one of my favorite sites Hispanic Kitchen.

And now the photos!

Venezuelan Hallacas Ingredients

Venezuelan Hallacas Ingredients

Venezuelan Hallacas Ingredients

Venezuelan Hallacas Ingredients

Venezuelan Hallacas Ingredients

Venezuelan Hallacas Ingredients

Venezuelan Hallacas Ingredients

Venezuelan Hallacas Ingredients

The Making of Venezuelan Hallacas: El Guiso | The Stew & El Aceite Onotado | Annatto Oil

The Making of Venezuelan Hallacas: El Guiso | The Stew & El Aceite Onotado | Annatto Oil

The Making of Venezuelan Hallacas: La Prensa | The Press

The Making of Venezuelan Hallacas: La Prensa | The Press

My beautiful Aunty Gaby super ready to make Hallacas

My beautiful Aunty Gaby super ready to make Hallacas

The Making of Venezuelan Hallacas: La Masa | The Dough

The Making of Venezuelan Hallacas: La Masa | The Dough

The Making of Venezuelan Hallacas: Las Hojas de Plátano | The Plantain Leaves

The Making of Venezuelan Hallacas: Las Hojas de Plátano | The Plantain Leaves

The Making of Venezuelan Hallacas: Prepping the Dough

The Making of Venezuelan Hallacas: Prepping the Dough

The Making of Venezuelan Hallacas: Adding the Filling

The Making of Venezuelan Hallacas: Adding the Filling

The Making of Venezuelan Hallacas: Wrapping the Hallaca

The Making of Venezuelan Hallacas: Wrapping the Hallaca

The Making of Venezuelan Hallacas: Tying & Cooking

The Making of Venezuelan Hallacas: Tying & Cooking

*A very special thank you to Gaby Ojeda and Fernando Sucre for the beautiful images, that still make my mouth water! (I LOVE YOU GUYS)… and guardenme mi Hallaca!

¡Buen Provecho!

Cool Tool Thursday

15 Dec

Today’s Kitchen Tool is:

The Stainless Steel Index Cutting Board

The Stainless Steel Index Cutting Board

The Stainless Steel Index Cutting Board

You can never be too organized in the kitchen… and you definitely don’t want to serve a hot plate of Salmonella to your guests!!!

Cool Tool Thursday

1 Dec

Today’s Kitchen Tool is:

El Tostador de Arepas | Tostiarepas | Arepa Toaster

This slideshow requires JavaScript.

Yet another great Venezuelan cooking tool.  I have written about it before, but I thought this ingenious tool should be featured on a Cool Tool Thursday post as well.   The Tostiarepa was invented not too long ago, and it was a relief for all Venezuelan areperas (arepa makers), including my mom.  Arepas usually take a bit long if you make them using the original technique and the budare (another Cool Tool featured here).  However, this great new invention was created with the purpose of making arepas cook a lot faster and easier.  You might think that this tool is too specific, because it was literally created with only one purpose in mind.  However, for us Venezuelans who eat an Arepa at least once a day, this is an essential tool in the kitchen.

The first Tostiarepa were made out of aluminum and you still needed to use the stove to heat them up on one side, and then turn it and heat up the other side.  Latter, came the electrical Tostiarepa, which you only have to plug, fill, wait 7 minutes, and done!

A lot of companies that specialize in kitchen appliances make their own version of this arepa maker, arepa toaster, Tostiarepa, tosty arepa, tostador de arepas, or whatever you wish to call it.  Some of these brands include Brentwood, Bene Casa, Miallegro, Oster and of course Imusa.  And you can find these in stores like Amazon.com, Overstock.com, Sears and Target.  Some even have different sizes of Tostiarepas to make either 2, 4, or even 6 arepas at once.

Cool Tool Thursday

3 Nov

Today’s Kitchen Tool is:

La Tostonera

This slideshow requires JavaScript.

One of those tools that you only use once, when making something in particular.   Unless you can find some other use for it.   However, this Venezuelan cooking tool or utensil is perfect for making Venezuelan Tostones.   All you have to do is place the plantain slices in the pre-cut whole inside the Tostonera, and it will flatten them to the famous Tostones shape without pressing too hard.   Also, it is very popular as a Mother’s Day gift.   I remember making one at school for her.   The school provided the wooden components and we assembled it, stained it and decorated it to give to our moms on Mother’s Day.

The Hispanic Houseware Brand IMUSA sells Tostoneras (Wood Plantain Press), and I have seen them at several Publix stores hanging in a display close to the plantains.   You can also find IMUSA Bamboo Tostonera at Macy’s on sale for $6.99.   At Kmart for $4.99.

Recipe: Venezuelan Churros

26 Oct

One of the warmest memories of my childhood are crispy hot churros.   It was custom for my family to have Sunday lunches at our Grandparents’ house, and sometimes even go for a treat afterwards.   My grandparents live near a cute little park called Parque Agustín Codazzi in the Prados del Este development in Caracas, Venezuela… and sometimes I was good enough to be taken to the park after visiting the grandparents.   But as we would drive towards the park and try to find a parking space, I was exited to go to the park, sure… but mostly I was scanning the place for a big white truck… the “Churros Truck”.   Sometimes it wasn’t there, but when it was, we were sure to get some churros to-go, before we left the park.   It was just so exiting to wait in line (because there was always a line) and grab your brown baggy of delicious goodness.   They were the best churros in the world to me.   Then as time went by and people saw a potential business venture in these churros, several shops started popping up here and there, a fast-food version of churros (like Churro Mania).   They came in different shapes and sizes, and even toppings. But to me there is nothing like the Churros from the white truck at the Codazzi Park.   So here I am telling my husband this story and I decide I have to make some myself, because now the Codazzi Park isn’t exactly right around the corner.

Ingredients for Venezuelan Churros

Ingredients for Venezuelan Churros

What you need:

– 1 1/8 Cup water
– 2 Tablespoons butter
– 3/4 Teaspoon salt
– 1 Cup flour
– 1 ½ Eggs
– Vegetable oil (enough for frying)
– ½ Cup sugar
– Pastry Bag with the largest star-shaped tip you have
– Toppings: Chocolate Fudge, Condensed Milk, Dulce de Leche (optional)
– Brown Paper Bag

Preparation:

1. In a large saucepan add the water, the butter and the salt.   Bring the mixture to a simmer just so that the butter melts and the ingredients are mixed in well.
2. Reduce the heat to low, add the flour and mix in well using a wooden spoon.   The mixture will begin to form a ball and it should break away from the sides of the saucepan.
3. Let the mixture cool for 15 to 20 minutes.

Let It Cool Down

Let It Cool Down

4. In the meantime, you can begin to heat up enough oil either in a deep fryer or large enough saucepan at about 350ºF.
5. Add the eggs one by one to the dough and mix in well with an electrical mixer with a dough attachment for about 5 minutes (or mix by hand with wooden spoon).
6. Spoon the dough into the pastry bag, and squeeze out the churros right into the oil.   You can make them as long as you wish, but not too long that they don’t fit in your frying container.   I made them about 3” long, but they are usually about 6” long.

Spoon Mixture Into Pastry Bag

Spoon Mixture Into Pastry Bag

7. Use kitchen scissors or a knife to cut between churros as they come out of the pastry bag.   Cook until golden, about 6 minutes.   But don’t do the entire batch at once; do as many as they fit in your fryer without being to close to one another so they don’t stick to each other.

Squeeze Right Into The Oil

Squeeze Right Into The Oil

8. In order to coat them with sugar you can do two different methods.   One is to put the sugar inside a brown paper bag, and as soon as they come out of the fryer, place them in the bag and shake the bag.   The other is (the one I tried here, because I did not have a paper bag handy) to place a layer of sugar on a paper towel and toss them on top as they come out of the fryer and roll them on top of the sugar, or just sprinkle sugar on top.   They will get coated with sugar either way.

Coat With Sugar

Coat With Sugar

9. You can eat them just like that, with the sugar. Or you can get creative and add some delicious toppings like Chocolate Fudge, Condensed Milk or Dulce de Leche.

Add Toppings

Add Toppings

Venezuelan Churros with Chocolate Topping

Venezuelan Churros with Chocolate Topping

Venezuelan Churros with Dulce De Leche Topping

Venezuelan Churros with Dulce De Leche Topping

Venezuelan Churros with Condensed Milk Topping

Venezuelan Churros with Condensed Milk Topping

Tips

– If you like this recipe (and so do your kids) I suggest you get a “Churrera” or a churro making machine or gun. It will make it a lot easier. Some even have the capability to have the topping on the inside of the churro.

Old School Churrera - Photo By Cesar Astudillo (Flickr)

Old School Churrera - Photo By Cesar Astudillo (Flickr)

Churro Pastry Gun from La Tienda

Churro Pastry Gun from La Tienda

*This recipe makes about 20-25 churros.
*Also, please forgive my “mini-churros” pictured here. I did not have a large enough tip for my pastry bag.

Cool Tool Thursday

20 Oct

Today’s Kitchen Tool is:

The OCD Chef Cutting Board


This slideshow requires JavaScript.

For those of us who think food not only has to taste good, but look good… or perfect… whichever.

Cool Tool Thursday

8 Sep

Today’s Kitchen Tool is:

The Cheat Sheet Kitchen Apron

This slideshow requires JavaScript.

This apron is great if you’re like me and you don’t want to break out the calculator to figure things out.   It has conversion, weights, measurements and even cooking guides, tips and glossary.   It is specially helpful if English is your second language… or if cooking is a foreign language for that matter.

Cool Tool Thursday

28 Jul

I don’t know why, but when it comes to kitchen tools, I simply must have them all.   I think one of the reasons is because when I was little, my aunt used to have all the coolest kitchen tools, and I would love to look at all her cookbooks’ pictures and see how she used every single tool.

Every now and then I will share one of these cool kitchen tools with you.   Perhaps they are not essential, or even necessary, but I would definitely love to have them all.

Today’s Kitchen Tool is:

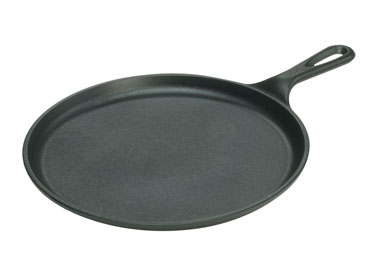
El Budare (Comal or Round Cast Iron Griddle) 

El Budare

El Budare

I figure since we where in the Arepa theme, I would post a good kitchen tool to have when making arepas.

This tool is commonly known in Venezuela as “El Budare”.   Initially I think the native Indians used large stones that they leveled and shaped as circles in order to cook many things including arepas, Cachapas and casabe.   Most places still have large circle or square budares in order to cook more arepas at a time.   However, since we probably don’t have the kind of space in our home needed to place an original budare to cook, we can still make delicious arepas using a basic round cast iron griddle like the ones sold by Lodge Logic.

Here are some links to great images I found online of original and even improvised budares:

The making of Casabe

Improvised Budare

MacGyver Budare

Budare on the streets

Budare Improv