Archive | Ingredients RSS feed for this section

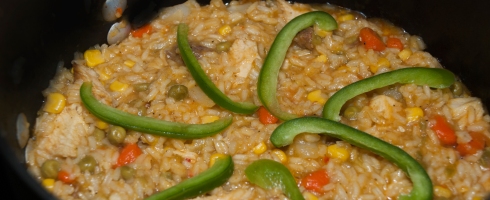
Recipe: Arroz con Pollo | Venezuelan Rice And Chicken

4 Oct Arroz con Pollo | Venezuelan Rice And Chicken

It is custom in our culture that women are the ones in charge of cooking within the family unit. However, there are two specialties that my dad was always in charge of preparing. At least once Sunday every month, he would be in charge of making Parrillas at my grandparents’ house, and a different Sunday he would be in charge of making Arroz con Pollo at our house. He has been perfecting his Arroz con Pollo recipe all these years and still to this day, he makes it at least once a month for himself. Arroz con pollo, previously known as pollo en arroz (chicken in rice), is a main dish in which the rice leaves its usual spot as a side and becomes the main event. The rice absorbs all the flavors and colors of the chicken and other ingredients.

Recently my dad traveled to the US to visit, it was a big surprise for us because we had no idea he was coming. He stayed over for a month, and we begged him to make his famous arroz con pollo for us one day. I had been trying to recreate his arroz con pollo for years so I could include it on this blog, and I had no luck. From being unable to find the perfect rice, to not knowing the amount for each ingredient, to overcooking the rice and ending up with arroz-con-pollo pâté… finally, I was able to learn from the pro, how to make the perfect arroz con pollo. As my dad was cooking, we would remember all those Sundays he used to prepare it at home, and he would explain all the tips and tricks to make it perfect. He even said his arroz con pollo is like a Venezuelan Paella with chicken instead of seafood, for those of us who don’t like seafood (my dad is not a big fan of seafood, unlike my mom who eats almost everything from the sea). He also mentioned I would have to put this disclaimer out there: “this is merely ONE way of making Venezuelan Arroz con Pollo… my way”.

Arroz Con Pollo Ingredients

Arroz Con Pollo Ingredients

What you need:
– 2 Chicken Breasts
– 2 Medium Potatoes
– 2 Carrot Sticks
– 1 Bell Pepper
– 1 Large Onion
– 2 Chorizos
– 3 Chicken Bouillon Cubes
– 2 Cups of Yellow Rice
– 1 Teaspoon Olive Oil

Arroz Con Pollo Ingredients

Arroz Con Pollo Ingredients

– ½ Tablespoon Garlic Powder
– ½ Tablespoon Adobo
– Salt to taste
– Pepper to taste
– 1 Small Can of Sweet Peas
– 1 Small Can of Whole Kernel Corn
– Parmesan Cheese to taste
– Limes (Lime Juice) to taste
– Olive Oil to taste

Preparation:
1. In a large enough pot (like a 3 Qt. Saucepan), bring about 1.5 to 2 Qt. water to a boil, on high temperature.

Boil Water

Boil Water

2. Add the 2 chicken breasts to the boiling water, and lower the temperature to medium.

Add Chicken Breasts

Add Chicken Breasts

3. Peel, wash, and cut the potatoes. Then add to the pot.

Potatoes

Potatoes

4. Peel, wash, and cut the carrots. Then add to the pot.

Carrots

Carrots

5. Wash and cut in small cubes ¾ of the bell pepper and add to the pot. Leave the other ¼ of the pepper cut in thin slices, and set aside (we will use it to garnish the plate afterward).

Bell Peppers

Bell Peppers

6. Chop the onion and add it to the pot.

Onion

Onion

7. Add 2 chicken bouillon cubes (or 1 packet) to the pot.

Chicken Bouillon

Chicken Bouillon

8. Take the chorizo out of the freezer and slice it. It is better to cut it while it’s still frozen than when it has been thawed, since it will become a mess. Set aside.

Cut the Chorizo

Cut the Chorizo

9. Taste the chicken broth from the pot, and if needed, add another chicken bouillon cube (or half a packet). Set the temperature to high again and cook for another 15 minutes.

Chicken Broth

Chicken Broth

10. After everything has been cooking for about 45 minutes (since you first added the chicken breasts in the pot), take the chicken breasts out of the pot, cut them in small cubes, and then return it to the pot. Bring the temperature back to medium.

Remove Chicken and Cut

Remove Chicken and Cut

11. After 10 minutes. Drain all of the liquid out of the pot, keep all ingredients and also keep the broth in a separate container. We will use the broth later to cook the rice in it, so don’t throw it away.

Drain The Ingredients, Keep The Broth

Drain The Ingredients, Keep The Broth

12. In a large enough saucepan add a little bit of olive oil and turn up the heat to medium. Add all of the drained ingredients from the pot to the pan.

Sauteé Ingredients

Sauté Ingredients

13. In the large pot you were using before, add a little bit of olive oil, add the 2 cups of Yellow Rice and sauté it a little bit. I have to say, my dad and I bought the Iberia brand of yellow rice and we were fooled. The package is transparent so you can see the rice, and the rice looks yellow because the package is yellow, not the rice. It says yellow rice because it brings that yellow powder in it which turns the rice yellow when you cook it, but the rice is not yellow straight from the package. There are other brands that have the yellow rice already pre-stained yellow, and you should get that one instead. I saw that the Conchita brand has a clear container, and you can see that the rice is already yellow.

2 Cups of Rice

2 Cups of Rice

Sauté The Rice

Sauté The Rice

Actual Yellow Rice

Actual Yellow Rice

14. In the meantime, sauté the other ingredients in the other pan.
15. Once you sauté the rice just a little bit, add 4 cups of the chicken broth to the rice. Cook as directed in the rice package. Usually, turn the heat to high, bring to a boil. Then, lower the temperature and cover.

4 Cups of Rice

4 Cups of Rice

16. Add the adobo, garlic powder, salt, and pepper to the other ingredients in the other pan, then stir.

Add Seasoning

Add Seasoning

17. Add the chorizo to the ingredients in the pan, mix well.

Add Chorizo

Add Chorizo

Mix And Continue Cooking

Mix And Continue Cooking

18. Meanwhile, drain the cans of peas and corn.
19. Add all the ingredients from the pan to the pot with the rice. Stir thoroughly so that the rice mixes well with everything else.

Combine All Ingredients

Combine All Ingredients

20. Add the cans of peas and corn and mix well together.

Add Corn

Add Corn

Add Peas

Add Peas

21. Take the temperature to low and cover, then cook for about 25 to 30 minutes or until the rice is thoroughly cooked.
22. Serve hot with optional toppings: olive oil, Parmesan cheese, and lime juice. Use the rest of the bell pepper to decorate.

Arroz con Pollo | Venezuelan Rice And Chicken

Arroz con Pollo | Venezuelan Rice And Chicken

Optional Toppings

Optional Toppings

Arroz con Pollo | Venezuelan Rice And Chicken

Arroz con Pollo | Venezuelan Rice And Chicken

Arroz con Pollo | Venezuelan Rice And Chicken

Arroz con Pollo | Venezuelan Rice And Chicken

Note: This recipe usually includes Venezuelan Ají Dulce, but we were unable to find any. Most recipes don’t add the corn, but I thought my dad’s addition of the corn was delicious.

¡Buen Provecho!

¡Gracias Pa!
This is another very special post, and I dedicate it to my dad
Alejandro R. Ojeda

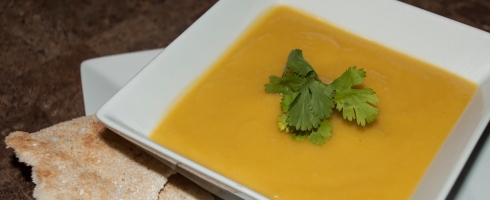
Recipe: Crema de Auyama | Venezuelan Cream of Squash Calabaza (Soup)

4 Jan Crema de Auyama | Venezuelan Cream of Squash Calabaza (Soup)

By now you must know how much I love soups and creams. I have given you the Apio Soup and the chicken soup recipes so far, but there are plenty more Venezuelan soup and cream recipes to come. Today I want to share with you another very popular Venezuelan creamy soup, the Crema de Auyama. The Auyama, pronounced awˈʝa.ma, is technically a fruit because it contains the seeds of the plant inside. However, most people consider it a vegetable. It most resembles the squash and pumpkin types. In Venezuela it is used in most soup preparations like Sancochos and it is also used on its own to create this cream. However, it is also used to create sweet recipes such as bread and cakes.

The Auyama is easy to cultivate and therefore it is sold in large quantities and at a cheaper price than other vegetables. It is rich in potassium, calcium, vitamin A, and fiber. It is also low in calories because it is mostly made out of water, but it is very tasty. It is believed that because it was easily cultivated, Europeans used it as fodder to feed their animals. Each plant can bear up to 8 fruits and it only takes 140 days to harvest. In Venezuela it is available all year long. However, the Auyama harvested in summer has a sandy-textured pulp and it works best for pasta fillings or cakes. On the other hand, the Auyama harvested in winter is the one that is best for creams and soups, because the pulp is more fibrous and pale, and it has more water content.

Here in the US, the type of pumpkin or squash that I believe to be the closest to the authentic Venezuelan Auyama is sold as Squash Calabaza. I have bought it at Publix and Sedano’s in big chunks (they cut it and sell each individual piece in cling wrap), I have also bought one at Wal-Mart sold as a whole (the whole Calabaza), but I think the ones that come cut in chunks are the ones that most resemble the Auyama taste. The Venezuelan Auyama belongs to the Curcubitaceae family, and the curcubita genre, in the varieties called máxima, moschata, mixta and pepo. Its size is large and it comes in different shapes and sizes, with skin that varies from green to yellow to orange, it can be either smooth or corrugated, and the pulp varies from pale yellow to bright yellow-orange. The taste also varies from very sweet to not so sweet. This is probably why it has been hard for me to find one that truly matches the Venezuelan Auyama taste.

This particular recipe is my sister’s very own recipe, so it is not a traditional recipe, but it is very close to it. My sister, Mariale Ojeda, a.k.a. The Soup Queen as we call her around here, is an expert at making delicious soups for me, the soup lover. This post was created by her, the recipe, the cooking and the photos are all hers. I have to say special thanks to her for all the soups she has been cooking for us lately and for this amazing recipe and post she created as a featured writer of Venezuelan Cooking.

Ingredients for Crema De Auyama

Ingredients for Crema De Auyama

What you need:
– 4 lbs. Auyama (Squash Calabaza)
– 6½ Cups Chicken Broth or Chicken Bouillon (enough to cover all the Auyama)
– 5 to 8 Stems of Cilantro
– 1 Teaspoon Minced Garlic
– ½ Chopped Onion
– 1/3 Sliced Bell Pepper
– ½ Stem Sliced Leek

Preparation:
1. Peel the Auyama and remove the seeds. Cut it in big chunks.

Cut The Auyama In Big Chunks

Cut The Auyama In Big Chunks

2. Place the chunks of Auyama in a large enough pot. Cover entirely with the chicken broth or chicken bouillon (1 bouillon cube per cup of water).

Cover With Chicken Broth

Cover With Chicken Broth\

3. Boil the Auyama at medium to high heat for about 13 minutes.
4. Add the cilantro and continue to boil for another 7 minutes.

Add Cilantro

Add Cilantro

5. Stir occasionally and remove accumulated foam from the top.
6. Meanwhile, cut the rest of the vegetables and heat up a pan with a little bit of olive oil.
7. Toss the veggies in the pan and sauté until brown, then set aside.

Sauté Veggies. Set Aside.

Sauté Veggies. Set Aside.

8. After about 20 minutes of boiling, test the Auyama by taking out a large piece and try to mash it with a fork, as if making mashed potatoes. If you can do this easily, then it’s done.

Test if the auyama is done

Test if the auyama is done

9. Add the sautéed vegetables to the Auyama pot, stir and remove pot from the heat. Let it cool down.

Add veggies to auyama

Add veggies to auyama

10. Once it has cooled down, grab all the solid pieces and place them in a blender or food processor.

Blend

Blend

11. Blend together and gradually add as much of the liquid remaining on the pot as necessary, to reach the right creamy consistency. What you are looking for is a creamy soup consistency.

Creamy consistency

Creamy consistency

12. Serve hot with your favorite garnish and topping, like my sister and I do. Some of our favorite toppings include Parmesan cheese, cream cheese, avocado, rice, croutons and cassava bread.

Crema de Auyama | Venezuelan Cream of Squash Calabaza (Soup)

Crema de Auyama | Venezuelan Cream of Squash Calabaza (Soup)

Note: You can make a big batch of this Squash Calabaza creamy soup and store it in the fridge for a couple of days, or you can store it in the freezer for up to a month. Reheat on the stove and not on the microwave for better results.

¡Buen Provecho!

Recipe: Hallacas Venezolanas | Venezuelan Christmas Dinner Hallacas

1 Jan

I am truly exited to be able to share this recipe with my readers and followers. As a kid I was sometimes involved in the making of hallacas during Christmas in Venezuela, but with very little responsibility; something like handing over a piece of yarn, or a spoon. Finally, eleven years after moving to the US, I can say that I have truly been involved in, and enjoyed the hallaca making experience. If you haven’t read my previous post regarding Venezuelan Christmas traditions, you can take a look here, to understand the full scope of a traditional Venezuelan Christmas Dinner, celebrations, traditions and dishes, but for this post I am going to limit myself to only explaining the hallacas.
This past year (2014), my paternal grandparents came to spend Christmas here in Florida with the rest of my paternal family, which they usually do every year. However, this year was extra special because they didn’t come alone, they invited my great-grandmother (my paternal grandfather’s mother) to join us. My great-grandmother, la señora Nery Ruso (98), is my true role model and a great inspiration as a woman. From a very young age she was dedicated to working, studying, raising her children, and it paid off in a life filled with accolades, awards, medals, and the highest honors as an entrepreneur, writer, business owner, a true influential character in the Venezuelan society. Writing for the most important newspapers in the country, socializing with several presidents and their wives, marrying internationally recognized painters, founding recognized magazines and pageants. A true inspirational woman who worked hard to position herself into spots once only held by highly educated men.
As I was sitting there ready to learn how to make the traditional hallacas from my great-grandmother, my grandmother and my aunt, I asked my great-grandma, who we all call Bila (A nickname my dad gave her when he was a kid), if she knew where and how did the hallacas come from. Bila said the story she knows is the one I wrote on my previous post about Venezuelan Christmas. But the way she described it to me was even better. She said a long time ago there were the very rich families with European descendants and they used to have these giant parties with all kinds of dishes that their maids would prepare for them. At the end of the parties, the maids would clean up the tables and think what a waste to throw away such expensive ingredients like olives, capers, steaks, pork, chicken, and raisins. So the maids would chop up all the ingredients and make them into a stew, and since the corn dough was cheap they used that to make the outer envelope for the stew. She said eventually the rich people would come to try these inventions and they became what we know today as the hallaca.
The hallaca/hayaca (pronounced Ah-jac-kah) is an original traditional Venezuelan dish that we only consume during the month of December and during Christmas and it is the number one most important component for a true Venezuelan Christmas Dinner. The hallaca brings our families together even for the preparation, which can take up to 3 days and at the very least two people to make at least 50 Hallacas. The preparation itself is a reason to come together and celebrate, and create an assembly line with positions assigned, like the chopper, the cook, the dough kneader, the wrapper, and the knot maker. This year I was very fortunate to have these three women teach my sister and me how to make the hallacas. We made them over two days in the afternoons (because of my busy work schedule), at my aunt’s house, in the middle of her moving overseas. It was definitely a crazy experience, but all the fun we had and all the tips I learned were worth it. I felt blessed that there were three generations of experts each giving me their own tips and advice, at the end I was very tired, but the experience couldn’t have been any better and definitely worth it. Each person has their own way of making hallacas, each family has their own secret ingredient or traditions passed down from generation to generation, and techniques that are also improved upon generation to generation. For example, the flattening of the dough was and still is usually done by hand pressing with your fingers, but my aunt has a beautiful tortilla press (tortillera), which she bought in Mexico that she uses for hallaca making, and it makes it a lot faster and easier. Even tying the yarn can be a subject of debate. The funny part is my great-grandmother would want to teach me how to do it her way, my grandmother would want to teach me how to do it her way, and my aunt had her own way of doing it, which was different that both their ways. After taking in all that knowledge from those three generations I think I am confident in making hallacas on my own next year and sharing all this knowledge with you so you can also make them at home this year, or next year.  Each family and each region in the country has their own recipe and their own way of making the hallacas, but the process is basically the same.

A Few Tips Before We Begin
This is basically a summary of all I learned while making hallacas with my great-grandmother, my grandmother and my aunt.
a) The entire process is time consuming and it takes a toll on you physically. Be sure to set aside at least two entire days for making hallacas, and enlist the help of a couple of friends or family members. However, as my great-grandmother said… “Muchas manos en la olla ponen el caldo morado” – Too many hands on the pot, make the broth turn purple.
b) You will need a large area for the ‘assembly line’. You can use your dining table if you have a large enough one, but be sure to cover it either with newspaper, a tablecloth you don’t care about damaging, a plastic table cloth, or some other protective surface. Be sure you don’t have a carpet or rug you don’t wish to damage or stain either.
c) On that note, come prepared with a change of clothes that you don’t mind staining, or aprons…and some hairnets, or if you want to be cute and fancy like us, you can wear bandanas. You just want to make sure that hair doesn’t become an ingredient.
d) Be sure one of your helpers is the person in charge of cleaning up. You don’t want to wait until the end of the night when you are tired and have a mountain of dishes to wash. Be sure your helper is washing everything as you go, because sometimes you might need to use the same tool twice.
e) Be sure to gather all the tools and ingredients necessary at least a day before you begin, so you don’t have to send someone out to get them and loose a pair of helping hands. Also be sure the tools are nice and clean and ready to be used.
f) Be sure to empty out your fridge because you will need a lot of space to store the hallacas when ready. And also be sure you don’t make the hallacas way to far in advanced, otherwise you will have to freeze them, and they are better when they are not frozen. The weekend before Christmas is good enough.
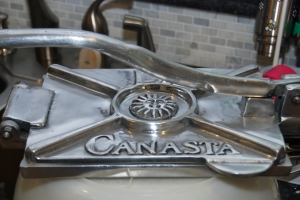
g) Kitchen Tools. There are a few kitchen tools that would make your job a lot easier. You don’t have to buy the expensive brands, and you may even be able to borrow some of these from someone else. A tortilla press or tortillera is not something you would probably have in your home, but there are a few cheap wooden ones you can get online, like the ones from the IMUSA brand. They have a round cast iron one for $20 at Bed Bath and Beyond, but I am not sure if those are large enough. You are better off with a large rectangular one, which you can buy online from a Mexican store, on etsy or ebay. You could also make your own as shown here… or you could just use your hands or a rolling pin, or even a large heavy Pyrex baking pan. You will also need several cutting boards, sharp knives and keep your knife sharpener handy, several bowls and Tupperware containers to keep all the ingredients you have to chop beforehand, large stew pots and large pans, several clean wash cloths and scissors, extra large bowls for mixing the dough and keeping the stew, strainers, latex gloves, measuring cups, and measuring spoons.

What you need for 50 Hallacas:
Guiso | Stew (Filling):
– 5.5 lbs. Sirloin Tip Roast
– 3.5 lbs. Chicken Breast With Rib (No Skin)
– 2.5 lbs. Rib End Boneless Pork Roast
– 1 lb. Bacon
– 5 Lemons Cut In Half
– 1 Cup Vegetable Oil
– 6 Cups Chopped Onions
– 4 Cups Chopped Leeks
– 2 Cups Chopped Green Onions
– 3¼ Cups Minced Garlic
– ½ Cup Capers in ½ Cup Chicken Broth
– 2.5 lbs Red Bell Pepper, Grated without skin or seeds
– 5 Cups grated Tomatoes (No Skin or Seeds)
– 4 Chopped Sweet Peppers (Ají Dulce)
– 1 Cup White Wine
– ½ lb. Papelón Rallado (Grated shredded sugar cane blocks available in Latin stores)
– 1 Tablespoon Ground Black Pepper
– 2 Teaspoons Paprika
– 5 Tablespoons Salt
– ½ Teaspoon Mustard
– 2 Cups Chicken Broth
Masa | Dough:
– 9 lbs. Harina P.A.N.
– 4½ Cups Chicken Broth
– 17 Cups Water
– 5 Cups Oil
– 6 Tablespoons Annatto Seeds
Adornos | Garnish:
– 1 lb. Bacon (Same one that was cooked with the pork cut in long slices)
– 2 lb. Red Bell Peppers (Cut in long slices without skin or seeds)
– ½ lb. Sliced Almonds
– 1 lb. Medium Onions, cut in long rings or long slices
– ½ lb. Small Drained Capers
– 1 lb. Medium Pitted Green Olives, Drained
– ½ lb. Raisins
Envoltura | Wrapping:
– 10 lbs. Plaintain Leaves (about 10 bags)
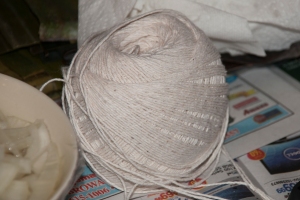
– 2 rolls of Pabilo (Cotton Yarn, Butcher’s String, Kitchen Twine, etc)

Preparation:
DAY ONE
1. The first thing you want to do is prep and clean all the plantain leaves, cut them and separate them by size. As I mentioned before, this recipe can take up to three days in the making and you want all your assembling parts to be ready on the final day. Therefore, you can begin by prepping the plantain leaves on day one. You can even do it before day one, or you can do it while the stew is on the stove. Either way you should do it before you are ready to assemble the hallacas.  Here in the US, it is fairly easy to find plantain leaves. There are a couple of brands that sell plantain leaves in a bag, in the frozen section. They sell them as Hojas de plátano or Banana Leaves, although the real translation should be plantain leaves. They have Goya, La Fe, La Nuestra, El Sembrador, etc. You can buy either one. My aunt bought El Sembrador and La Fe brands. The plantain leaves are really large and they come all folded together inside the bag, and they are pretty cold when you handle them because they are frozen. Its best if you leave them out to thaw a bit before you begin this process, because they will be easier to handle.
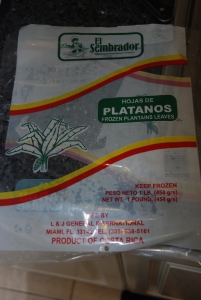
Hojas de Platanos | Plantain Leaves | Banana Leaves

Hojas de Plátanos | Plantain Leaves | Banana Leaves

If you look at the leaf, you can tell it has a main vein or central nerve, which is where it is attached to the tree, then a lot of little lines perpendicular to the vein/nerve that go from the nerve to the edge of the leave, lets call them little veins or little nerves. When you are working with the leaf, whether it is cleaning it or cutting it, you should always keep the side where these little veins or little nerves are most visible protruding, side up. And also lay them with those lines going away from you (you would see them vertically) and the line where the main nerve is, or used to be closest to you. Don’t worry I will illustrate all of these complicated terms below for you.
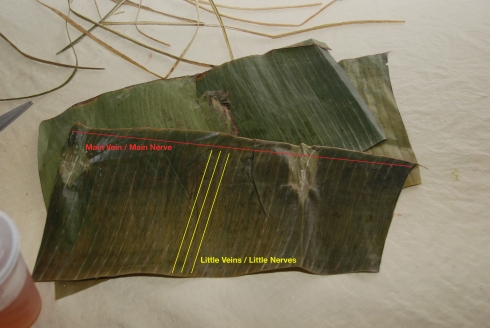
Plantain Leaf Parts

Plantain Leaf Parts

2. First you should open the bags and lay them all opened and flat on a large table. They are supposedly already cleaned, but you should clean them anyways with a wet kitchen towel or cloth. They are easily broken and torn in half so it is better to clean them all first and then proceed to cut the veins and cut them into all the different sizes you will need. Clean the leaves with a wet cloth and then dry them with a dry cloth.
3. Once you have cleaned them and dried them all, you can proceed to cut the vein or central nerve if you will. If you lay the long plantain leaf vertically in front of you, you will notice one side has a thick vein (the side that is most straight). You can proceed to cut the whole vain, which is only about half an inch from the edge.
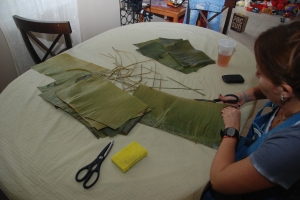
Cuttin the veins of the plantain leaves

Cutting the veins of the plantain leaves

4. Once you cut all the veins from all the leaves, you can proceed to classify and cut them into all the different shapes and sizes you will need. You can also proceed to tear apart the pieces, which are already torn, because if they already have a tear, they will eventually tear all the way.
5. The different pieces you will need are:
– La camisa | The Shirt: This is the main piece which is used to directly place the dough on. They can be roughly about 15” x 10” rectangles. You want to pick the best pieces for this category. You want them to be flexible and without any torn edges. These will also be used as the second piece, which goes on top of the shirt to prevent much water to getting into the shirt, which holds the hallacas itself. But this second piece will not be directly in touch with the dough, its just a second cover (I guess we can call it the jacket, lol… just kidding, that is not the official name)
– La Tapa | The Cover: These leaves are a bit smaller than the shirts, they are usually about 8” x 10” rectangles. They are used are a cover or top for the main ones. The more you cover up your hallacas, the less water will get into them.
– The faja | The Belt: These leaves are 3” to 5” wide times whatever width of the original plantain leave. They are used, as their name describes it, simple to hold in the hallacas and all those previous leaves together right before it is ties up with the thread.
*From one good entire plantain leaf you can probably get one or two shirts, a cover and a couple of belts.
*Someone asked me if they could make Venezuelan Hallacas without using the plantain leaves, the answer is no.  As you will understand by the end of this post, the plantain leaves are essential to the making of Venezuelan Hallacas, and they even give the that distinctive smell and taste.
DAY ONE (Continued) OR DAY TWO
Guiso | Stew (Filling):
1. Clean the pork and the chicken rubbing them with the lemon halves and then rinsing thoroughly with enough water.
2. In a large enough stewing pot with hot boiling water, cook the pork and the bacon on medium heat for 10 minutes. Remove from the pot and drain the meats (you can get rid of this liquid). Set the pork aside to cool down so it can be cut into small square pieces of about ½ an inch to ¾ of an inch. Cut the bacon in long strips and reserve it for the adornos | garnish.
3. In the meantime you can begin to chop up, de-skin, de-seed, and grate all the rest of the ingredients for the stew (filling), like the onions, leeks, green onions, garlic (mince it), red bell peppers (grate), tomatoes (grate), sweet peppers, sugar cane (grate), all in small little pieces.
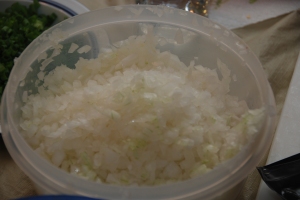
Chopped Onions
Chopped Onions

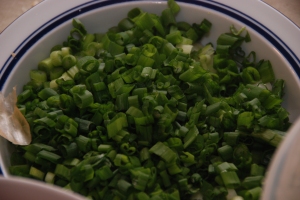
Chopped Green Onions

Chopped Green Onions

Chopped Ají Dulce | Sweet Peppers

Chopped Ají Dulce | Sweet Peppers

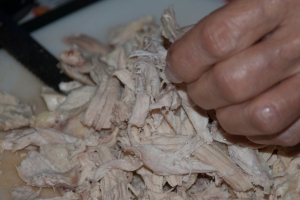
3. In a different pot with enough water, cook the chicken at medium heat until it is thoroughly cooked, but not too long. Remove the chicken from the broth, and drain the broth and let it cool (we will be using it later). Take ½ Cup of this broth and put all the capers in it, save the rest of the broth. Let the chicken cool down and once it is manageable, shred only half of it into long strings of about 2 to 3 inches long.
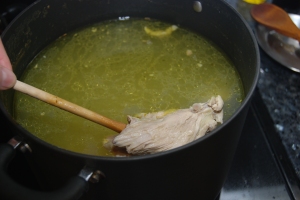
Chicken Broth & Chicken
Chicken Broth & Chicken

Shredding the Chicken

Shredding the Chicken

4. In yet another large pot, add the oil and stir-fry at high heat the onions, leeks and green onions for about 5 minutes or until they brown. Add the garlic and the capers along with the chicken broth they have been soaking in, and cook at medium heat for about 15 minutes or until it begins to boil.
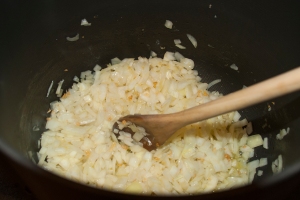
Frying the Ingredients

Frying the Ingredients

5. Add the bell peppers, tomatoes and sweet peppers and let it cook for 10 more minutes at medium heat.
6. Add the wine, sugar cane, pepper, paprika, salt, mustard, 2 cups of the chicken broth we saved earlier, and cook at medium heat for 15 minutes or until it begins to boil.
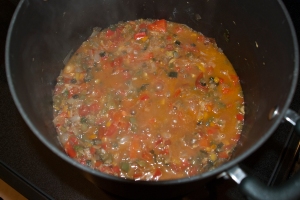
Adding the liquids

Adding the liquids

7. Add the beef and the pork we cooked earlier, cover, and continue to cook at medium heat for 40 minutes.
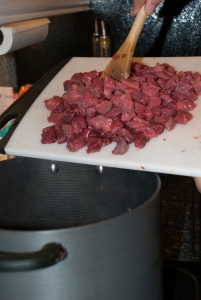
Adding the Beef

Adding the Beef

8. Add the half of the chicken you didn’t shred before and continue to cook for 15 more minutes making sure the meats are not disintegrating and they are still in small pieces.
9. Taste the stew and add more salt if necessary.
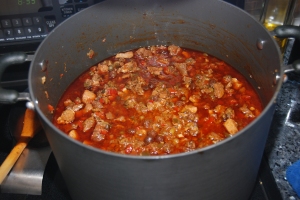
Add Salt To Taste

Add Salt To Taste

10. Remove from the heat and let it cool down. If your stew if too liquid, you can thicken it by adding one tablespoon of Harina P.A.N. dissolved in water. Add as many as necessary to get the right consistency.
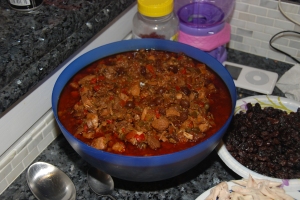
The Stew Is Ready

The Stew Is Ready

11. You can cut and prep all the garnishes while you are cooking the stew so you have them ready before you begin with the next step.
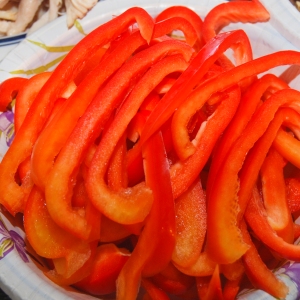
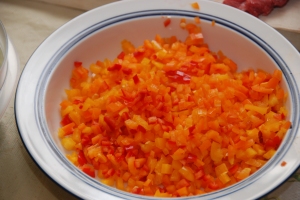
Garnish : Red Bell Peppers
Garnish : Red Bell Peppers

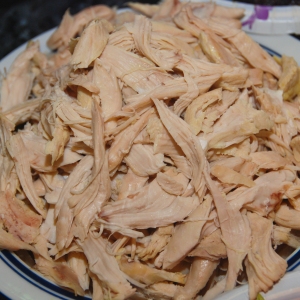
Garnish : Shredded Chicken
Garnish : Shredded Chicken

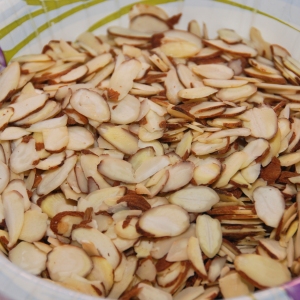
Garnish: Almonds
Garnish: Almonds

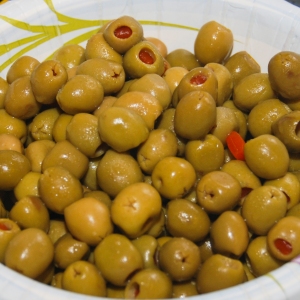
Garnish: Olives

Garnish: Olives

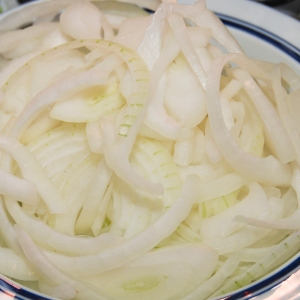
Garnish: Onions

Garnish: Onions

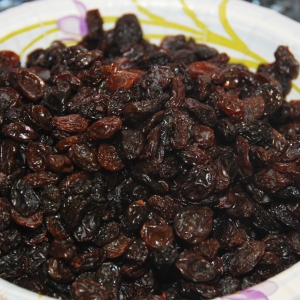
Garnish: Raisins

Garnish: Raisins

DAY TWO OR THREE
Masa | Dough:
1. In a large pan, heat up the oil and the annatto seeds at low heat. This step is the process by which we are tinting the oil to the necessary color we need to give the hallacas its famous color. The annatto seeds are the ones that give this reddish caramel color to the oil, and the oil then turns the dough its bright orange/yellow color. Once the oil is tinted it can be placed in a measuring cup, making sure to drain all the annatto seeds from it first. Let it cool.
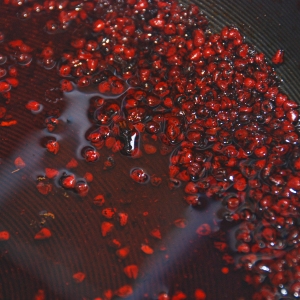
Making Annatto Oil
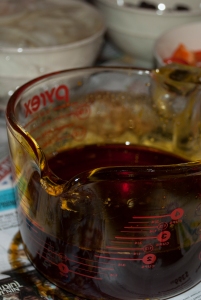
Making Annatto Oil

Annatto Oil

Annatto Oil

2. In a very large bowl, like extra extra large mixing bowl, add the Harina P.A.N. and add one cup of oil and two cups of the colored/tinted annatto oil we just made. Add the chicken broth that we saved, and add the salt and water, and mix in together with both hands until you have a fine and soft dough, that is easily manageable. It is a bit softer than your usual Harina P.A.N. mix for arepas, because it has oil in it.
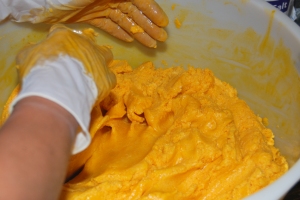
Making The Dough
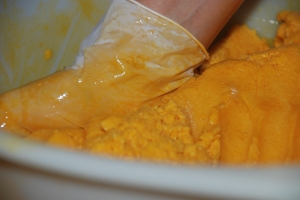
Making The Dough

Making The Dough

Making The Dough

3. You can add more Harina P.A.N. more salt, or more annatto oil to make it just the right consistency or the right color. You can also divide all the ingredients in half and make two batches at a time instead of the whole batch at once.
4. Divide the dough into small little balls the size of a small orange, or two to three inches in diameter.

The Set Up:
1. Now that you have everything you need ready, you need to set up your assembly line in a large enough table. What you will need (in this order) is:
– Plantain Leaves: The Shirts
– The rest of your annatto oil (you should have some left over, but if you don’t you can make some more, following the steps above, it’s pretty easy)
– The dough
– The Stew
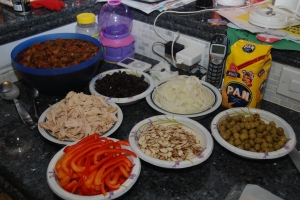
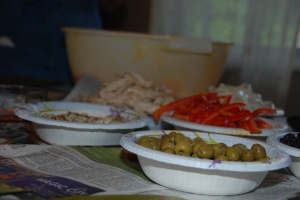
– All the garnishes ready in different little bowls
– Plantain Leaves: The covers and The Belts
– The Thread

Setting Up The Work Area
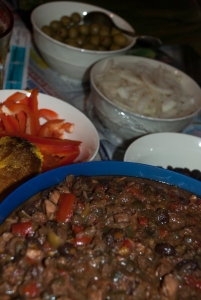
Setting Up The Work Area
Setting Up The Work Area
Setting Up The Work Area
Setting Up The Work Area
Setting Up The Work Area
Setting Up The Work Area

Setting Up The Work Area

Setting Up The Work Area

Setting Up The Work Area

Setting Up The Work Area

Setting Up The Work Area

Setting Up The Work Area

Setting Up The Work Area

Envoltura | Wrapping (The fun part):
1. Now that everything is set up and ready to go, we can begin assembling each hallaca. The first step is to grab one plantain leave (the shirt) and lay it flat in front of you. Be sure to place the leaf with the lines going vertically from side to side in front of you, and the protruding and most visible parts of the little veins or little nerves side up.
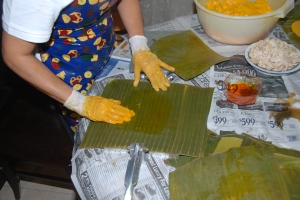
Start with an empty shirt

Start with an empty shirt

2. With a small clean kitchen rag or towel (I used my hands because I was wearing gloves, remember I told you, you will need gloves for all this), grab some annatto oil and spread it in a circular motion on top of the leave.
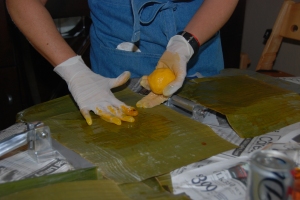
Add Annatto Oil

Add Annatto Oil

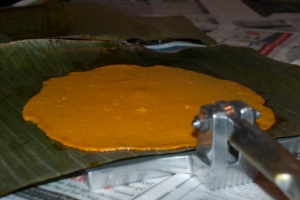
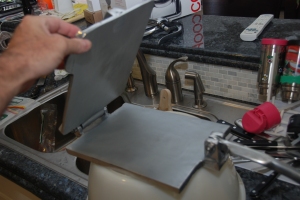
3.  Grab one of the balls of dough and place it in the middle of the leaf. If you have an awesome tortilla press like my aunt has, just press it and voila! If not you have to press the dough lightly with your fingers until its flat. You can also use a heavy plate or any other way you can come up with to flatten the dough faster and easily. Use another shirt on top of that one covered with annatto oil if you use any other method other than the manual method to flatten the dough. The flat dough should be about 4 millimeters thick and be flattened in a circular shape.
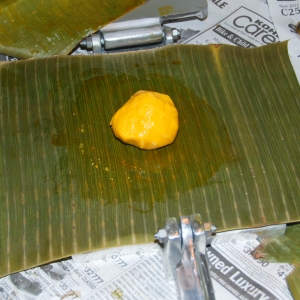
Set a ball of dough in the center
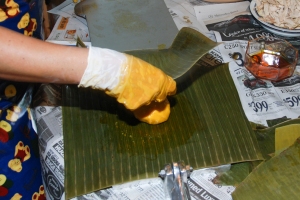
Set a ball of dough in the center

Cover with another plantain leave with annatto oil on it
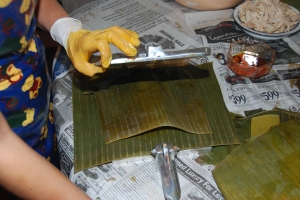
Cover with another plantain leave with annatto oil on it

Close the press
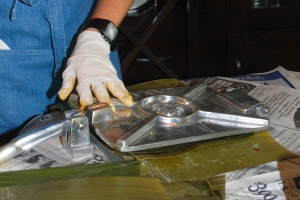
Close the press

Press down a bit

Press down a bit

Press down fully, but not too much
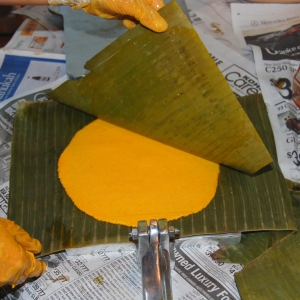
Press down fully, but not too much

Open the Press and Remove the top leaf
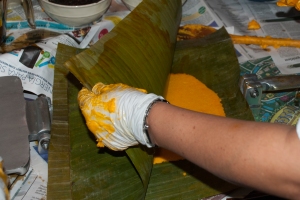
Open the Press and Remove the top leaf

Easy as Pie
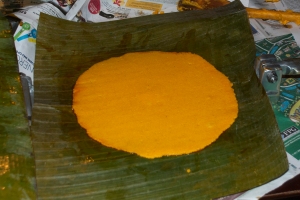
Easy as Pie

Voila!

Voila!

Beautifully pressed hallaca dough

Beautifully pressed hallaca dough

4. With a large spoon that measures out about half a cup (or 8 tablespoons), pour some of the stew in the center of your flattened dough.
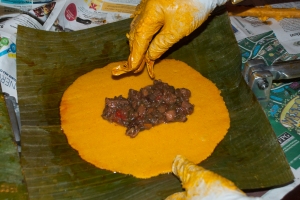
Add the stew

Add the stew

5. Add all the garnishes as follows for each hallaca: 2 strips of bacon, 2 strips of red bell pepper, 2 sliced almonds, 2 strips of onions or one onion ring, 2 green olives, 4 capers, and 6 raisins.
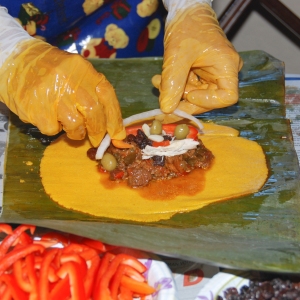
Add garnishes

Add garnishes

6. Proceed to close the hallaca by folding in the top and bottom of the leaf towards the center, once the leaves meet in the center on top of the hallaca dough, fold that piece a couple times (the extra leaf), and lay it flat then fold the sides in.
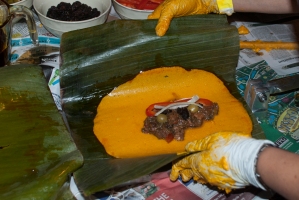
Closing an hallaca (my aunt's method)

Closing an hallaca (my aunt’s method)
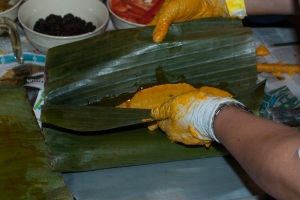
Closing an hallaca (my aunt's method)

Closing an hallaca (my aunt’s method)
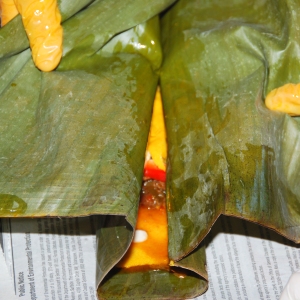
Closing an hallaca (my aunt's method)

Closing an hallaca (my aunt’s method)
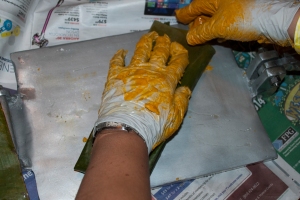
Closing an hallaca (my aunt's method)

Closing an hallaca (my aunt’s method)
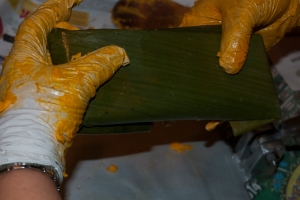
Closing an hallaca (my aunt's method)

Closing an hallaca (my aunt’s method)
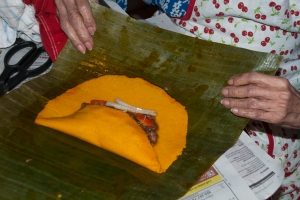
Closing an hallaca (my great-grandmother's method)

Closing an hallaca (my great-grandmother’s method)
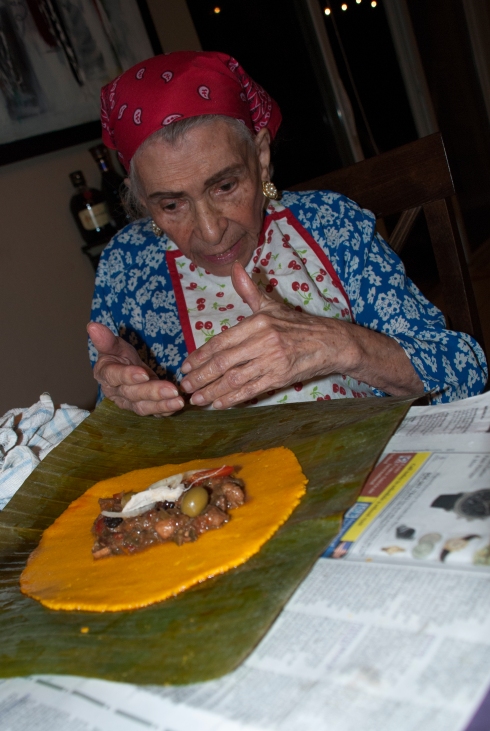
Closing an hallaca (my great-grandmother's method)

Closing an hallaca (my great-grandmother’s method)
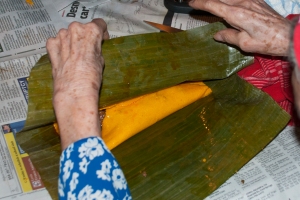
Closing an hallaca (my great-grandmother's method)

Closing an hallaca (my great-grandmother’s method)
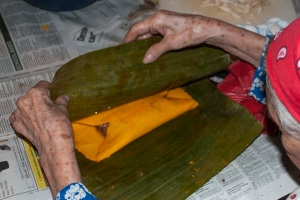
Closing an hallaca (my great-grandmother's method)

Closing an hallaca (my great-grandmother’s method)

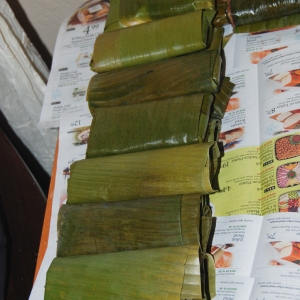
7. Cover it again with another leaf (the shirt) if necessary. Then wrap it again with a cover and finally add the belt to it.
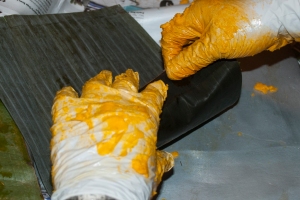
Wrapping an hallaca
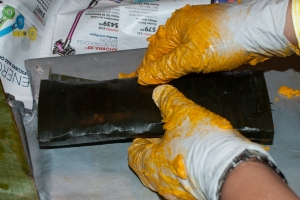
Wrapping an hallaca
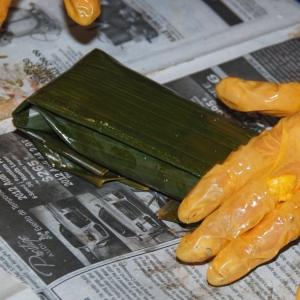
Wrapping an hallaca
Wrapping an hallaca

Wrapping an hallaca

Wrapping an hallaca

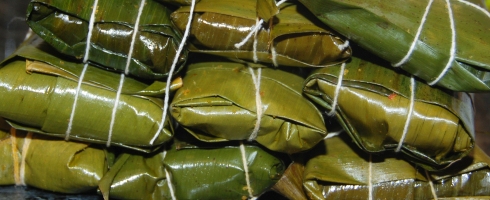
Wrapped Hallacas Ready To Be Tied Up

Wrapped Hallacas Ready To Be Tied Up

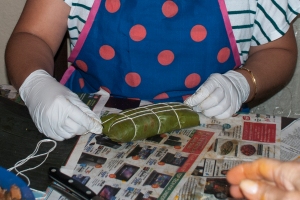
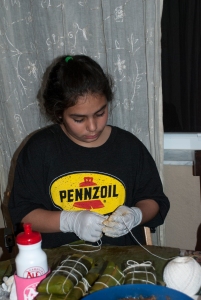
8. Tie up as you would a gift (as shown in the photo) and tie up with a knot.
Tie them up
Tie them up

Even the little ones can help

Even the little ones can help

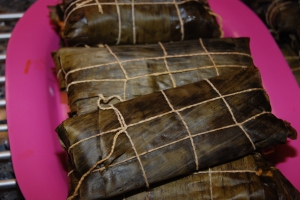
9. Set aside one next to another, preferably not one top of another. If you run out of space you can do up to two layers, but not more than that.
Hallacas

Hallacas

10.  Continue until you run out of ingredients. You should end up with about 50 hallacas in total.

Cooking:
1. In a large enough pot heat up enough water (about half the size of the pot). Add a bit of salt. Cook at high heat until the water boils. Add as many hallacas as you can fit, they must all be completely submerged in the water. You can do it in batches as they become ready from the assembly line. You can also add some of the left over plantain leaves on top to help keep them submerged and also add aroma to them. Cover and let them cook for about 1 hour. You might want to have several pots and timers on your stove to keep track of you different batches.
2. Once cooked, remove them from the pot and let them drain. The easiest way is to drain them on a clean sink, and stand them up one next to the other so they can drain the water inside them a lot faster.
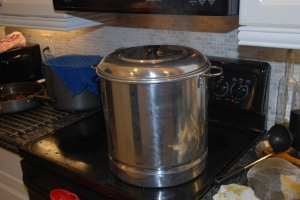
Boiling Hallacas
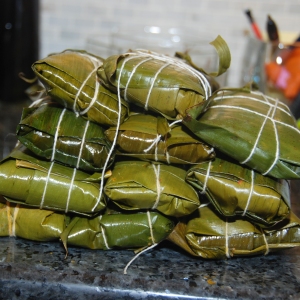
Boiling Hallacas

The Hallacas Are Ready

The Hallacas Are Ready

Serving:
1. Let it cool for a minute, but not too long, you don’t want it to get cold.
2. Lay them flat on a large enough serving plate that will serve as the ‘opening plate’. Cut the thread and carefully open each layer of plantain leave until you get to the hallaca. Use the last plantain leave to lift up the hallaca and carefully slide it on to the plate where it will actually be served.
3. Just to clarify… you do not eat the plantain leaf.
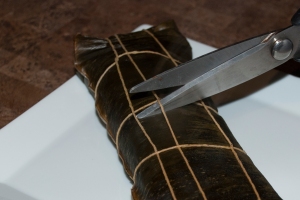
Serving An Hallaca
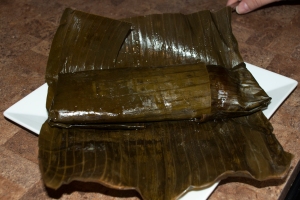
Serving An Hallaca
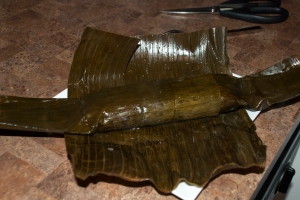
Serving An Hallaca
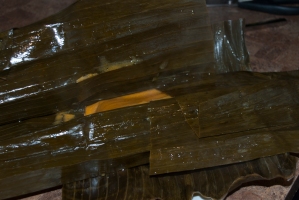
Serving An Hallaca
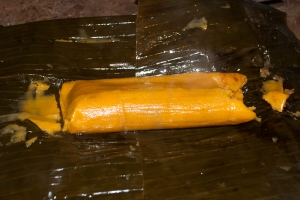
Serving An Hallaca
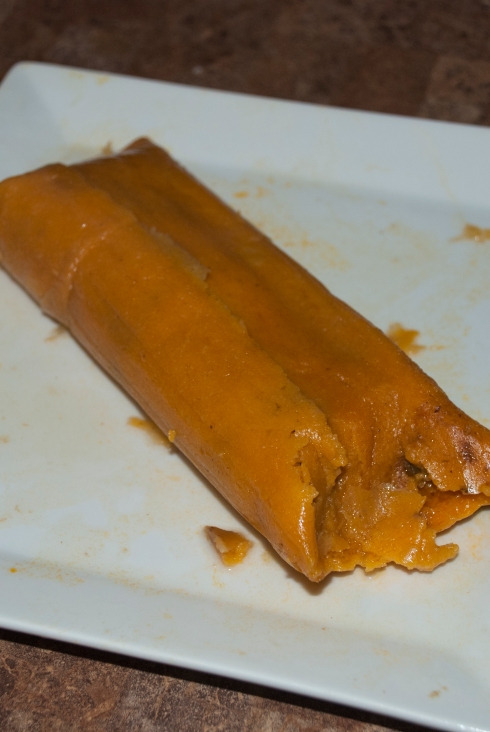
Serving An Hallaca

Serving An Hallaca

Serving An Hallaca

Serving An Hallaca

Serving An Hallaca

Recipe: Hallacas Venezolanas  | Venezuelan Christmas Dinner Hallacas
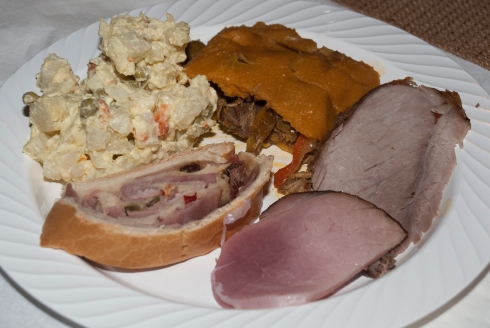
Recipe: Hallacas Venezolanas | Venezuelan Christmas Dinner Hallacas


Venezuelan Christmas Dinner Plate

Venezuelan Christmas Dinner Plate

Storing:
1. After you make your entire batch of 50 hallacas and you wish to store them, you can let them all cool down and then keep in the fridge for up to 4 weeks.
2. If you are planning on freezing your hallacas its better to freeze them before they are cooked so that the dough maintains itself better. In this case, you can take them straight from the freezer and then boil them as described above.
3. If you do freeze them after they have already been cooked, you should thaw them to room temperature before you boil them again.

Re-heating:
1. To reheat your hallacas, take them out of the fridge and boil them in enough water to cover all the ones you wish to serve at the moment. Add a little bit of salt to the water. Boil them for 15 to 20 minutes, turning them at the half point.

Bollos de Hallaca:
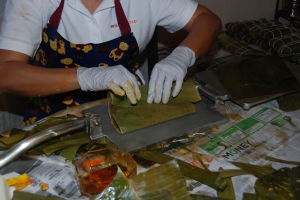
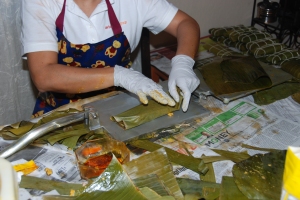
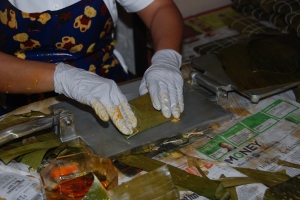
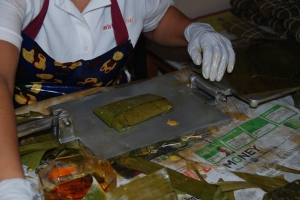
1. If you run out of some ingredients, or if you already have the number of hallacas you wish to make and still have some leftovers of the ingredients, you can make bollos de hallaca.
2. To do so, simply add all the leftover dough, stew, and garnishes and mix them all together to form the compact dough.
3. You wrap them the same way you did with the hallacas, but add a distinction, like a little bow made of a string of plantain leaf, or a different tying method, or just something distinctive to set them apart from the hallacas. It is basically the same thing, except the bollos are all mixed in together in a uniform mass, and the hallaca has all the stew and ingredients inside and the dough outside serving as a pocket or container.
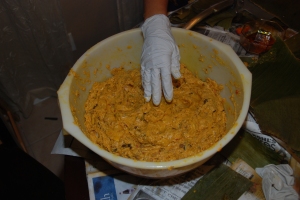
Bollos de Hallaca
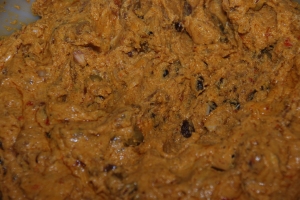
Bollos de Hallaca
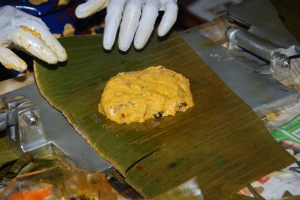
Bollos de Hallaca
Bollos de Hallaca
Bollos de Hallaca
Bollos de Hallaca
Bollos de Hallaca

Bollos de Hallaca

Bollos de Hallaca

Bollos de Hallaca

Bollos de Hallaca

Bollos de Hallaca

Bollos de Hallaca

Bollos de Hallaca

¡Buen Provecho!

¡Gracias A Todos!

This post is very special to me and I will never forget the two days I spend making hallacas with my family, and I dedicate it to everyone involved in making hallacas possible for Christmas 2014:
Nery Russo, Felípe Ramón Ojeda Russo, Ana C. Sandoval de Ojeda, María Gabriela Ojeda de Sucre, Fernando Sucre, Marialejandra Ojeda, Raymond Wolowicz, and even little miss Andrea Sucre.
You were all involved in a small or big way, you all taught me something and you all sacrificed your time and busy schedule so we could all make hallacas together! I love you all!

*This post was supposed to be out by December 24th, but you guys know (by reading this post) how Venezuelan Christmases can be, so it is a little bit late.

Recipe: Pay de Parchita | Venezuelan Passion Fruit Pie

26 Oct

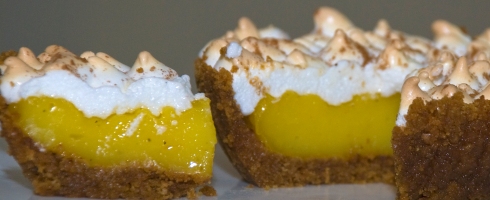
I’m not usually a fruit dessert lover. My philosophy is that if it doesn’t include chocolate, then it’s not worth it. However, there is one fruit desert that I absolutely love, and that is Passion Fruit Pie. Passion Fruit is a tropical, exotic and seeded fruit native from South America, specifically from Brazil. The passion fruit in Venezuela is known as parchita or maracuyá, and it can have either a yellow-orange or a red-purple skin. Its shape is oval and the skin is tough and smooth. You can tell when it is ripe because the skin gets softer and wrinkled. So don’t pick the prettiest ones when buying passion fruit, on the contrary, pick the ugly ones. Just make sure they don’t smell sour or have any dark or bruised spots. On the inside both the yellow and the red versions look the same. The inside of a passion fruit is filled with black oval shaped seeds surrounded by a yellow gooey pulp. The flavor of the passion fruit is a bit sour and the aroma is very powerful. The pulp is used to make juices, mousses, cakes, ice cream, jelly and jam and to prepare different kinds of sauces, vinaigrettes and salsas. It may be hard to find passion fruit at your regular supermarket store, so try to call them ahead of time and make sure they have some ripe ones available. The fruit is available year-round so it shouldn’t be too hard to find some. Your best bet is places like Whole Foods, the Fresh market or even any farmers market near you. I would go for the farmers markets first, because the other places may be expensive, I had to pay around $3 per each fruit (crazy!).

Parchita, Maracuyá, Passion Fruit

Parchita, Maracuyá, Passion Fruit

Parchita, Maracuyá, Passion Fruit

Parchita, Maracuyá, Passion Fruit

The passion fruit comes from the passionflowers plant called Passiflora. It is said that the passionflowers’ name came to be around the sixteenth century, when the first Christian missionaries came to South America and found these flowers to be a good sign that their mission would be a successful one. The name came to be because they believed that the flower symbolized the death of Christ (the Passion of Christ). The flower itself has five petals and five sepals, which they believed to represent the disciples without Peter and Judas. The flower also has two rows of colorful filaments, which they believed to signify the halo around Christ’s head or the crown of thorns. The flower has five stamens and three spreading styles with flattened heads, which they believed to represent the wounds and the nails respectively. The flower has tendrils that look like the whips used to afflict Christ. Finally, the leaves look like fists or handgrips, believed to be those of the soldiers. Weather you believe in all this symbolism or not, you have to admit it’s a pretty cool name for a fruit.

A long time ago, my paternal grandfather used to own a restaurant called TACÚ back in Caracas. I used to work there as a hostess. My mom used to make whole desserts and sell them to TACÚ to be resold by the slice. She used to make all kinds of delicious Venezuelan desserts, and one of them was this Passion Fruit Pie. One time, our oven at home wasn’t working so my mom had to bake her desserts elsewhere. She went to my paternal grandparents’ house to bake the desserts there. My grandpa, being the passion fruit lover he is –he eats one almost every morning for breakfast– said the passion fruit pie my mom was finishing up didn’t look too presentable, and that she should leave it at his house and make another one again to be sold at the restaurant. The truth is he just wanted to keep the pie at home, and eat it himself, which he did. So now I am sharing with all of you my mom’s famous and secret Passion Fruit Pie recipe that all the clients at TACÚ (and the owner himself) loved.

2014-10-12 Pie de Parchita 025 EDITWhat you need:
For the Crust
– 1 whole package of Galletas María Puig (María Cookies) – 250 gr.
– 180 g. Margarine or Butter
– 2 tbsp. Sugar
– ¼ tsp. ground cinnamon
For the Filling
– 2 c. Passion Fruit juice (freshly squeezed)
– 5 tbsp. Corn Starch
– 3 egg yolks
– 1 cup sugar
For the Meringue
– 3 egg whites
– ½ cup sugar
– ¼ tsp. ground cinnamon

Preparation:
The Crust
1. Preheat your oven to 350°.
2. Use a food processor or blender to grind up all the Galletas María Puig until they are finely ground. The Puig brand is a Venezuelan brand, and the Galletas María, or María Cookies are a staple in traditional Venezuelan brands. I understand it would be hard to find the original Galletas María Puig, however you can purchase other brands that are not the exact same, but they are very similar to the original María Cookies. Some of the other brands of María Cookies can be found at Wal-Mart, Publix, and Sedanos. The other brands are Goya, Iberia, La Fé, Conchita, Rio and Gullon among others. Just make sure that the entire package amounts to 250 gr., which means for some of the brands you may have to buy 2 packages.

Blend the María Cookies

Blend the María Cookies

3. Melt the butter or margarine at low heat in a small pot.

Melt the butter or margarine

Melt the butter or margarine

4. In a large bowl combine the María Cookies, the melted butter, the sugar and the ground cinnamon. Mix well with a wooden spoon, and also with your hands to make sure there are no large pieces of cookies left behind and no clumps in the mix.

Mix the ingredients

Mix the ingredients

5. In a round 9-inch pie Pyrex add the mixture and press gently with your fingers to mold and shape the mixture evenly into the Pyrex.

Shape the mixture evenly into the Pyrex

Shape the mixture evenly into the Pyrex

6. Bake for 15 minutes at 350°. Once done, let it cool down a bit and then put it in the fridge while you make the filling.

The Filling
7. First you must make the fresh passion fruit juice. Take each passion fruit and cut it in half, then with a spoon, scoop out all the pulp and seeds into a food processor or blender. After you have taken the juice of all the passion fruits you have (I used about 10), blend them as much as you can. The seeds will create these black spots on the mixture when you blend them, but don’t worry, that just makes your pie look even better, because it was made with fresh fruit and the seeds are edible. I did strain it a bit after I blended it, just to remove any big pieces of seeds left behind, and I used a very tight strainer. After you make the juice, it will be very strong and sour/bitter so you will have to add some water to water it down. I ended up with about 1½ cups of juice concentrate, and then I added ½ cup of water to complete the 2 cups of juice. There is no telling how much juice concentrate you will end up with, or how much water you will have to add, but you can guestimate with these measurements I provide from what I got.

Blend the Passion Fruit pulp and seeds

Blend the Passion Fruit pulp and seeds

Blended passion fruit juice

Blended passion fruit juice

Strained Passion Fruit juice

Strained Passion Fruit juice

8. In a medium saucepan, add the sifted cornstarch, the sugar, and mix in at medium heat. Little by little, add the passion fruit juice, and mix constantly. Add the 3 egg yolks (lightly beaten), and continue to mix. Cook the mixture at medium temperature until it comes to a boil. Cook for one more minute and then remove from the heat and let it cool down.

Combine ingredients in sauce pan

Combine ingredients in sauce pan

Combine ingredients in sauce pan

Combine ingredients in sauce pan

9. Take the crust out of the fridge and add the filling mixture on top. Be sure that the crust isn’t hot when you add the filling on top of it. Let it sit for a bit and then put it in the fridge one more time for it to harden while you make the meringue.

Add the filling on top of the crust

Add the filling on top of the crust

The Meringue
10. Making the perfect meringue can be a bit tricky, so if you have already mastered this task, you can just go ahead and use your own meringue recipe. There are all kinds of rules that people believe you must follow to create the perfect mile high meringue, but I am just going to tell you, I am no meringue expert, and the two times I have made it, it has come out just fine.  I just whipped the egg whites with an electrical handheld mixer and then added the sugar slowly until I reached the desired consistency.  However, you can Google the steps to creating the perfect mile high meringue and you can follow them, but don’t be surprised if it doesn’t come out just right. Here is a good blog post on Meringue.

Add meringue on top

Add meringue on top

11. After you make the meringue, using a pastry bag and tip, decorate the pie top with the meringue making swirls to create dollops with tips all around the pie top. Sprinkle the cinnamon on top just to decorate. Then bake the whole pie again for 15 minutes at 350°. You just want to brown the meringue, so keep an eye on it.
12. You can store it in the fridge after it cools down a bit. Serve cold.

Pay de Parchita | Venezuelan Passion Fruit Pie

Pay de Parchita | Venezuelan Passion Fruit Pie

Pay de Parchita | Venezuelan Passion Fruit Pie Individual Portion

Pay de Parchita | Venezuelan Passion Fruit Pie Individual Portion

Pay de Parchita | Venezuelan Passion Fruit Pie Individual Portion

Pay de Parchita | Venezuelan Passion Fruit Pie Individual Portion

¡Buen Provecho!

¡Gracias Mami & Mariale!
This post is very special to me, and I dedicate it both to my mother (the owner of this recipe), and to my sister for helping me throughout the whole process from searching for the right parchitas all over town up to tasting the first bite and taking us back in time when we lived in Venezuela and ate my mom’s passion fruit pie when she used to make it a long, long time ago.

Recipe: Hervido o Sancocho De Gallina | Venezuelan Chicken Soup

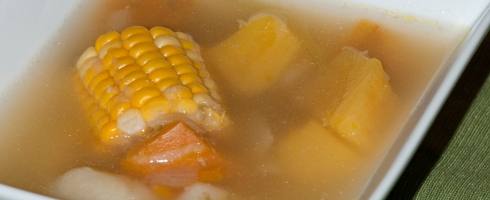
10 Sep Hervido o Sancocho De Gallina | Venezuelan Chicken Soup

Soups are one of my favorite dishes. The Apio Soup is at the top of the list of course, but I generally like any type of soup. Growing up, it was a given that I would have at least one cup of soup before lunch every time I went to my paternal grandparents’ house after school. They always had apio soup, auyama soup, and I would even eat the spinach soup. Looking back I realize it was their way of feeding us our daily serving of veggies without dealing with us ‘picky-eaters’. However, when visiting my maternal grandparents, the tradition was to eat the soup as a main dish. This is because they would prepare sancochos or hervidos, either made from chicken base or fish base. My maternal family lives on the coast, so fish is the most common dish on the table. It was also a trick to get me to eat fish. And I would; I would eat all the veggies and all the fish, as long as it was in the soup.

All soups are not created equally, and they do not serve the same purpose. The soups I ate at my paternal grandparents’ house in the city were appetizers, a small serving before the main dish for lunch. The soups I ate at my maternal grandparent’s house had been cooked in two large pots, or maybe even three, to feed everyone in the family as a main dish, accompanied by some arepas, casabe, and avocado.

The word sancocho comes from the Latin sub-coctum, wich means to cook at a low heat. That is precisely what sancocho is, and even though it is also called hervido, which means boiled, in order to make sancocho, you must never let the water actually come to a boil. People also call sancocho the actual family gathering where they meet to enjoy this delicious dish.

Soups (sopas) are basic broths with small pieces of solid foods like vegetables, chicken, beef, sometimes rice, pasta or even dough balls, some even have milk or eggs. Some of these soups end up being creams (cremas) if those ingredients are all blended together. Stews (sancocho o hervido), on the other hand, are hearty enough to be the main dish, with big pieces of vegetables and roots, corn and even plantains. Sancochos and/or hervidos can be made with chicken, beef, fish or even pork based broths, and some people even make ‘cruzado’ (mixed/crossed) when they make it from two or even three different base broths. Stews can also be made into creams when blended together.

To me, there is nothing like a good cup of soup, cream, or stew when you have the flu.

Ingredients: Hervido o Sancocho De Gallina | Venezuelan Chicken Soup

Ingredients: Hervido o Sancocho De Gallina | Venezuelan Chicken Soup

What you need:
– 1 Whole Chicken
– 1 Lemon (to clean the chicken)
– 2 Small Onions
– 2 Large Leeks
– 2 Bell Peppers
– 2 Cilantro Stems
– 1 Lb. Yuca
– 1 Lb. Apio
– 1 Lb. Ocumo (Sold as Malanga in the US)
– 1 Lb. Auyama (Sold as “calabaza” – Cucurbita moschata or ayote or zapallo, is a type of pumpkin squash)
– 1 Lb. Batata Blanca Alargada (Sold as Boniato or White Sweet Potato)
– 3 Large Ears of Corn
– 8 Garlic Cloves
– 2 Small Stems of Spearmint
– 2 Tablespoons Salt
– 1 Teaspoon Pepper
– Water

Preparation:
1. First cut the chicken, or if you want to make your life easier, buy the pieces separately (breasts and drums, bones included). Wash the chicken pieces by using two halves of the lemon to scrub it and then rinse it and damp dry with paper towels.
2. Place the chicken in a large enough pot and fill with water, about half the pot, enough to cover the chicken. Add the ears of corn as well; cut them in thirds or fourths. Bring to a boil.
3. Add the leeks, bell peppers and the onions. You can wash these and then cut in large pieces, since they will be removed later.
4. Cook for about one hour to an hour and a half or until the chicken is thoroughly cooked. Add the cilantro right around half way through cooking the chicken. Add more water as necessary.
5. You will notice that a layer of foam will start to form on the top as you cook. You should keep an eye on the pot and remove the foam as it starts to collect on the top.
6. Once the chicken is cooked, remove the chicken from the broth and set aside to cool for a bit. In the meantime strain the broth, so that you remove all the pieces of onion, leek, bell peppers and cilantro. Be sure to keep the broth, since we will use it to cook the rest of the ingredients.

Remove the chicken from the broth and set aside to cool for a bit.

Remove the chicken from the broth and set aside to cool for a bit.

7. Use however much broth you have, hopefully around 11 Cups. Wash, cut and peel (if necessary) the rest of the ingredients in large pieces (Yuca, Apio, Boniato, Malanga, Calabaza, etc.), and add them to the pot with the broth. Also add the garlic, the salt and the pepper.
8. Boil on high for about 30 minutes or until all the vegetables are ready. In the meantime you can shred the chicken using a fork to remove the meat from the bones and set aside the meat to add it to the soup later on. You can leave some bigger pieces of chicken as well.
9. When the vegetables are almost done, you can add the chicken, the spearmint and a little bit more cilantro.
10. Turn the heat to low and continue to cook for about 5 more minutes. Remove the cilantro and spearmint.
11. Serve hot with casabe or a plain arepa. It is also a custom to add a couple of pieces of avocado.
12. You can also take out the chicken and corn from the soup, and blend the soup into a cream, and then add back the chicken and the corn, for a delicious cream version of this soup.

Hervido o Sancocho De Gallina | Venezuelan Chicken Soup

Hervido o Sancocho De Gallina | Venezuelan Chicken Soup

Note: When cutting the Malanga, you should wear gloves because it might sting if you get it on your skin or eyes.
Optional: Some people add other types of vegetables and ingredients in the soups like potatoes, carrots, zucchini, yam, bollos, hallaquitas, plantains, etc.

¡Buen Provecho!

Recipe: Perico Venezolano | Venezuelan Scrambled Eggs

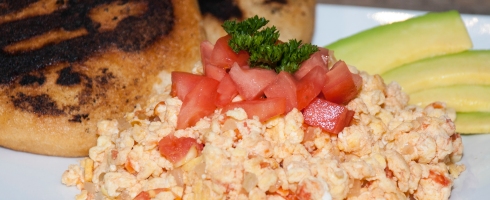
24 Jul Perico | Venezuelan Scrambled Eggs

Venezuelan scrambled eggs are just like Venezuelans; anything but plain.  Scrambled eggs were too boring, so we incorporated a few things to make them extra special.  Throw some onions and tomatoes, and you’ve got very colorful and tasty scrambled eggs.  I don’t know why do we call these extra special scrambled eggs Perico, but I think it is because perico is the Spanish word for parakeet, and when you add tomatoes to scrambled eggs, they get a red tint to them, just like our parakeets.

When I was a kid, my mom used to make arepas con perico usually on the weekends.  I didn’t like perico when I was a kid, but as an adult I love it.  Especially because with just a few tweaks, like using only the egg whites and no oil, you can make a lighter breakfast.

Ingredients: Perico

Ingredients: Perico

What you need:
– 1/8 C. Oil
– 1 Tbsp. Butter
– ½ C. Onion
– ½ C. Tomato
– ½ Tsp. Salt
– 1/8 Tsp. Pepper
– 3 Eggs

Preparation:
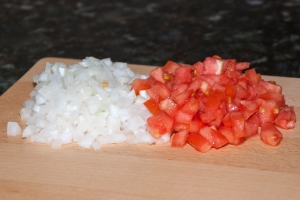
1.  Chop the onion and tomato in small cubes.  It is recommended to take the seeds and skin from the tomato, but… who has time for that on a Saturday morning?  I like tomatoes; skin, seeds, and all.

Chop Onion and Tomato

Chop Onion and Tomato

2.  In a large enough frying pan, add the oil and the butter and heat on medium.  You can skip either the butter OR the oil if you prefer a lighter option.
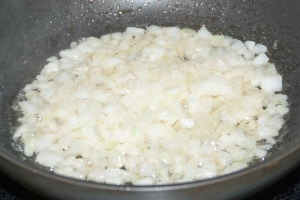
3.  Add the onion and fry until it browns (about 4 minutes).

Fry Onion

Fry Onion

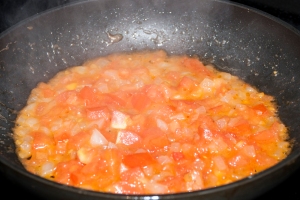
4.  Add the tomato, salt and pepper, and fry for another 6 to 7 minutes, or until the mixture dries up a bit.

Add Tomato

Add Tomato

5.  Beat the eggs and add them to the mix (you can use egg whites only for a lighter option as well).  Continue frying and mixing for about 3 minutes until the eggs cook thoroughly and become dry, but at the same time keeping it loose and without clumping it together.  You can also add some milk to the beaten eggs to make them fluffier.
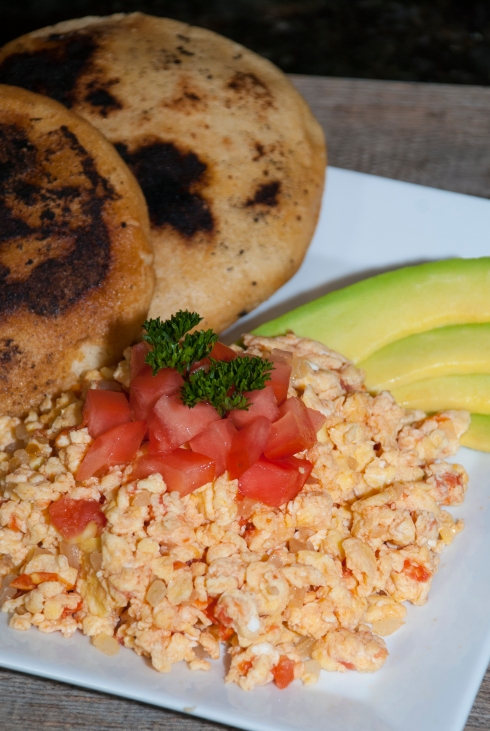
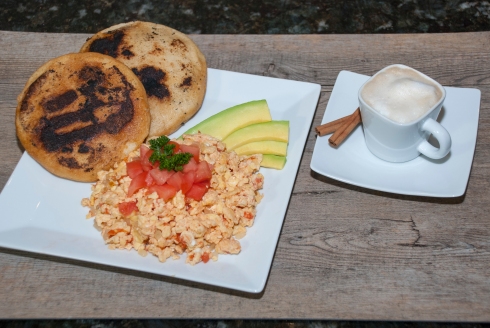
6.  Serve hot with arepas… I happened to have some avocado nearby, and it was just the perfect addition to this breakfast for champs.

Perico | Venezuelan Scrambled Eggs

Perico | Venezuelan Scrambled Eggs

Desayuno Venezolano | Venezuelan Breakfast

Desayuno Venezolano | Venezuelan Breakfast

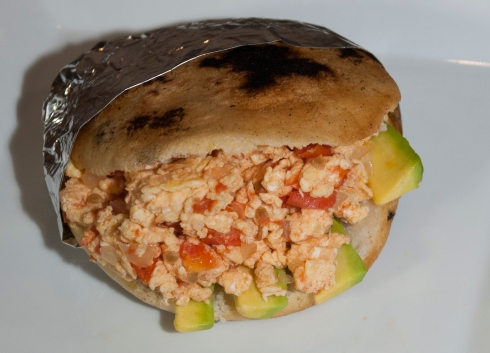
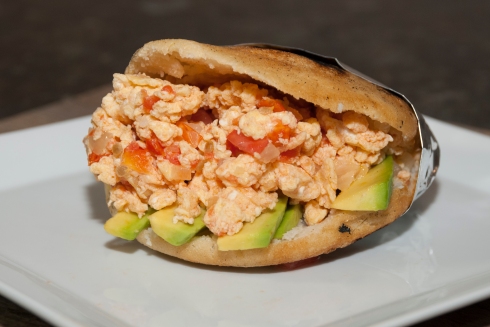
Note:  Perico can be served just like any other scrambled egg dish; with bacon or sausage, and toast.  It can also be served as an arepa filling (relleno de arepa), already inside an arepa. (Avocado addition is great here too… as you can probably tell by now… I love avocado)

Arepa Rellena con Perico | Perico Filled Arepa

Arepa Rellena con Perico | Perico Filled Arepa

Arepa Rellena con Perico | Perico Filled Arepa

Arepa Rellena con Perico | Perico Filled Arepa

*Serves 2

¡Buen Provecho!

Recipe: Mojo de Cilantro y Perejil | Venezuelan Cilantro & Parsley Mojo Sauce

17 Jul Mojo de Cilantro y Perejil | Venezuelan Cilantro & Parsley Mojo Sauce

This is another type of mojo, like the ones most restaurants have at the table, just like they have salt and pepper.  Personally, I prefer the cilantro and parsley mojo over the mojo isleño.  You can use any mojo as a topping for tostones, hallaquitas, yuca sancochada, yuca frita, parrilla, and empanadas.  You can also use this mojo as a topping for grilled fish, chicken, pork or steaks.

Ingredients Mojo Venezolano

Ingredients Mojo Venezolano

What you need:
– 1 Tbsp. Vegetable Oil
– 1 to 2 Sweet Peppers (Ají Dulce)
– ½ Onion
– ½ Tomato
– ¼ Cup Cilantro Leaves
– ¼ Cup Parsley Leaves
– 1 Tbsp. Wine Vinegar
– 1 Tsp. Salt
– ½ Tsp. Pepper

Preparation:
1.  Do not wash the cilantro or the parsley at first.  Take the leaves and measure out first, not too tightly, and then proceed to wash them. (Note: It doesn’t matter if you use curly parsley or regular parsley)
2. Finely chop all the ingredients.

Finely Chop All Ingredients

Finely Chop All Ingredients

3. In a medium frying pan add the oil and begin to fry the onion and the sweet pepper for about 3 minutes.
4. Add the tomatoes, cilantro and parsley, and continue to fry for about 3 more minutes.  Remove from heat.

Fry All Ingredients

Fry All Ingredients

5. Add the wine vinegar, the salt and the pepper.  Try the mixture and add more salt to taste if necessary.

Mojo de Cilantro y Perejil | Venezuelan Cilantro & Parsley Mojo Sauce

Mojo de Cilantro y Perejil | Venezuelan Cilantro & Parsley Mojo Sauce

6.  Serve as a topping of your favorite recipes, such as fish, potatoes, meats, arepas, boiled yuca or hallaquitas.

Mojo de Cilantro y Perejil | Venezuelan Cilantro & Parsley Mojo Sauce

Mojo de Cilantro y Perejil | Venezuelan Cilantro & Parsley Mojo Sauce

¡Buen Provecho!

Recipe: Mojo Isleño Venezolano | Venezuelan Mojo Sauce

5 Jun Venezuelan Mojo Isleño

When I lived in Venezuela, going out to have lunch or dinner at a restaurant wasn’t an everyday thing.  It was more of a luxury.  Middle class families, such as mine, did not eat at a restaurant very often.  But one thing I remember about the few times we ate out is the mojo, or what people think its called Venezuelan Green Sauce.  Mojos are a type of sauce that most restaurants have at the table like they have salt and pepper.  It’s a must.  They are on the table for you to use as you wish.  You can use it as a spread on your bread or hallaquitas, as a sauce for your meat, as a dressing for your potatoes or yuca, even for your soup.  You name it.  Most mojos are prepared with a mixture of herbs, vegetables, oil and vinegar.  Every restaurant has their own recipe and ingredients and some serve both a regular version, and a spicier version.  Personally I like to use mojos as a topping for tostones, hallaquitas, yuca sancochada, yuca frita, parrilla, and empanadas.

Venezuelan Mojo Isleño Ingredients

Venezuelan Mojo Isleño Ingredients

What you need:

– 1 ½ Medium Onions
– 8 Garlic Cloves
– 1 ½ Cups Cilantro Leaves (no stems)
– ½ Cup Parsley Leaves (no stems)
– 1 or 2 Ajíes Picantes (Chili Peppers or Red Chilies)
– 1/8 Cup Bread Crumbs
– ½ Cup Beef Stock
– ¼ Cup Vegetable Oil
– ¼ Cup Vinegar
– ¼ Teaspoon Black Pepper
– 1 Teaspoon Salt
– ½ Tablespoon Paprika

Preparation:
1.  Do not wash the parsley and cilantro at first.  Take the leaves and measure out first, not too tightly, and then proceed to wash them.

Venezuelan Mojo Isleño Ingredients

Venezuelan Mojo Isleño Ingredients

2.  Using a food processor, blend the onions, garlic (I suggest you mince it first), parsley, cilantro, chili peppers (without the veins or seeds).

Blend Ingredients

Blend Ingredients

Green Paste

Green Paste

3.  After you have blended all the ingredients very well and obtained sort of a green paste, mix in the breadcrumbs with a spoon.

Breadcrumbs

Breadcrumbs

4.  Place the mixture in a pot and add the beef stock, vegetable oil, vinegar, salt, pepper, and paprika.
5.  Cook to a boil, and then continue cooking in high heat for about 12 minutes until it turns into a yellow-greenish color and a thick consistency.

Boil

Boil

6.  Serve as a topping for your favorite recipes, such as fish, potatoes, meats, arepas, boiled yuca or hallaquitas.

Venezuelan Mojo Isleño

Venezuelan Mojo Isleño

Venezuelan Mojo Isleño

Venezuelan Mojo Isleño

*Note:  My mojo looks very green, because I was unable to find the red chili peppers, so I used a green jalapeño instead.

¡Buen Provecho!

Recipe: Chicha Venezolana | Venezuelan Chicha (Rice Drink)

1 Apr Chicha Venezolana | Venezuelan Chicha (Rice Drink)

Growing up in Venezuela is one of those things I would never wish to change about my life.  All the experiences, good and bad, are what make me who I am today.  Although there were some tough times, there were also plenty of great times that fill the good memories I have of Venezuela nowadays.

I was fortunate to have a loving family who valued education above all things.  I was fortunate to have parents and grandparents who made sure I could attend the best schools, private bilingual schools.  Attending a bilingual private school had advantages and disadvantages.  Of course, they were all advantages, but when you are 12 years old, you probably don’t think that having to take 16 subjects all year long (8 in English and 8 in Spanish) is an advantage at all.  Now I that I live in the US, and people can’t tell that I am from a different country, because I don’t have an accent, make me realize all the advantages.

One other advantage I remember fondly from being in a private school is definitely the food.  The school had what we call a “cantina escolar”, the school’s cafeteria.  And no, the ‘cantina’ did not serve any alcohol!  They sold anything and everything from arepas to empanadas, pabellón criollo, breakfast, tequeños, tequeñón, and anything else you might think of.

One year, my school hired a ‘carrito de chicha’, a little cart much like a hot dog cart that would sell chicha.  This tiny cart would be downstairs and my friends and I would run down during recess to get some chicha.  What is chicha? you ask?  Only the most refreshing drink you’ve ever had.  There is just something about the cold, creamy, sweet chicha that gave you enough energy to run all over during recess and still be awake for the next 4 class periods.

Venezuelan Chicha is a refreshing drink made with rice.  Back in the day, people used to soak the rice overnight, and then let it dry and grind it, then blend it and add sugar and sell it on the street as refreshment.  Nowadays, we even have commercialized chicha brands that you can buy at the store just like a carton of milk.

So now you can make your own chicha at home, and it’s very easy.  The best part is that you don’t have to wait a day while you soak the rice, or use a grinder.  Because let’s face it, who even owns a grinder?

Ingredients for Venezuelan Chicha

Ingredients for Venezuelan Chicha

What you need:

– 1 Cup White Rice
– 10 Cups Water
– ½ Teaspoon Salt
– ¾ Cup Sugar
– 1 Cup Powdered Milk
– 1 Tablespoon Vanilla Extract
– Condensed Milk (optional)
– Ground Cinnamon
– Cinnamon Sticks
– Ice

Preparation:

1. In a large enough pot, bring the 10 cups of water to a boil.
2. Once the water is boiling, add the rice, the salt, and one cinnamon stick and continue to boil for about 30 minutes, or until the rice is quite mushy.

Boil the Rice

Boil the Rice

3. Remove the pot from the heat and set aside to cool.  At this point, also remove the cinnamon stick.
4. While the rice is still a bit warm, add the sugar and vanilla extract and stir by hand.
5. Add the powdered milk little by little so it doesn’t clump up, and stir by hand.
6. Let the mixture cool down a bit longer.
7. Using a blender, liquefy the mixture.  You will probably need to do this about 2 cups at a time, because the entire batch will not fit in an average size blender.

Blend

Blend

8. Put the mixture in a pitcher and in the fridge to cool down completely.
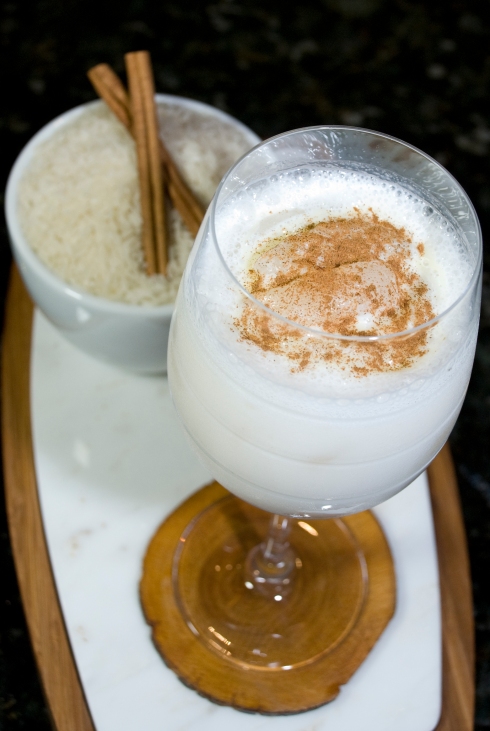
9. Once cool, you can serve it in many different ways.  You can serve it with crushed ice, like a smoothie.  Or you can serve it with ice cubes.  But it’s always served with ice.  You can sprinkle some ground cinnamon on top, and you can also add some condensed milk.

Venezuelan Chicha with Cinnamon

Venezuelan Chicha with Cinnamon

Venezuelan Chicha with Cinnamon and Condensed Milk

Venezuelan Chicha with Cinnamon and Condensed Milk

Chicha Venezolana | Venezuelan Chicha (Rice Drink)

Chicha Venezolana | Venezuelan Chicha (Rice Drink)

¡Buen Provecho!

Recipe: Ensalada de Remolacha | Venezuelan Beet Salad

25 Mar Ensalada de Remolacha | Venezuelan Beet Salad

I wasn’t sure how to call this recipe, and I don’t know where it came from or how it came to be. All I know is that I have always called this salad the “Ensalada Rusa”, which means Russian Salad. I just didn’t want to call this recipe the ‘Venezuelan Russian Salad’, because that doesn’t make sense. However, I am pretty sure that is not the name for this salad, because when I Google it I get the recipes for a different salad, a salad similar to chicken salad or Olivier Salad.

When I was a kid I was not a fan of the word salad or “ensalada”. When I would ask “What’s for lunch?”, I didnt want to hear that salad was on the menu. However, my mom used to make this beet salad all the time, because she knew it was the one salad I would eat, and even ask for seconds. My grandma also used to make the same beet salad, but she included lettuce in it, and I wasn’t a fan of the lettuce addition. I would still eat it, but I probably wouldn’t ask for seconds. This salad is delicious, mainly because it’s not really a salad. I consider it more of a side dish, a carb-loaded side dish. And who doesn’t love carbs?

These past holidays my sister came to visit us from Venezuela and I asked her to help me cook some of my favorite dishes so I could blog about them and post the recipes. As soon as she told me she always makes this salad back home, I knew I had to go buy the ingredients and have her show me how to make it. I had never found a good recipe online, and I wanted to know how my mom used to make it. So we bought all the ingredients and she made it for me. It was just like my mom used to make it, and it was very easy, too.

One thing you must know… this salad is pink! My sister and I even thought it would be a great salad or side dish to serve at a bachelorette’s party, girl’s baby shower or party… or any pink themed party!

Ingredients Venezuelan Beet Salad

Ingredients Venezuelan Beet Salad

What you need:
– 3 Small to Medium Potatoes
– 3 Eggs
– 2 Beets
– 2 to 3 Carrot Sticks
– ¼ Chopped Onion
– ½ Cup Mayo
– 1 Teaspoon Vinegar
– 1 ½ Teaspoon Lemon Juice
– 1 Teaspoon Salt

Preparation:

1. Rinse all the vegetables. You don’t have to peel the beets, in fact, you shouldn’t. But you can peel the potatoes and carrots if you wish to save some time.
2. Boil the beets in a large pot with enough water to cover them entirely. You don’t have to boil all the vegetables separately, but it is preferred that you do. (Beets usually take around 45 minutes)
3. On a separate pot boil the potatoes and carrots. (About 15-20 minutes)
4. On a separate pot, boil the eggs. (About 7 minutes – and peel once done)
5. Once all your vegetables are ready, you can put them in a bowl with cold water and ice so they are easier to handle.
6. Cut all the ingredients in small cubes and put them in a large bowl. Don’t forget the onion.

Venezuelan Beet Salad

Cut into small pieces

Venezuelan Beet Salad

Add vegetables and eggs in a large bowl

7. Add the mayo, vinegar and lemon juice and mix well, but delicately so you don’t smash any ingredients and it turns into puree.

Venezuelan Beet Salad

Add the mayo and mix delicately

8. Add salt to taste and you can add white pepper if you wish.
9. Serve cold.

Ensalada de Remolacha | Venezuelan Beet Salad

Ensalada de Remolacha | Venezuelan Beet Salad

Ensalada de Remolacha | Venezuelan Beet Salad

Ensalada de Remolacha | Venezuelan Beet Salad

¡Buen Provecho!

*Optional: Some people (like my grandma) like to add finely chopped lettuce to this salad. My mom also adds a bit of mustard sometimes. Other people add a bit of extra virgin olive oil and even a touch of soy sauce.

Recipe: Pollo A La Ana | Venezuelan Creamy Chicken

18 Mar Pollo A La Ana / Venezuelan Creamy Chicken

This recipe is one of my favorites. Not only because it is delicious, but because it was one of the very first recipes I learned how to prepare by heart. The name is in honor of my grandmother Ana Cecilia Sandoval de Ojeda. Even though she claims that we have all taken the recipe and changed it and improved up on it in our own way, she is still the main inspirational source for the original recipe, and many other recipes featured in my blog. This isn’t really a traditional Venezuelan recipe that everyone knows about, but it is definitely a big part of my life and memories of my childhood in Venezuela.

I first tried this delicious creamy chicken recipe when I was a kid and I used to visit my grandparents’ home almost every weekend. Sometimes I was dropped off at their house after school, too. And when I was lucky, I would eat my grandma’s creamy chicken for lunch. She would usually serve it with rice, some vegetables and baked plantains on the side. But the plate wasn’t ready until she poured some of the creamy sauce on top of my rice.

When I moved from Venezuela to the US, I sure missed my family and all the Venezuelan food I was so used to eating. I moved in with my aunt and my cousin. Life in the US was very different and we were always in a hurry, working and going to school at the same time. No one really had time to cook. However, we decided we needed to start cooking and eating home-cooked meals. My cousin and I, college students and part time employees, didn’t really know our way around the kitchen. We could make arepas, sandwiches, salads, eggs, and… that was pretty much it. One day we decided we needed to learn how to cook more complicated dishes and we both remembered our favorite creamy chicken, and we decided to give it a shot. We called grandma and our aunt for their recipes, but they gave us the basic steps and no measurements to go by, assuming these grown women should already know their way around the kitchen. After a couple of attempts and tweaks, and even after one time Whooper (my cousin’s dog) stole one of our chicken breasts, we finally nailed and perfected our own version of the creamy chicken. We served it with rice, plantains, and my now famous (don’t really know why) broccoli and cauliflower au-gratin. After a couple of times, our dish became popular in the family and we would be requested to prepare it at least once a month. We also prepared it when we had our boyfriends (at the time) come over for dinner, bragging about our cooking skills, as if we knew how to prepare any other complicated dishes. We even prepared it once for my (now) husband, and he loved it, even though he doesn’t care for chicken and he doesn’t like mushrooms.

Last time my grandmother came to the US, I invited her over to our place for a day of cooking. That day she taught me how to prepare the best tequeños ever, and I also asked her to show me how SHE makes the original version of this creamy chicken. She made it and showed me, but she wanted to include the changes and additions all of us in the family had made to the recipe, and it came out to be the best version of the creamy chicken I have ever had.

A couple of weeks ago, she was in a rush, and she didn’t have time to go through all her recipes, so she decided to just call me and ask me for the recipe. This particular moment in time, when my grandmother, my inspiration in the kitchen, my mentor, had called ME for a recipe, was the moment I felt like a real woman.

Therefore, I dedicate this one to my grandmother, Ana Cecilia Sandoval de Ojeda, with all my love.

What you need:

– 4 Chicken Breasts
– 1 Tablespoon Olive Oil (Extra Virgin if preferred)
– 1 Tablespoon Worcestershire Sauce
– ½ Teaspoon Soy Sauce
– 1 Teaspoon Adobo Seasoning (without Pepper)
– ¼ Onion (chopped in small pieces)
– 1 or 2 Garlic Cloves
– ½ Cup Sliced Mushrooms
– ½ to 1 Cup White Wine
– 1 Cup Heavy Whipping Cream
– 3 to 4 Shallots (optional)*
– 2 Tablespoons Chopped Cilantro (optional)*
– 1 Teaspoon Ground Nutmeg (optional)*
– ¼ Cup Sliced Almonds (optional)*

Preparation:

1. First wash the chicken breasts and dry them thoroughly. You can filet them in half (my grandma prefers it this way), you can cook them whole, or you can make your life easier and buy the thin ones instead (just buy double the amount – so 8 thin ones instead of 4 whole ones).

Filete Breasts

Filete Breasts

2. Season the chicken breasts with the olive oil, Worcestershire, soy sauce and adobo. Make sure to get it on both sides. It’s easier if you use a bowl for this step.
3. Leave the chicken breast to soak in all those flavors, and in the meantime cut the shallots and the onions, and begin to sauté them along with the minced garlic on a pan.

Chop Onions and Shallots

Chop Onions and Shallots

4. Add the chicken to the pan and begin to sauté them as well, because they will take a bit to cook thoroughly.
5. After the chicken is partially cooked, add the mushrooms and cilantro, and continue to cook for about 5 more minutes.

Slice Mushrooms

Slice Mushrooms

6. Add the wine to the pan and let it cook at medium heat.
7. When the chicken breasts and the mushrooms start to brown and there is little wine left, you can add the heavy whipping cream and let it cook for a while to mix all the flavors together. NOTE: Don’t let it cook for too long, or the sauce will start to become too thick.

Cook At Medium Heat

Cook At Medium Heat

8. At this point, you can add salt and pepper to taste (if needed), along with the ground nutmeg and almonds.
9. Serve hot with rice, vegetables and plantains.

Pollo A La Ana / Venezuelan Creamy Chicken

Pollo A La Ana / Venezuelan Creamy Chicken

*All the optional ingredients are the result of all of us changing and trying to make the recipe our own.  No matter which one you decide to include or leave out, this creamy chicken will surely be a favorite in your home.

¡Buen Provecho!

Recipe: Venezuelan Tequeños | Venezuelan Cheese Wrapped in Dough (Appetizers)

15 Sep Recipe: Venezuelan Tequeños | Venezuelan Cheese Wrapped in Dough (Appetizers)

There are a lot of great memories I have from my childhood in Venezuela.  Most of those come from the various family celebrations held at my grandparent’s house.  Birthday parties, graduation parties, mother’s day parties, anniversary parties, farewell parties, welcome parties, wedding parties and just-because parties.  Back then most of my family still lived in Venezuela, and those get-togethers could become quite packed.  First cousins, second cousins, third cousins, aunts, uncles, grandparents, great-grandparents, parents, godparents, friends, friends-of-friends, family dentist, even our piano teacher was invited.  Back when things didn’t cost so much, too.  My grandparents went all out to celebrate each and every one of these special occasions.  I remember they even used to hire waiters, tables, tents, caterers, cooks, and even a band sometimes.  Back then, most parties were like that, even if it was just a birthday party, it could look like what now is only done for weddings.  And just like in all well organized and catered parties, they always served hors d’oeuvres, or as we call them in Venezuela; “pasapalos”.  This word is actually quite funny, at least to me.  It is actually two words in one, “pasa” and “palos”.  The literal translations are “pasa” = pass, and “palos” = sticks.  What they mean in Venezuelan slang is “pasa” = to pass, and “palos” = drinks (the alcoholic kind).  Therefore pasapalos is something to pass drinks, in this case, an appetizer or small hors d’oeuvre.

One thing is certain though; a true Venezuelan party is not complete without the star “pasapalo”.  And that, of course, is the Tequeño. (Pronounced te-ke-nyos)

According to an article printed in a Venezuelan newspaper (sorry, the clipping I received didn’t have the paper’s name on it), the creation of Tequeños is attributed to Josefina Báez.  Josefina was a young entrepreneurial Venezuelan woman who, at the age of 15, created the now famous Tequeños.  Josefina owned a catering business of sorts, where she would make and sell other delicious Venezuelan pastries to local ‘bodegas’ (small grocery stores).  Josefina would also prepare pastries to entertain guests, such as her older sisters’ boyfriends.  Josefina one day decided to use some leftover dough from her pastry-making of the day and rolled up some cheese inside of it, and then she fried it and served it to their guest as simple “cheese wraps”.  Sooner than later, her cheese wraps became famous around the small city where she lived.  The city’s name is “Los Teques”, which doesn’t have any real translation, since it is a proper noun.  Usually people native from Los Teques are called “Tequeños”.  Therefore, once the cheese wraps were famous in this small city, another pastry maker from Los Teques, Luisa Casado, decided to sell Josefina’s cheese wraps to clients in other cities, eventually making it to Caracas, the capital city.  Once the cheese wraps were known in Caracas, they became even more popular.  They started ordering them and serving them as hors d’oeuvres in all kinds events such as baptisms and weddings, and people would begin to call these cheese wraps by the name of the people who would bring them to the city; the “Tequeños”.

You may notice that I did not call this post “cheese sticks”, because these are NOT your regular cheese sticks, they are way better.  However, the key to making real Venezuelan Tequeños, and not some other plain boring “cheese stick”, is the cheese.  You must have authentic Venezuelan Queso Blanco.  And trust me, if you do not live near an authentic Venezuelan market, you may not find the right cheese, but you could try to sample different cheeses at a Latin market near you and try to find a similar cheese.  Basically, the cheese has to be white, not too salty, and it has to melt easily, but does not become completely liquified, and it is also not watery inside its package.  Whatever you do, do not make Tequeños with Mozzarella.  You will have a very bland and boring ‘cheese stick’.

Ingredients for Venezuelan Tequeños

Ingredients for Venezuelan Tequeños

What you need:
– 2 Cups All Purpose Flour
– 1 Egg
– 4-5 Tablespoons Cold Water
– 2 Teaspoons Salt
– 5 Tablespoons Butter
(Cold, Straight From The Fridge)
– 2 Tablespoons Sugar
(or more if you like the dough to be sweeter)
– 500 Grams of Queso Blanco Venezolano (There is a round Mexican one called Gallo Blanco that could work, and I found one called El Latino that was very good)
– Vegetable Oil (for frying)
– Paper Towels

Preparation:
1.  Cut the cheese in strips of about 2-3″ long and ½” thick. Save inside Tupperware in fridge for later.

Cut the cheese in strips

Cut the cheese in strips

Queso Blanco El Latino

Queso Blanco El Latino

2. In a big mixing bowl, add the flour, the sugar, and the salt.  Mix well.
3. Take the butter out of the fridge and cut in little pieces.  Then add the butter to the mix and begin to mix it using the tip of your fingers to mash the butter together with the rest of the ingredients.  Mix well until the mixture is as fine as possible.  It will probably feel like little grains of rice.

Cut the butter

Cut the butter

Mix the butter with the rest of the ingredients using your fingertips

Mix the butter with the rest of the ingredients using your fingertips

4.  Add the egg and begin to mix with a wooden spoon.

Add egg and mix well

Add egg and mix well

5. Add the water and continue mixing, until all ingredients are well blended together.
6.  Once you have more uniform dough, take it out of the bowl and begin to knead it over a flat surface (use flour on the surface).  Knead for at least 5 minutes, as you would bread dough.

Knead dough

Knead dough

7.  Once you have a soft and uniform dough, cover it with clear wrap paper and let it sit for about ½ and hour or more.

Let dough rest for half an hour or more

Let dough rest for half an hour or more

8.  Place some flour on a clean flat and hard surface, like your countertop or cutting board.  Spread the flour evenly over the entire working surface (so the dough won’t stick to it).
9.  Using a rolling pin, begin to flatten the dough.  It shouldn’t be too thin or too thick.  Perhaps just a bit thinner than a ¼ of an inch.

Flatten dough with rolling pin

Flatten dough with rolling pin

10. Once flattened, cut strips from the dough of about ½ an inch thick by 10 inches long.

Cut dough in strips

Cut dough in strips

11.  Roll the sticks of cheese with the strips of dough by placing one end of the cheese stick at an angle on one end of the dough, then closing the tip and rolling until the cheese is covered.  Making sure the cheese is fully covered and the ends are sealed (you can dab your finger tips in water to help you seal the dough).

Roll the cheese with the strips of dough

Roll the cheese with the strips of dough

Roll all the way to the end

Roll all the way to the end

Be careful at the end

Be careful at the end

The perfect Venezuelan Tequeño (Rolled by my Grandma, Ana)

The perfect Venezuelan Tequeño (Rolled by my Grandma, Ana)

A little tip from Grandma: Tap the tips against your working surface to flatten them and to help seal them. Cover with flour.

A little tip from Grandma: Tap the tips against your working surface to flatten them and to help seal them. Cover with flour.

12. You can place the tequeños on a baking sheet or Tupperware and also spread some dough on the bottom and top of each row of tequeños.

This recipe was supposed to yield for 50 Tequeños, but I don't know what happened to us.  Let me know if you make it, how many did you get. We got 30 Tequeños.

This recipe was supposed to yield for 50 Tequeños, but I don’t know what happened to us. Let me know if you make it, how many did you get. We got 30 Tequeños.

13. Cover them with plastic wrapping paper, or Tupperware cover and keep in the freezer until ready to fry.
14.  When ready to fry and serve your tequeños, make sure you have enough vegetable oil and that the oil is not too hot.  Then you fry them straight from the freezer and do so slowly until they are golden brown.  Don’t fry them for too long or the cheese will begin to melt its way out of the dough, and you don’t want that to happen.

Fry the Tequeños straight from the freezer.

Fry the Tequeños straight from the freezer.

15. Place the tequeños on paper towels to remove the excess oil and serve while still hot.

Recipe: Venezuelan Tequeños | Venezuelan Cheese Wrapped in Dough (Appetizers)

Recipe: Venezuelan Tequeños | Venezuelan Cheese Wrapped in Dough (Appetizers)

Recipe: Venezuelan Tequeños | Venezuelan Cheese Wrapped in Dough (Appetizers)

Recipe: Venezuelan Tequeños | Venezuelan Cheese Wrapped in Dough (Appetizers)

¡Gracias Tabue!
This post is very special to me, and I dedicate it to my grandmother
Ana C. Sandoval de Ojeda.
She makes THE BEST Tequeños EVER, and I thank her for coming to my house, and teaching me how to make them.  I owe this blog a photo of the both of us in my kitchen. Love you!

¡Buen Provecho!

Recipe: Yuca Sancochada o Frita | Venezuelan Boiled or Fried Cassava

4 Apr

First and foremost, DO NOT EAT RAW YUCA!  Raw yuca contains two cyanogenic glucosides called linamarin and lotaustralin, which are decomposed by linamarase, thus liberating hydrogen cyanide.  I am no chemistry expert, but this stuff is highly toxic and you could become seriously ill and it could even be deadly.
So, now that I have scared you enough, lets talk about how yummy yucca is, if you dare to eat it, he he.  You have nothing to worry about, as long as you cook the yuca before you eat it.  In Venezuela we eat it all the time, and no one that I know of has ever died from eating yuca. So, seriously, don’t worry.  Just don’t eat it raw.
Yucca is a tuberous root, and in Venezuela we eat it in several different ways.  Yuca is served boiled as a side to our delicious parrillas, rotisserie chicken, or anything you can think of.  We also add it to soups.  We fry it to make delicious yuca fries.  We even prepare it differently to make casabe, a sort of yuca cracker.  So we use it much like you would a potato.  Boiled yuca is usually served hot with a little bit of butter, or a cilantro and parsley mojo, or Guasacaca (specially when eating at parrillas).  Fried yucca is usually served as a side much like French fries, with salt, but you could definitely dip it in a delicious Venezuelan Salsa Verde as well.

Cassava (yuca) roots, the Taínos' main crop

Boiled Yuca
What you need:

– 500 gr. yuca (about 1 large or 2 pieces)
– Enough water to cover the yuca
– Salt (to taste)
– Toppings (butter, cilantro and parsley mojo, guasacaca, salsa verde, etc).
Preparation:
1. Cut the tips of the yuca, then peel it and rinse it with water.

Cut, peel and rinse.

Cut, peel and rinse.

2. In a large enough pot, add the water and the yuca (make sure the water covers the yuca entirely).  Turn the stove to high heat until the water starts boiling and then continue to cook for about 30 minutes.

Boil the Yuca

Boil the Yuca

3. Add the salt and then continue to cook for about 15 to 30 more minutes or until the yuca is soft (test like a potato), or until it starts to open up.
4. Drain the yuca and serve hot.
5. You can serve it with butter, with salt, or with a cilantro and parsley mojo, salsa verde or guasacaca.

Yuca Sancochada | Boiled Yuca

Yuca Sancochada | Boiled Yuca

Fried Yuca
What you need:

– Same as above, plus oil for frying
Preparation:
1. Follow the instructions for Boiled Yuca.

Yuca Sancochada | Boiled Yuca

Yuca Sancochada | Boiled Yuca

2. Make sure you drain the yuca right away, and then let it cool completely. Or better yet, place it in your fridge for it to cool faster.
3. Cut the yuca into sticks.

Cut

Cut

4. Heat up enough frying oil and fry the yuca sticks until golden brown all over.
5. Serve hot and sprinkle with salt.
6. You can serve with a yummy dipping sauce like Venezuelan Salsa Verde or Guasacaca.

Yuca Frita | Fried Yuca

Yuca Frita | Fried Yuca

¡Buen Provecho!

Recipe: Crema de Apio Venezolano | Venezuelan “Celery Root” Soup

28 Mar

In order for me to tell you about “Apio”, pronounced (ä’ pē-ō), I must tell you about my long journey to find it.  This post is 5-6 years in the making, and one of the reasons I started this blog!
When I was a kid, I used to eat Apio in various different Venezuelan dishes.  At my grandmother’s house they usually served a little bit of Apio Cream (just a thicker creamier soup), as an appetizer before lunch.  My mom sometimes served Apio Creamy Soup as a light dinner.  Apio could be found in big pieces, like you would find carrots or potatoes in a light chicken soup preparation.  My other grandmother used it in her preparation of Sancocho de Pescado (like a fish stew of some sort), in big chunks.  We also ate it in Chupe de Gallina, another chicken soup, but very hearty. I also recall it served as a pure (like mashed potatoes, but of Apio), in some fancy restaurants.  So it’s safe to say, I loved Apio!
Fast-forward a few years… and all of a sudden… I forgot about Apio! I moved to the US, where nobody knows about Apio, and I guess it just slipped my mind. Until, I had a crazy craving for some delicious Apio Soup. So I ask myself, what is apio in English? What does Apio translate to? I “Googled it”. As it turns out, apio means celery. Simple enough. All I have to find is Creamy Celery Soup. Guess what? Campbell’s makes Cream of Celery, so I should probably just go buy one at the store. So I did. I came home with my can of soup, and I cooked it on the stove, and was a bit puzzled about the green color, but hey, the can says Cream of Celery, so it must be right… I try it… YUCK!!!! This isn’t APIO!!!! Of course NOT! Dummy!!!
I go back to the drawing board… Google, that is.  Oh, of course! Apio IS celery, yes, but that is what we in Venezuela call “Apio españa”, Spanish (from Spain) Apio. Ok, my bad! Now I realize I am looking for something else. I call my mom, my aunt, my cousin, my sister, my grandma, my other grandma, and pretty much everyone I know to ask about Apio. I had never seen the raw product, I only saw the cooked product, and so I didn’t know what it was supposed to look like. The general description was “It looks like a potato, but more like a stick of carrot, and with weird limbs coming out of it, like ginger, but it is yellow on the inside”. WHAT? So I begin my search for this Apio. I bought something that sort of matched the description of what they told me, which was called Parsnip. I went home and cooked it. It wasn’t it. I bought Turnip. That wasn’t it either. Finally, after researching all over the Internet, I find out what it was. It is called Celery Root here in America. But guess what? They don’t sell it anywhere. So I asked around all the markets I could find, until I finally found “Celery Root” at a new organic market that had opened up. YES! Finally I get to make my Apio Soup. I buy it, I send pictures to everyone to make sure it is the right one, and they said it was. I make the soup, IT’S NOT IT!!! At least it didn’t taste like it to me, and it wasn’t really yellow, it was more like beige.
I came down to South Florida to visit my family and I asked for my cousin to cook me some Apio. We went to the local Hispanic Super Market, where they sold Celery Root, BUT it was labeled “Celery Root: Apio Venezolano”. So I knew it HAD to be the right thing. And of course, my cousin cooked it for me, and it WAS the right kind of Apio. But then I knew I could only find it either in South Florida or in Venezuela.
Now here I am, after 5 years, back in Florida.  Of course, my first post HAS to be about Apio, because I went to the Hispanic Market called Sedano’s and I found my “Apio Venezolano”.  I bought it, I brought it home, I peeled it (it was yellow, how it’s supposed to be), then I cooked it, it smelled like apio, then I tasted it, and… IT WAS APIO!!!
So, I know only a few of you, those lucky enough to find the real Apio Venezolano, are going to be able to make this recipe. However, I must say the Parsnip version was pretty close to it.  Also, this recipe is good for any kind of tuber vegetable or almost any vegetable for that matter.

Celery Root: Apio Venezolano

Celery Root: Apio Venezolano

What you need:
– 500 grams of Apio Venezolano (about 2 to 3 big pieces)
– 4 ¼ cups of Chicken Broth
– Salt
Optional:
– Queso Blanco (Yet another hard to find ingredient)
– 2 tbsp. butter
– ¼ Onion
– Cilantro
– Basil
– Leeks
– Cream Cheese
Preparation:
1. Peel the Apio. Use a knife first for the tougher parts, and then you can use a regular potato peeler for the rest.

Peel the Apio Carefully

Peel the Apio Carefully

2. Cut the Apio in half, so that it fits in the pot and the water covers it. This step is optional.
3. Cook the Apio and the Chicken Broth in high heat for about 25 minutes, or until the Apio is soft. Just like you would if you where boiling potatoes.

Cook the Apio

Cook the Apio

4. At this point you can add the optional ingredients for extra flavor, such as the onion (in big pieces so its easy to remove later), the cilantro, the basil and the leeks.

Optional: Cilantro

Optional: Cilantro

5. Once the Apio is done, remove the optional ingredients (or you can leave them if you wish), and remove the Apio from the broth.

Remove Apio from Broth

Remove Apio from Broth

6. Puree the Apio using a food processor (and optional ingredients if you wish), and then slowly add the stock little by little until you reach the desired consistency. This is supposed to be a “cream of apio” soup, but if you puree the apio first, and then add the broth bit by bit, mixing well, you can stop adding broth when you have reached the desired consistency, so you don’t have a soup that is too thick or too thin. You can also add the optional butter here to help it reach the desired consistency.

Puree the Apio

Puree the Apio

7. Return the mixture to the pot and cook on low heat for another 10 minutes or so. You can add the remaining broth if it starts to thicken too much.

Pureed Apio

Pureed Apio

8. Serve with optional cubes of Queso Blanco, or toast, or Cream Cheese, or all three. I myself like to have the cream cheese on the table and just scoop some into my soup and eat a little piece with each spoonful. Delicious!

Optional: Queso Blanco

Optional: Queso Blanco

Crema de Apio Venezolano

Crema de Apio Venezolano

Venezuelan Cream of Celery Root

Venezuelan Cream of Celery Root

¡Buen Provecho!

Just for reference of what apio ISN’T, here are the pictures of the first attempt of Celery Root bought at a local organic market. NOT Venezuelan Apio for sure!

Celery Root, but NOT Apio Venezolano

Celery Root, but NOT Apio Venezolano

Celery Root, but NOT Apio Venezolano

Celery Root, but NOT Apio Venezolano

Celery Root, but NOT Apio Venezolano

Celery Root, but NOT Apio Venezolano

Celery Root, but NOT Apio Venezolano

Celery Root, but NOT Apio Venezolano

More on Apio
Other names I have found for Venezuelan Apio include Celeriac and Arracacha, but I haven’t confirmed these myself.
Also, Apio could be a good substitute for Potatoes in all kinds of preparations, because it has less calories (nutritional facts coming soon).

Recipe: Pasticho Venezolano | Venezuelan Lasagna

18 Jan

One of my favorite dishes is Pasticho Venezolano. The beef, the pasta, and the cheese… what’s not to like?  Venezuelan Pasticho is a little different than your regular lasagna.  The main difference is that Venezuelan Pasticho doesn’t include ricotta cheese, and to me that is PERFECT, because I don’t care for ricotta.  Our Pasticho is plain and simple, but that is what I love about it, you can appreciate all the flavor of the seasoned ground beef, the mozzarella and the pasta without any one of them overpowering the other, like ricotta does.  We do make it creamier and more interesting by adding layers of béchamel sauce. YUM!

What you need:
– 1 or 2 boxes of lasagna pasta
– Grated Parmesan Cheese
– Sliced Mozzarella Cheese
Beef Filling
– 1 lb. Ground Beef
– ½ Tablespoon Worcestershire Sauce
– ½ Tablespoon Soy Sauce
– ½ Tablespoon Adobo
– 1 Tablespoon Butter
– 1 Tablespoon Olive Oil
– 1 Onion
– 1 Garlic Clove
– 1 28 oz can of cut tomatoes, peeled
– 2 Tablespoons Red or White Wine
– 1 Teaspoon Salt
– ½ Teaspoon Pepper
– 1 Teaspoon Oregano
– 1 Tablespoon Cilantro
– 1 6 oz. can of tomato paste
– 1 Teaspoon Basil
Béchamel Sauce
– 2 Tablespoon Butter
– 2 Tablespoon Flour
– 1 1/3 Cup Milk, hot
– 1/8 Teaspoon Salt
– 1/8 Teaspoon Pepper

Preparation:
Beef Filling
1.  Spice up the ground beef with the Worcestershire sauce, soy sauce, and adobo.  Set aside.

Add Condiments to Ground Beef

Add Condiments to Ground Beef

2.  Add the butter and olive oil in a pan and heat it up just a bit until butter is melted.  Then add the onion and garlic, finely chopped, and cook until golden brown.  About 4 minutes.

Heat up Butter and Olive Oil

Heat up Butter and Olive Oil

Add Finely Chopped Onion

Add Finely Chopped Onion

Add Garlic

Add Garlic

3.  On a separate pan begin to brown the ground beef.  Remember to drain the excess oil when done.

Brown Ground Beef

Brown Ground Beef

4.  Blend the tomatoes using a blender or food processor.
5. Add the tomatoes, wine, salt, pepper, oregano, and finely chopped cilantro to the onions and garlic.
6.  Combine the meat with the tomato mixture.

Combine Beef With Tomato Mix

Combine Beef With Tomato Mix

7.  Add the tomato paste (diluted in water as directed on the can), and then add the basil as well.
8.  Continue to cook at low heat, covered, for a while until the sauce reduces and thickens.  If it is too dry, you can add more tomato paste, but don’t add water or the sauce will bee too thin.

Cook at Low Heat

Cook at Low Heat

Béchamel Sauce
9.  In a small pot, heat up the butter.
10.  Add the flour and cook for 2 to 3 minutes.  Lower the heat.
11.  Beating with a whisk, begin to slowly add the hot milk.
12.  Add salt and pepper, and a touch of nutmeg if you wish.
13.  Cook until it thickens and set aside.

Béchamel Sauce

Béchamel Sauce

Cooking the Pasta
14.  Follow the instructions on the box of the pasta.
15.  Some pasta boxes state that you can cook them directly in the oven.  I prefer to boil the pasta first, even if the box says you do not need to do so.  Boil the pasta as you would any other pasta.  Boil enough water, add a bit of salt and olive oil, then add the pasta into the pot and cook until tender.  You can leave the pasta “al dente” so that they can finish cooking up in the oven.
16.  Lay the pasta flat on a baking sheet, separated so they wont stick to one another.

Lay Pasta Flat

Lay Pasta Flat

Making the Pasticho
17.  Preheat the oven at 350º.
18.  Grease a 19” x 13” Pyrex with butter.

Greasy Pyrex with Butter

Greasy Pyrex with Butter

19.  Begin by making a layer of pasta so that there are no spaces left between them at the bottom of the Pyrex.

Begin with a layer of pasta

Begin with a layer of pasta

20.  Add Béchamel sauce on top of the pasta.

Béchamel Sauce goes on top of pasta

Béchamel Sauce goes on top of pasta

21.  Add a layer of the beef filling.
22.  Add a layer of Parmesan cheese.  You can add a layer of ham if you wish.

Layer of Beef, and then Layer of Parmesan Cheese

Layer of Beef, and then Layer of Parmesan Cheese

23.  Repeat: Layer of pasta, layer of béchamel sauce, layer of beef filling, but now add a layer of Mozzarella.

Repeat: Pasta, Béchamel Sauce, Beef, but now add Mozzarella

Repeat: Pasta, Béchamel Sauce, Beef, but now add Mozzarella24. Repeat until you have used all the beef filling. 25. The last layer would be one layer of pasta, béchamel sauce and Parmesan cheese. You can also add bits of butter here and there, about a tablespoon all over. 26. Place in the oven until the top layers are golden. Make sure you check it so it does not burn. Since we boiled the pasta, it is already cooked. What you are looking for is for all the layers of cheese to melt and for it to all be compacted together. So it could be done in 10 to 30 minutes depending on your oven.Bake until cheese is melted and top layer is golden

27.  Serve with tostones, garlic breadsticks and salad (Great Salad recipe coming up next week).

Pasticho Venezolano | Venezuelan Pasticho

Pasticho Venezolano | Venezuelan Pasticho

¡Buen Provecho!

Recipe: Pabellón Criollo

14 Dec Pabellón Criollo Venezolano

The “Pabellón Criollo”, it the most traditional Venezuelan dish after the Arepas.  Pabellón is a word for “pavilion”, but it can also mean the national flag, an ensign, or even a tent.   The Pabellón Criollo, the traditional Venezuelan dish is made up of shredded (or pulled) beef, black beans, rice and fried plantains, as the most basic version of it.   Some people, depending on the part of the country, also add a plain arepa on the side, some avocadoes, some delicious grated white cheese and even a fried egg.  When fried plantains are added, it is known as the “Pabellón con Baranda”.

This dish is our national dish, but it originated in Caracas, the capital city.  People believe this dish is closely related to Venezuelan history and our miscegenation.  This is reflected on the colors of each main component in the dish, black beans, white rice and brown beef.  These three colors symbolize the union of the three races: African, European and indigenous.

We can find Pabellón Criollo in any part of the country, and we even use it to fill our empanadas and arepas.  But we only use the black beans, beef, and plantains to fill those.

Recipes for main components:

Carne Mechada (Venezuelan Shredded/Pulled Beef)
Caraotas Negras (Venezuelan Black Beans)
Arroz Blanco (Venezuelan White Rice)
Tajadas (Venezuelan Fried Plantains)

Preparation:

1. Make sure you soak the black beans overnight!
2. Prepare the shredded/pulled beef first, as this will take the longest to cook (4 hours).
3. When the beef has been cooking for about 1½ to 2 hours already, begin to cook the black beans (this will take 2 hours).
4. Proceed to remove the beef from the boiling water.  Shred/pull the beef and continue cooking as directed on the recipe (adding the sofrito and stir frying it).
5. Proceed to finish the black beans recipe as well.
6. Set the beef and beans aside, and begin cooking the rice.
7. Make the plantains while the rice is cooking.
8. Finish the rice and the plantains.
9. Serve all together.

Pabellón Criollo Venezolano

Pabellón Criollo Venezolano

Pabellón con Baranda

Pabellón con Baranda

Tip

– For a fancier presentation of this delicious dish, you can create a Pabellón Criollo tower:

1. Place an oiled pastry ring in the middle of the plate.
2. Add a layer of rice, a layer of black beans, and a layer of beef in equal parts (about one third of the rings height).
3. Top with plantain circles, alternated with cheese or avocado.
4. Decorate with herbs.

Pabellón Criollo Tower

Pabellón Criollo Tower

Pabellón Criollo Fancy

Pabellón Criollo Fancy

¡Buen Provecho!

Recipe: Carne Mechada (Venezuelan Shredded/Pulled Beef)

7 Dec

Venezuelan Carne Mechada, Carne Esmechada, or Carne Desmechada, is what you know as shredded or pulled beef.   Some people call it “Ropa Vieja”, which literally translates to “Old Clothes”.   Some others call it “Vaca Frita”, which literally translates to “Fried Cow”.   But we simply call it Carne Mechada, which literally translates to Shredded or Pulled Beef.   This is the main component in the most traditional Venezuelan dish, the Pabellón Criollo.   However, Carne Mechada is also used to stuff arepas, empanadas, pastelitos, and even Cachapas.

What you need:

Ingredients to Boil the Steak

Ingredients to Boil the Steak

To boil the beef
– 2 lbs. Flank Steak
– 8 Cups of Water (or enough to cover the beef)
– Salt (to taste)
– 1 Stick Green Onion
– 1 Peppermint or Spearmint Leaf
– 1 or 2 Sprigs of Parsley
– 1 or 2 Sticks of Celery
– ½ Onion
– ½ Red Bell Pepper

Ingredients for the Sofrito

Ingredients for the Sofrito

Sofrito
– 3 Tablespoons Vegetable Oil
– 1 ½ Onions
– 1 ½ Bell Peppers
– 1 Garlic Clove
– 3 ½ “Ajíes Dulces” (Sweet Habanero or Yellow Lantern Chili Pepper)
– 2 Tomatoes
– ½ Teaspoon Pepper
– 1 or 2 Sprigs of Cilantro
– 1 Tablespoon Soy Sauce

Preparation:

1. Cut the Flank Steak in 2 or 4 pieces so they fit in your pot.

Flank Steak / Falda

Flank Steak / Falda

Cut Steak into 4 Parts

Cut Steak into 4 Parts

2. In a large enough pot, place the Flank Steak and cover with enough water.
3. Add the salt, green onion, peppermint, parsley, celery, onion and bell pepper.
4. Cover and cook for about 4 hours at medium heat until the steak softens.

Cook for About 4 Hours

Cook for About 4 Hours

5. Remove from heat, take the steak out of the pot, place in a baking sheet and let it cool for a little bit (You can use the remaining beef stock for other preparations).
6. Once the beef is cool enough to handle, start shredding or pulling it.   Be sure to pick out the fat and hard parts of the beef at this point.

Shred / Pull Beef

Shred / Pull Beef

7. In a large enough pot, add the oil, and sauté the rest of the onion, the bell pepper the garlic and ajíes cut in Juliennes, for about 5 minutes.

Sauté Ingredients for the Sofrito

Sauté Ingredients for the Sofrito

8. Add the beef to this sauté mixture and continue to sauté for about 3 minutes.

Add the Beef to the Sofrito

Add the Beef to the Sofrito

9. Add the tomatoes, the pepper, the cilantro, and the soy sauce.
10. Taste everything to make sure you don’t need more salt or soy sauce.
11. Cook at low heat for about 15 minutes.   You may also add a bit of the beef stock and cook at medium heat until the liquid is reduced.

Carne Mechada (Venezuelan Shredded/Pulled Beef)

Carne Mechada (Venezuelan Shredded/Pulled Beef)

*Makes 4 servings.

¡Buen Provecho!

Recipe: Caraotas Negras (Venezuelan Black Beans)

30 Nov

Venezuelan Black Beans are nothing like your typical Mexican Black Beans.   For starters, they are not spicy at all.   We usually serve them as a side, but we also eat them in soups, as a filling for our famous Arepas, refried, mixed in with white rice, with Queso Blanco on top, and even with sugar on top.   However, they are always present in the traditional Venezuelan Dish, Pabellón Criollo.

Ingredients

Ingredients

What you need:

– 5 Cups of Water
– 1 Cup of Black Beans (washed and strained)
– ½ Red Bell Pepper
– ½ Teaspoon Salt
– 1 Teaspoon of Oil
– ½ Onion
– 1 ½ “Ajíes Dulces” (Sweet Habanero or Yellow Lantern Chilli)
– ½ Garlic Head
– ½ Tablespoon Cumin

Preparation:

1. Make sure to pick out “bad” Black Beans and little rocks or other impurities from your cup of Black Beans and wash them as well.

Black Beans

Black Beans

Pick Out "Bad" Beans

Pick Out "Bad" Beans

2. In a large enough pot, add the cup of Black Beans and add the water to them.
3. Let them soak for a maximum of 12 hours and a minimum of 5 hours. (I highlight this step so you remember you have to do this the night before.

Soak Overnight

Soak Overnight

4. In the same pot that they have been soaking (if you soaked in a pot, not a bowl like I did), add the bell pepper and cook at a medium heat, covered, for about an hour and a half or until they become soften. Add the salt.

Add Bell Peppers

Add Bell Peppers

Cook

Cook

5. In a different pan make the “sofrito” by frying the onion, the ajíes and the garlic with the oil until they turn brown (about 5 minutes).
6. Add the cumin, stir, and remove from the heat.
7. Add the “sofrito” to the pot where the Black Beans are cooking and reduce the heat.   Let this cook for another 10 minutes, or until the liquid has almost completely evaporated (depending if you will be serving them as a side or as a soup).   However, it is recommended to leave a bit of the liquid so they taste better.

Caraotas Negras (Venezuelan Black Beans)

Caraotas Negras (Venezuelan Black Beans)

Tips

– If you wish to refry your leftover black beans, simply sauté them with one or two tablespoons of oil until they become dry and shinny.   Top with Queso Blanco.

*Makes 4 servings.

¡Buen Provecho!

Recipe: Arroz Blanco Venezolano (Venezuelan White Rice)

23 Nov

White rice is white rice, right? Wrong! This cereal is common in all countries and cultures, but each one eats it differently.   My favorite is any kind of Asian rice preparation, because I like the mushy-sushi style rice.   However, that is not usually how Venezuelans prepare it or prefer it.   Rice is one of the most consumed products in Venezuela, because it is the cereal with the most protein content and the least fat content.   It also absorbs flavors of other ingredients pretty easily so most people use it often in all their dishes and preparations.   The most common type is the white long grain type, and it is usually served as a side in beef, chicken and fish dishes, as well as inside soups, and we even make a drink out of it, Chicha.

Ingredients for Venezuelan White Rice

Ingredients for Venezuelan White Rice

What you need:

– 1 Cup White Rice
– 2 Cups Water
– ½ Teaspoon Salt
– 1 Teaspoon Oil
– 1 Garlic Clove (minced)
– ½ Medium Onion diced in two
– 1/8 Green Bell Pepper in strips
– 1/8 Red Bell Pepper in strips

Preparation:

1. You can prepare the rice in two different ways.

Option 1:

– Add the water, salt, oil, garlic, onion, and bell peppers in a large enough pot.   Cook in high heat until the water is boiling, and then add the rice.   Stir everything together and let it cook for about 5 to 7 minutes, or until the water has almost completely evaporated.

Option 2 (Pictured):

– Add the salt, oil, garlic, onion, bell peppers and rice into a large enough pot.   Stir-fry all the ingredients on high heat, and then as they brown, add the water.   Bring to a boil, and then cook until the water has almost completely evaporated.

Stir-Fry Rice with Salt, Oil, Garlic, Onion and Bell Peppers

Stir-Fry Rice with Salt, Oil, Garlic, Onion and Bell Peppers

*I usually prefer option 2.

Bring to A Boil

Bring to A Boil

2. Turn the heat to low, cover, and cook for about 15 minutes, until the rice is soft, dry and loose/fluffy.

Remove Bell Peppers and Onions

Remove Bell Peppers and Onions

3. Remove the pot from the heat, and remove all the big pieces of onion and bell peppers.
4. Serve with butter on top and enjoy.

Press On To Container

Press On To Container

Flip On To Plate

Flip On To Plate

Slowly Remove Container

Slowly Remove Container

Venezuelan White Rice

Venezuelan White Rice

Tips

– Always stir rice with a fork and not a wooden spoon, because the wooden spoon will make it stick to itself, and it will end up being sushi/mushy rice.
– For the perfect rice consistency you can add a little bit of limejuice or a little bit of white vinegar.
– My dad used to serve us little “mountains” of rice.   Just grab a small enough bowl or container, then wet it or grease it with butter, press the rice onto the bowl, and flip it on the dish you are going to serve it.   You can also decorate with little herbs on top.

Some Venezuelan Brands of White Rice include Arroz Mary and Arroz Santa Ana.

¡Buen Provecho!

Recipe: Tortilla Española…Venezolana! (Venezuelan Spanish Tortilla)

9 Nov

As I have mentioned before, Venezuelan food is influenced by many other cuisines around the world.   One of the most noticeable influences is Spanish cuisine (from Spain).   Most Venezuelans can track their ancestors to Spain, and have adapted some Spanish dishes passed down generation to generation, to make them their own.   Some of my relatives who have close Spanish roots have introduced me to delicious Spanish dishes like the Spanish Tortilla.   But don’t be confused by the name, this is no regular tortilla.   When I told my husband I would make him this Spanish Tortilla, he imagined a Mexican Tortilla… but it is more like an omelet, a giant omelet.   I remember eating Spanish Tortilla when invited over to my second cousin’s house for sleepovers.   My cousin’s grandma is a true Spaniard, so they knew what they were doing over there.   My other aunt’s grandmother also made me delicious Spanish Tortilla every time I came to visit.   I think she must have had a secret ingredient (LOVE) when she made her Spanish Tortilla, because it tasted amazing.   She was sweetest little lady, may she rest in piece.   My mom made this dish sometimes as well, and she accompanied it with Salchichitas, or what my husband explained to me are called smokies here in America (Recipe next week).   So here is my version of the Spanish Tortilla, which I made a bit more interesting by adding some Chorizo in it.

Ingredients for Spanish Tortilla

Ingredients for Spanish Tortilla

Ingredients:

– 2 Potatoes (medium)
– ½ Onion (medium)
– 3 to 4 Eggs
– 90 gr. Chorizo (about two links)
– ½ Teaspoon Salt
– ¼ Teaspoon Pepper
– Vegetable Oil (Enough for frying)

Preparation:

1. Peel the potatoes and then cut them in slices as thin as possible (as if you were going to make potato chips).   Cut the onions in the same manner, in strips, or simply Julienne the onion.

Cut the Potato in Thin Slices

Cut the Potato in Thin Slices

2. Place the potatoes and onions in a bowl, add the salt and mix together.

Mix Potatoes and Onions

Mix Potatoes and Onions

3. In the meantime, start heating up the oil in a large enough frying pan or wok.   Use enough oil to cover the entire bottom of the pan so that it just covers the potatoes and onions.
4. When the oil is hot, add the potatoes and onions to the pan and begin to fry them.   The potatoes shouldn’t become golden brown, but it’s ok if they do just a bit.   You should move them around with a wooden spoon so that you don’t break them, but they get cooked evenly.   It takes about 10-12 minutes at medium heat for them to cook thoroughly.

Begin to Fry the Potatoes and Onions

Begin to Fry the Potatoes and Onions

5. In the meantime cut the chorizo in thin slices as well and set aside.

Cut the Chorizo

Cut the Chorizo

6. In a bowl, beat the eggs, only 3 at first.

Beat the Eggs

Beat the Eggs

7. When the potatoes and onions are done (potatoes should break in half easily when pinched with a fork), take them out and drain in a colander and let them cool down a bit.   Drain as much of the excess oil as possible.

Drain the Potatoes and Onions

Drain the Potatoes and Onions

8. Compare the size of the potatoes and onions mix to the beaten eggs, and then decide if you need to add the other egg.   There should be more potatoes and onions mix than eggs.   The size will depend on the size of your potatoes.
9. Add the potatoes and onions mix, as well as the chorizo slices and pepper to the beaten eggs.   Mix well and mash the potatoes just a bit, not too much.

Add Potatoes, Onions and Chorizo to Beaten Eggs

Add Potatoes, Onions and Chorizo to Beaten Eggs

10. Pre-heat the frying pan in which you will be cooking the tortilla.   It is better to have a smaller pan so that the tortilla will be thick, than to have a larger pan, because the tortilla will be too thin.   For this mixture I used a large frying pan to fry the potatoes and onions, and a smaller pan to cook the tortilla.   You should have a non-stick pan, but either way grease the pan with some oil or cooking spray before adding the mix to it.
11. Add the mixture to the frying pan and cook at medium/low heat.

Add Mixture to Frying Pan

Add Mixture to Frying Pan

12. When you can see that the bottom half is cooked thoroughly, by lifting one side carefully (or after about 8 minutes), you can proceed to the tricky part.   Grab a flat serving dish, larger than the circumference of the frying pan, pace it on top of the pan, and then carefully flip the tortilla on to the plate.   Clean the pan, and spray or coat with a bit more oil, then carefully slide the tortilla back into the pan to cook the other side.   Make sure to tuck in the edges so you get a clean round edge.

The Tricky Step

The Tricky Step

Flip Onto Plate and Slide Back Into Pan

Flip Onto Plate and Slide Back Into Pan

13. When the other side is ready, simply serve by flipping it into a serving dish.

Ready !!!

Ready !!!

Cut and Serve with Ketchup

Cut and Serve with Ketchup

Tips
– This is great to serve with a bit of ketchup and Salchichitas Glaseadas, or smokies.

... and Smokies

... and Smokies

*Makes about 4 servings.

¡Buen Provecho!